
Everything on model trains, model railroads, model railways, locomotives, model train layouts, scenery, wiring, DCC and more. Enjoy the world's best hobby... model railroading!
Mark wants to hear from anyone with experience building tunnels and asks:
“Hello, I’m building a layout for my ho/oe3 train I would like to build a tunnel but have no idea on how to go about it. Most of the layout is foam with plaster bandage over the top.”
Add you thoughts to Mark’s posting below.


Watch Video


 Take a FREE tour inside the club.
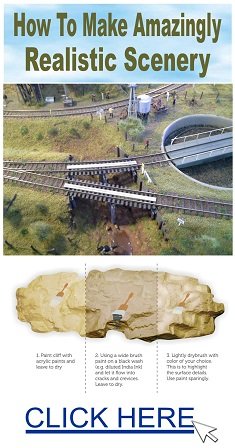


Mark,
There are TONS of books out there devoted exclusively to this topic (go online or to your local library to see them) along with the Model Trains Help E-Book available on this site.
But, to put it simply, you can either use window screen crumpled up (to give irregular contours) as the supporting structure for a mountain with wood blocks beneath to hold it up. Then apply Plaster of Paris all over the screen avoiding swirls and the like that don’t look natural. This method forms a sturdy but HEAVY mountain structure that is difficult to change if you make new plans.
Another method is to use styrofoam or crumbled up newspaper held in place with masking tape to provide your contours and then apply a couple layers of plaster cloth that will form a hard shell mountain. You can pull out the newspaper once the plaster shell gets hard (about 15 minutes) if any is in the way of your track.
In both examples, be sure to place your tunnel portals FIRST and make sure your trains can can run through the mountain BEFORE you apply the plaster/plaster cloth to make sure they don’t hit anything inside. It is also a good idea to provide access openings or panels in areas out of sight so you can retrieve derailed equipment.
Once the plaster has set & dried (overnight is best), you can apply colors for exposed rock areas. Diluted acrylic paints (raw sienna, burnt umber, black), clothing dyes and even instant coffee can provide all the earth tones you need. Try different color mixtures on hidden plaster areas until you get a shade you like.
Using an old paint brush or salvaged window sprayer, apply these stains liberally (wear rubber gloves!!) letting them run into cracks and the like to highlight the irregular surfaces.
If area place doesn’t look realistic, carve it up with an old knife or make a mini batch of plaster and recoat the area. Be sure to let this patched area dry over night before apply your dyes so it will take the dyes at the same rate and match your previous work.
Once the ‘rock’ work is completed, dust the surface with ground foam or similar products to simulate grass and weeds. Finish up by placing trees and bushes in realistic locations and you’re all done.
Hope this helps,
Geof