Monthly Archives: June 2014
Everything on model trains, model railroads, model railways, locomotives, model train layouts, scenery, wiring, DCC and more. Enjoy the world's best hobby... model railroading!
When most steam and some diesel locomotives reach the end of their run, they need to be turned around to head back in the other direction. If that station doesn’t have a turntable or a reversing loop track, they need a wye reversing track, commonly just called a wye.
Because of its size, a wye is usually located near the end of the yard, or track. Looking down on a wye is often like looking down on an equilateral triangle, with three equal sides, with one end connected to the yard track. At each corner is located a turnout or switch, often a wye switch, with the diverging tracks of equal angle, and beyond each turnout a short track to hold the locomotive and still clear the points of the turnout.
Operating a Wye
We can call the corner turnouts #1, #2, and #3, or 1, 3, 2, it makes no difference as the wye works just as well in either direction. For this example we will go #1, #2, #3. Turnouts #1 & #2 are aligned together and the locomotive proceeds forward through both turnouts and stops on the short track beyond #2. Now turnouts #2 & #3 are aligned and the locomotive proceeds backwards to the short track beyond #3. Finally turnouts #3 & #1 are aligned and the locomotive proceeds forward to the original track, except in the opposite direction.
On a model railroad each turnout must be powered, and isolated from the others with gaps. A wye is just a complicated reversing loop, but in a more compact space.
Add your comment.
 When building a model railroad layout it is well worth putting in place systems to safely store the model trains and any spare gear you might need in the future. It is also a good idea to have systems in place to organize your parts and tools so that you can easily find and access anything when needed. Being tidy and organized will remove the frustration if you can’t find the parts and accessories when needed. It could also save you hours of time when everything is well organized and at your fingertips.
Tips For Looking After Your Valuable Trains
When trains and track are not on display they need to be kept safe to avoid dust or damage. This will help keep them in good condition and help retain their value.
1. Try to keep trains stored in the original boxes if you still have them
Keep them away from direct sunlight or fluorescent lights in a dry area. Those little silica gel sachets can be stored inside the boxing to help keep out moisture and humidity. The metal parts are less likely to rust and the boxes shouldn’t become musty. Store them so the trains don’t roll around inside rub against something.
2. Wrapping trains safely
Be careful when wrapping trains in newspaper as the ink could smudge over time. Bubble wrap gives good protection, but if wrapped too tightly, the bubbles can leave circular markings. Also, be aware that plastic and tape can tear off decals when too tightly up against tinplate or plastic items.
I know this sounds fussy, but also be careful if wrapping valuable trains in old clothing. Even though the clothing may be clean, it could have residual detergents, chemicals, or clothes dye, which could “over time” remove color or detailing. You might need to put the clothing through 2 or 3 hot wash cycles using your washing machine to remove all the residual chemicals.
Alkaline (acid-free) tissue paper is usually suitable for wrapping metal and plastic items. Use 2 or 3 sheets wrapping the item first in one sheet, then in a second, and possibly again in a third sheet. It is a good idea to stick a little label on the outside so that you know what you wrapped. The silica gel sachets will help control the humidity. Also make sure all items are dry before storing. Remember too, that polyethylene bags can trap in moisture. A dehumidifier can be money well spent.
3. Wrap items according to the need.
For example, I would wrap flatcar loads separately. Rubber tires can get out of shape if squashed for a long time in storage. The rubber can also react with the chemicals in plastic over time. If you do separate the loads from the cars, keep the separate wrapped packages stored together so that each load goes with the right car.
Avoid using rubber bands as they break down and stick to surfaces over time. If feasible, store car loads upside down as this will remove weight from the tires. Mounting other loads using blocks of dry wood is an option if it keeps the load off the car surface. You can also use this method when displaying trains on a shelf.
4. Beware of sharp edges.
When storing expensive trains be careful to avoid potential scratches from exposed staples, nails, screws, or anything else they could come in contact with.
5. Try to keep the humidity to around 50 – 60 percent.
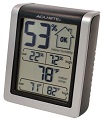
 If you have an Indoor Humidity Monitor
 you can measure the daily humidity of where your trains get stored. You won’t want the humidity too high or too low (paint and decals can crack, plastic can warp). A temperate of between 55F (13C) to 72 (22C) is the best range.
Safe Organized Storage
There are numerous options for parts storage ranging from compartmentalized cupboards, drawers and boxes either plastic or wooden. Have divisions in the containers or drawers makes it easier to find things and keeps everything neatly separated.
Here are a some storage options from the most expensive to cheapest.
A. Storage Cabinet System B. Storage Tower
C. Oak Chest with Dividers
D. Tool Box with dividers
E. Storage Cart with 6 Drawers
F. Storage Case Rack
G. Compartment Divided Box
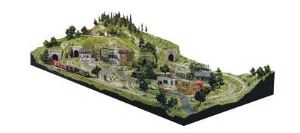
Not everyone wants to build their model railroad layout from scratch. In fact some prefer to buy something that requires less work and can be operational in a quicker time. The Woodland Scenics HO Scale Grand Valley Layout Kit 4ft x 8ft layout is an example of just such a layout. It comes with all of the sub-terrain, as well as the terrain and landscaping features needed to construct the layout.
 You can use some risers and some inclines to make the mountains, hills and the lower-lying sections of the layout. Foam sheets are used to create flat and elevated areas for the towns and structures. You cover it using plaster cloth to make the hard terrain cover. The next thing is to create and install the rocks and then add the tunnel portals and the culverts. You can then landscape using a wide range of trees, ground cover, details and other scenic products to complete a great layout.
As I said this type of construction is not for everyone, and many serious modelers would consider it cheating, but not everyone has the time or interest in creating everything from scratch. The concept is particularly good for someone starting off as it is a way of learning some of the required skills, which can then be used on their next layout… which they’ll probably want to make from scratch.
Woodland Scenics also do an N Scale Scenic Ridge Layout Kit
Add your comment.
The most common wiring mistake on a model railroad is doing too much without testing, such as, wiring ten turnouts and all the track, only to find it doesn’t work. Where do you start to fix such a problem? I would say, start over.
If you are new to the hobby, start small, such as an oval. With the power pack turned off and unplugged, connect two wires, one to each rail and to the terminals marked “Variable Track 0 To 12 Volts DC.” If in doubt read the instructions. Now plug in the power pack. if no smoke or sparks, turn the power pack on. Still nothing advance the throttle speed control. Still nothing, GOOD, turn the speed control off and place a locomotive on the tracks, making sure ALL the wheels are properly on the track. Advance the throttle and the locomotive should move. If not it may need a SLIGHT nudge. If it moves, stop it, move the “Direction” button, and try it in reverse. If the locomotive runs in both directions add some cars and play trains. Yes, I said play, because model railroading is to be FUN.
Now you have an operating model railroad that you can add to, one item at a time and test. As you gain experience you will have more confidence and become braver.
Add your comment.
If you are ready to lay track you must have some idea of what your layout will look like, and it also is a good time to ask some questions. Do you plan to use sectional or flexible track, or hand lay ties and spike the rails? Do you plan to use cork or other roadbed? If you are reading this I would guess you are not going to hand lay your track at this time.
Before you begin laying track you will have to have the track center-lines on the layout, whether it be a 4’x8′ plywood board, open grid, or even foam. Both roadbed and track may be attach in several ways. Nails are handy and we all know how to use them. Some roadbed is self adhesive, like peel and stick tape. Adhesive bathtub sealing caulk is used a lot now, while white glue, diluted with two or three parts water to one part glue is very common. Everything except nails will have to be weighted down until the adhesive sets, from a couple hours to overnight. Use soup cans, bags of rice or beans, even plastic bags with sand. Use the proper size rail joiner for the code size of track you are using.
Add your comment
Model steam locomotives are often equipped with smoke units to simulate the real thing. Smoke units are usually a simple cup under the smokestack, with a heating wire inside to heat the ‘smoke fluid.’ thus producing smoke. Each little plastic bottle will usually provide about 30 minutes of smoke. There are various brands including Marklin, Piko, Seuthe, and Faller.
Faller Smoke Generator Kit Details
The following video has some great scenes of a double header model steam engine belching out smoke. In real life the color of the smoke can vary depending on the quantity of coal being used. Too much coal in the firebox would emit black smoke. If the smoke was gray it usually was burning about the right amount of coal to keep the fire hot.
The guys at modelbuildings.org are still offering this FREE sample if you haven’t yet grabbed it.
The detailing is especially true to real life as they use “photo-realistic” images of actual buildings to replicate the weathering effects found in everyday life. This FREE sample even includes a choice of four signs for over the store frontage. You don’t need to sign up for anything to get the free sample (that’s unusual these days!), but I’m sure they would appreciate it if you purchased something from their website, or at least told your friends about their great site.
Download your FREE sample building here
Share this post with your friends.
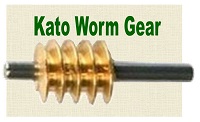
Electric motors need gears to reduce the speed of the motor and align it to gears mounted on the axles of the locomotive. To reduce the speed of the motor a small gear is mounted to the motor shaft and a large gear to the drive wheels. Because of wear, the smaller gear is usually brass, and the larger gear, plastic.
The drivers of a steam locomotive are usually large enough to allow a plastic gear large enough to make the speed reduction with a single set of gears. The gear is only on a single axle because, like the real locomotives, the side rods transmit the power to the other drivers.
 A model diesel locomotive has smaller wheels mounted in trucks at opposite ends of the unit. Therefore diesel models usually have motor with shafts out each end, leading to a set of several gears mounted in a tower above each truck.
Dirt, lint, and cat hair are bad for any gear set. Too much oil or grease on the gears attracts those contaminants to the axles, as well as the gear sets. Be sure any cleaning solution or lube is intended for use on plastic gears.
Add your comment.
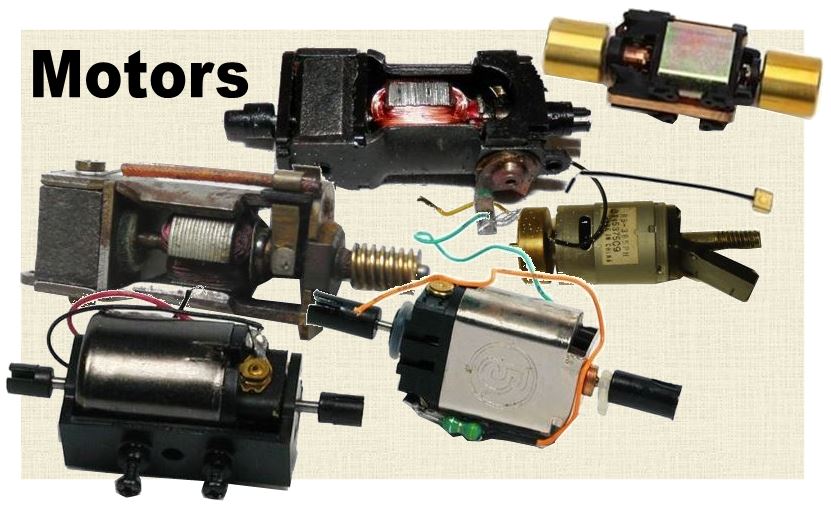
Until the recent development of can motors, the electric motors in our locomotives had an open frame. In an open frame motor, all the internal parts are visible, the magnets, armature, and brushes.

Bushes come in pairs one plus +, and one minus -, depending on the chosen polarity, and rub on the commutator to transmit current to the armature, making the motor turn. Brushes are made of a carbon substance, quite small, usually round, and held in place by a light spring wire or leaf. As they wear the face of the brush takes the shape of the commutator. This wear sometimes causes the carbon to eventually fill the tiny grooves on the commutator, and require cleaning.
Add your comment
Right now you can pick up the plans for this scale model store FREE OF CHARGE thanks to the guys at modelbuildings.org. The building is simple to download, print and then construct… and it looks amazing when built. There is no catch with downloading it (none of the usual forms to fill in or anything like that). You just download the plan and scale it to HO or N scale. The plan comes as OO scale. Instructions on what to do are on the website. Believe me, it looks incredibly real when you’ve constructed it. Perhaps you could send in a photo of your finished model in place on your layout when finished.
Get the free plans from http://www.modelbuildings.org/free.html
Please tell your friends about this excellent freebie and perhaps buy a couple of buildings from the site if you are impressed with this free gift!
The motor armature is made up of the windings and commutator, mounted on the motor shaft, which is supported by bearings. The armature is located so the windings are within the permanent magnet, and the commutator remains exposed for contact with the motor brushes.
Outside of a tiny drop of oil for the bearings, and possibly cleaning the carbon from the grooves of the commutator, there is little to be done.
Add your comment.