
Everything on model trains, model railroads, model railways, locomotives, model train layouts, scenery, wiring, DCC and more. Enjoy the world's best hobby... model railroading!
How to Plan Realistic Model Railroad Scenery: A Practical Guide for Beginners
Planning your first model railway layout can feel intimidating. There’s a lot to learn, countless choices to make, and plenty of opportunities to get things wrong. If it helps, even long-time model railroaders still make mistakes from time to time. The key difference is that experience teaches you which mistakes are hardest to fix later. With careful planning and a clear approach to scenery, you can avoid many common problems and create a layout that looks natural, balanced, and enjoyable to operate.
One of the most effective ways to improve the appearance of any model railroad is by introducing variation in scenery height. Flat layouts tend to look toy-like and predictable. Even modest changes in elevation… such as a slightly raised mainline, a shallow cutting, or a lower siding… add visual interest and help the scene feel more like the real world. However, elevation changes must be believable. Track should never appear to float above the surrounding terrain without explanation.
Whenever you raise a section of track, think about how it would exist in real life. Does it need a grassy embankment, a small cliff face, or a retaining wall? Would erosion, rock outcrops, or drainage ditches be visible? These scenic elements help justify the height difference and allow the track to “flow” naturally through the landscape. Taking the time to plan these transitions early is important because correcting unrealistic elevation later can be very difficult once track and wiring are complete.
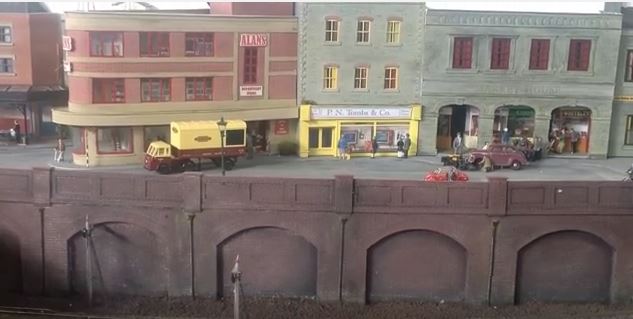
Another essential consideration is consistency of theme. Decide early on what era, region, and general setting your layout represents. While it can be tempting to mix different locations, seasons, or time periods, doing so on a small or medium-sized layout often results in visual confusion. A desert scene next to a lush mountain forest, or modern rolling stock passing a 1950s town, can quickly break the illusion.
If you want variety, use scenic dividers, tunnels, view blocks, or gradual transitions to separate scenes. On larger layouts, these techniques allow you to represent different areas without them clashing visually. On smaller layouts, sticking to a single, well-defined theme usually produces better results and a more convincing overall appearance.
Impulse buying is another common trap. Most hobbyists have brought home a structure, vehicle, or scenic item simply because it looked great on the store shelf. Before adding anything new, pause and ask a few questions. Does it fit the era? Does it belong in this location? Does it add to the story your layout is telling, or does it simply add clutter? Thoughtful restraint often leads to cleaner, more realistic scenes where individual details can be appreciated.
When it comes to building scenery itself, a handful of proven techniques can dramatically improve realism. Start with layered ground cover. Use earth-toned base colors, then add gravel, ballast, dirt, and ground foam in multiple shades. Nature is rarely uniform, so variation in color and texture is essential. Layering materials creates depth and avoids the flat, artificial look of a single surface texture.
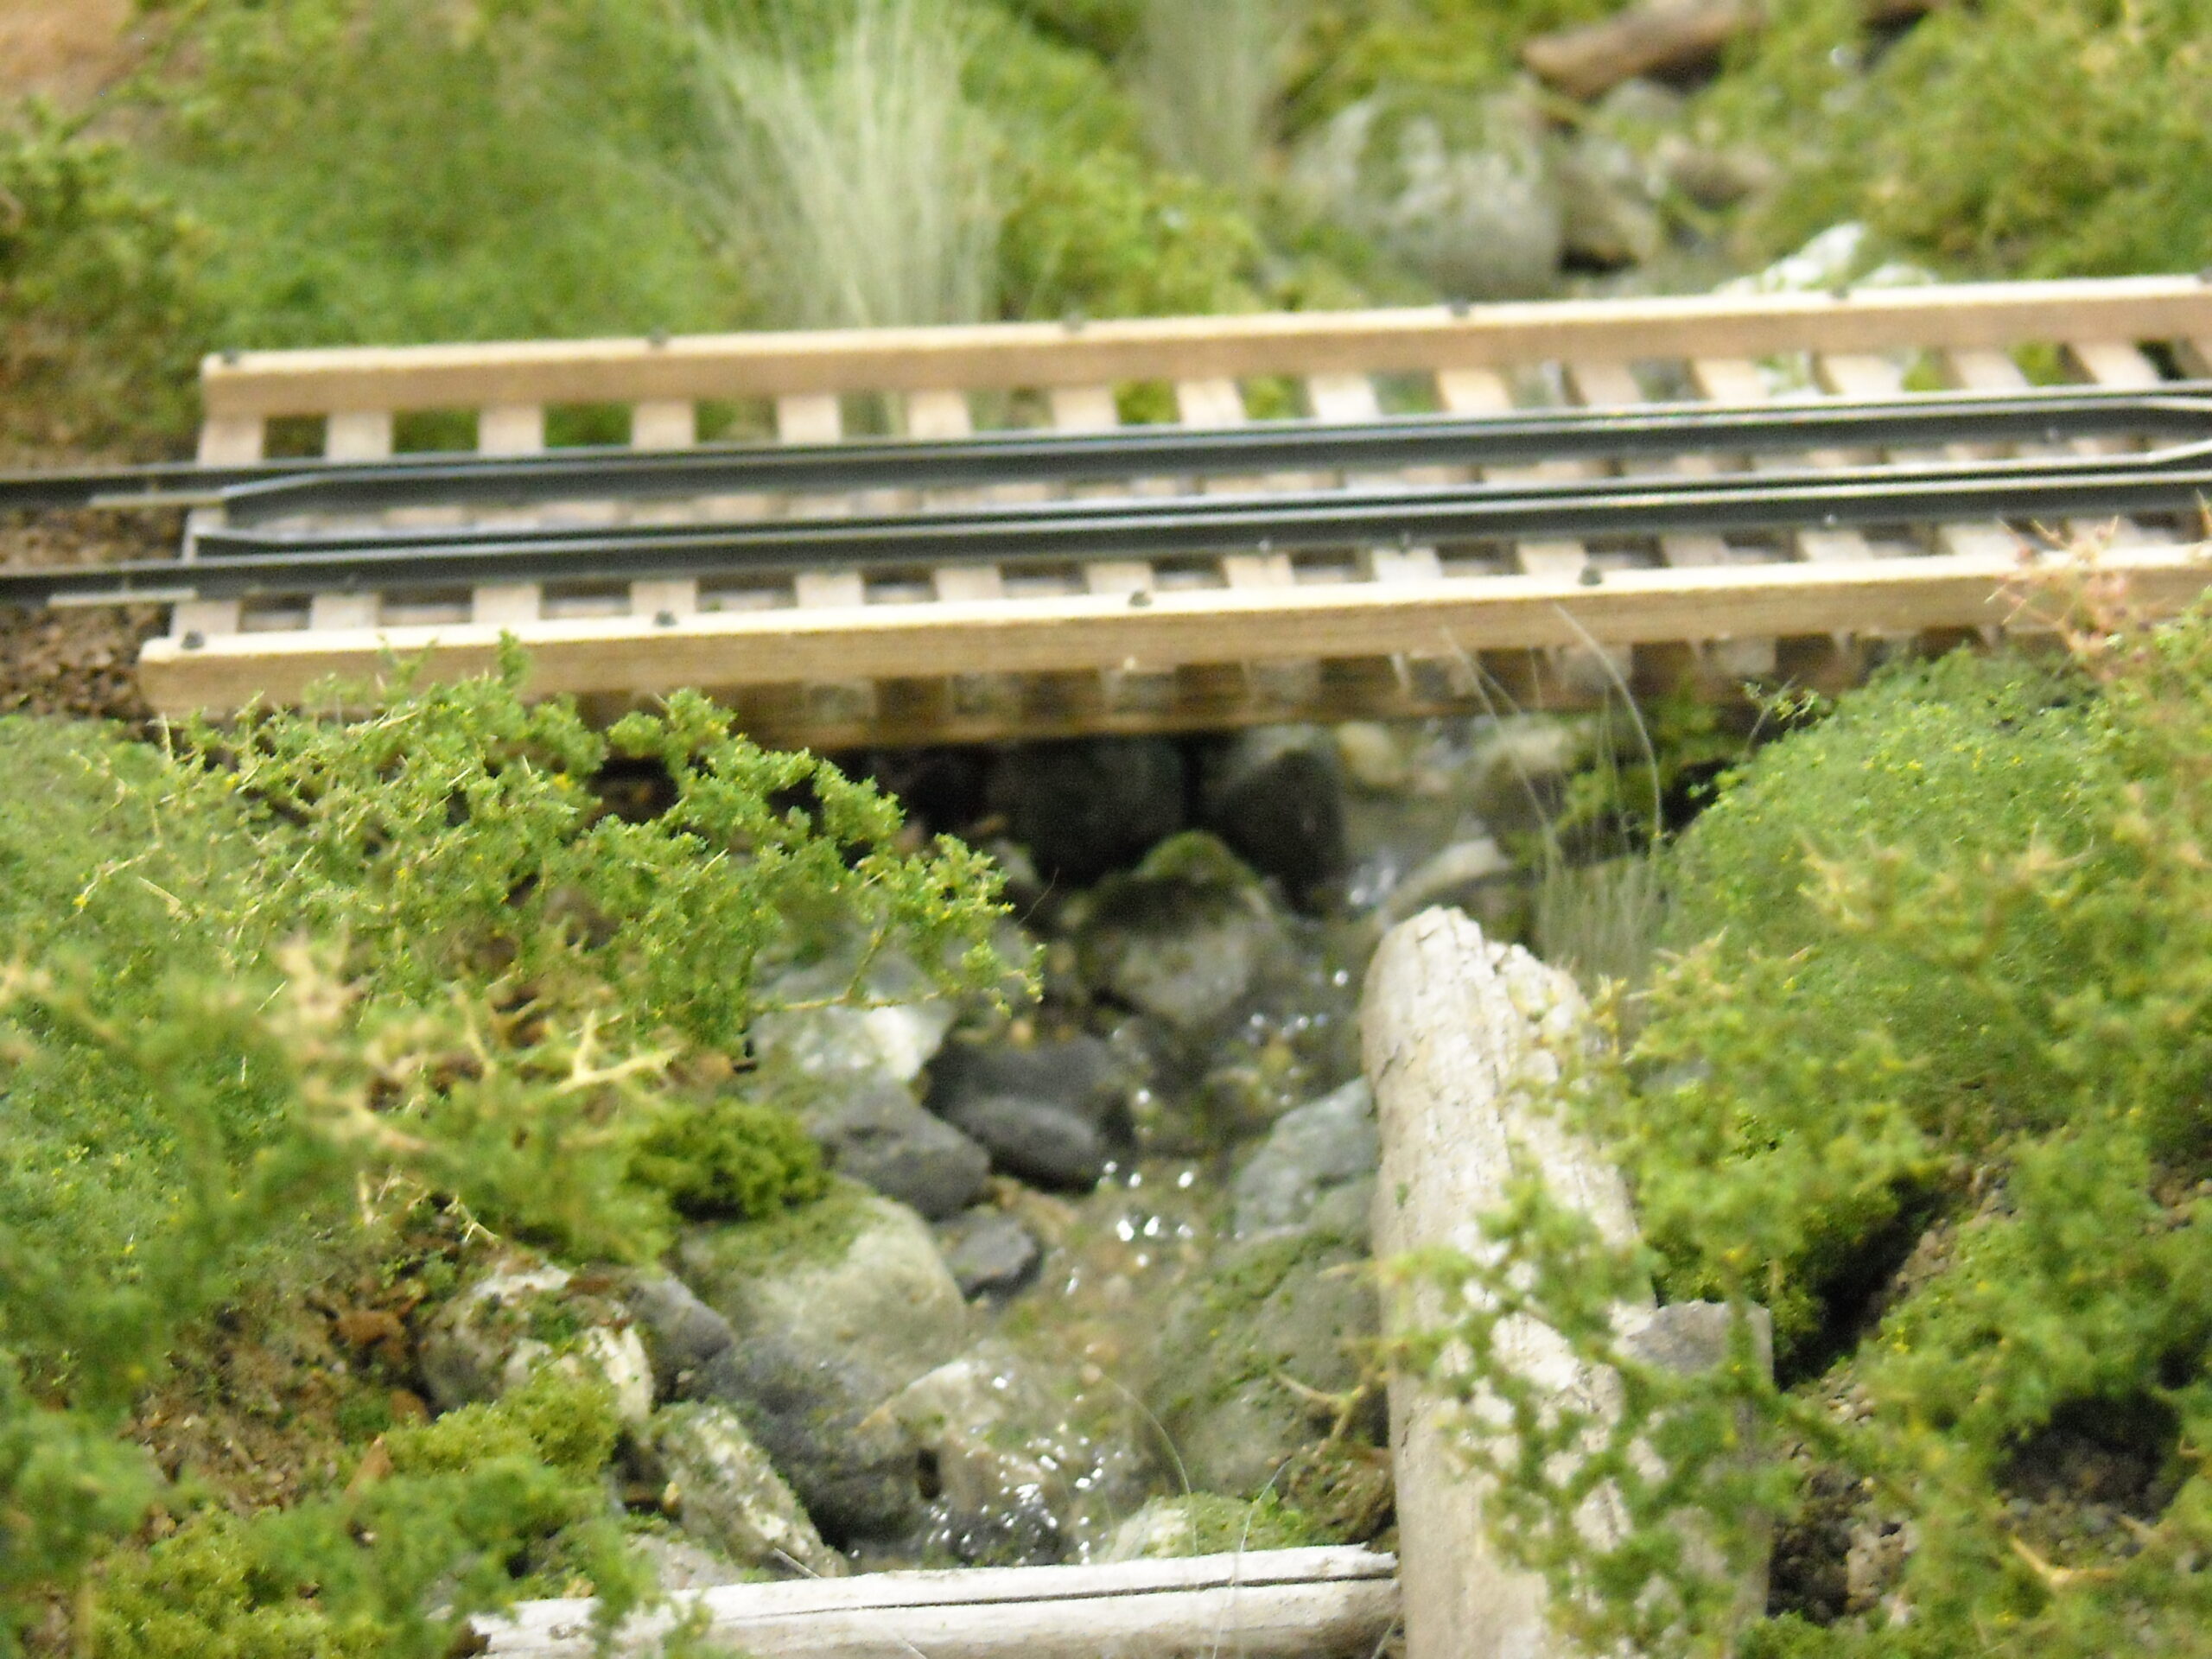
Water features are another powerful scenic element when done well. Rivers, creeks, ponds, or drainage ditches can add movement and interest to a layout. Use clear resin or acrylic water products, but don’t neglect the surrounding area. Realistic water scenes depend heavily on textured banks, muddy edges, rocks, and vegetation to sell the effect.
Trees and shrubs also play a major role in defining a scene. Use scale-appropriate sizes and shapes that match your chosen region. Forest edges should look irregular, not like a straight line of identical trees. Mixing tree heights, colors, and densities creates a more natural appearance.
Roads and streets deserve careful attention too. Whether paved or dirt, roads should show signs of use. Slight cracks, faded paint, tire wear, and weathering powders help integrate them into the scene rather than making them look freshly installed. Adding details such as signs, fences, and roadside vegetation further enhances realism.
Weathering ties everything together. Buildings, rolling stock, and even scenery benefit from subtle aging. Dust, rust streaks, grime, and faded paint help models blend into their environment instead of standing out unnaturally.
Lighting is the final layer that can truly bring a layout to life. Soft building lights, streetlamps, and illuminated structures create atmosphere and draw viewers into the scene, especially during evening operations.
Above all, slow down and plan carefully. Many scenery mistakes can be avoided simply by thinking things through before committing glue or paint. Model railroading is a long-term hobby, and learning never really stops. With patience, observation, and thoughtful planning, your layout can evolve into a realistic miniature world that you’ll enjoy for years to come.
Follow us on FACEBOOK https://www.facebook.com/modeltrainsrailroads
Subscribe
Login
0 Comments
Oldest


SUBMIT YOUR QUESTION


