Uncategorized
Everything on model trains, model railroads, model railways, locomotives, model train layouts, scenery, wiring, DCC and more. Enjoy the world's best hobby... model railroading!

Kevin asks:
“I’m still using DC right now, but I plan to switch to DCC eventually and maybe use a handheld throttle setup. I need a good, affordable power pack that works now but won’t be a dead-end later. Any recommendations?”
Join the conversation below.
Wayne asks:
“Some of my older locos are quite dusty, especially in the hard to get at places. What’s the best way to clean them – an aerosol air in a can like they use on computer keyboards?”
Join the conversation and add your suggestions below.
Alright, let’s talk loops. If you’re anything like me, you could happily sit back and watch trains circle around a layout for hours. It’s relaxing, it’s fun, and honestly… it’s part of the magic of model railroading. But here’s the thing: planning those loops takes a bit of thought if you want smooth operation and a layout that looks realistic rather than toy-like.
Here are some solid ideas (and a few important tips) to help you make the most of loops on your railroad.
Bottom line? Loops can be as simple or as complex as you want. With a little planning, and some clever scenery, you’ll avoid the “toy train around the Christmas tree” look and create something that feels like a real railroad.
If you’ve been in the hobby long enough, you’ve probably seen it, or maybe even experienced it yourself. A beautiful locomotive takes a wrong turn, derails, and suddenly it’s airborne, heading straight for the floor. Ouch. That’s the risk you run when your track is too close to the edge of the layout.
I get it. Sometimes space is tight and you just want to squeeze in one more siding or a longer mainline. But here’s the truth: running track right up to the edge is just asking for heartbreak.
The Real Dangers of Edge Running
Smart Solutions That Work
So, how do you keep your pride and joy safe? Here are a few tried-and-true ideas:
Bonus Tip: Make It Look Better Too
Here’s the fun part… moving your track back a few inches isn’t just safer, it actually makes your trains look better. When they disappear behind a fence, a bush, or a building, it creates the illusion of a longer run and adds realism.
Final Word
Bottom line? Don’t let your trains flirt with danger. A little planning, a simple barrier, or just a few inches of extra space can save you from disaster – and keep your engines running happily for years.
Aaron asks readers:
“I’m new to model trains and looking to buy my first HO set. I’d like to eventually upgrade to DCC and maybe use JMRI. There are so many options out there, any suggestions for a good starter set or manufacturer that offers quality and is compatible with future DCC upgrades?”
Dean has HO scale and asks:
“My Atlas GP40-2 runs ok until I ask it to pull some cars. The motor runs but it won’t move along the tracks. What’s the likely cause?”
Please add any suggestions to help Dean below this post.
If you’re planning your next model railroad layout and thinking about adding a turnout (or switch) inside a tunnel, let me just pause you for a second, because that little decision could lead to big headaches down the track.
Now, don’t get me wrong. I’m not here to tell you that it’s never okay. But if you’re fairly new to the hobby—or even if you’ve been doing this a while, it’s worth thinking twice before hiding a turnout inside a tunnel. Let me explain why.
There’s no doubt about it… turnouts can make a layout way more interesting. They let your trains branch off, switch tracks, and bring operations to life. But they can also be one of the more fiddly parts of trackwork. Even in easy-to-reach spots, turnouts can cause trouble with alignment, wiring, points not fully throwing, or debris getting caught in the mechanism.
So if they’re tricky in plain sight, just imagine trying to fix one that’s buried deep inside a tunnel where you can’t even see it!
That’s the big issue with tunnel turnouts… access. If something goes wrong (and eventually, something will), how are you going to get in there to sort it out? Cleaning? Awkward. Repairs? Frustrating. Replacing a turnout in a tight space with a tunnel roof above it? Good luck.
Plus, you’re flying blind. Can you be 100% sure that hidden turnout has flipped the right way for the next train? Because if it hasn’t, you’ll know pretty quickly… and probably not in a good way.
It’s not just modelers who shy away from putting turnouts in tunnels. Real-life railroads have to think about the same kinds of problems, only on a much larger and more expensive scale.
Turnouts inside full-size tunnels mean:
So if even the pros try to avoid it when they can, that’s a pretty good signal to us hobbyists.
If your track plan feels like it’s forcing you into placing a turnout inside a tunnel, don’t panic. There are a few workarounds that still give you the flexibility you want, without burying a potential problem where you can’t reach it.
I’m not here to be a layout dream crusher. Sometimes, depending on your space and design, you just have to hide a turnout inside a tunnel. And that’s okay… as long as you go in with your eyes open, and preferably with a screwdriver in one hand and an access hatch nearby.
But for most of us, especially when we’re just getting started, keeping things visible, reachable, and maintainable is the better way to go. So save yourself some trouble down the line, and think twice before sending your switches into the shadows.
Happy modeling, and may all your trains stay on the right track!
Lewis has HO scale and asks:
“My Kato Series SD80MAC has slowed and emits a high-pitched shrieking sound. I oiled the bearings, but it made no difference. I’m not sure of the cause or how to fix it.”
Add your thoughts to assist Lewis below.
Ryan asks for advice:
“I’m just getting started on my first HO layout and have a spare room to work with. I want to build benchwork that’s solid and expandable. What materials should I use for the base and supports? Any tips from people who’ve done this?”
You can post your suggestions below.
Having some areas of a model railroad out of reach is a mistake that should be avoided when prior to actually constructing your railroad layout. At some future time, you’ll need to recover a derailed engine from somewhere on your track. Hopefully this short video assists someone.
Travis asks readers:
“I’ve got 4 old Athearn Blue Box locos (DC) and I want to upgrade them to DCC with sound. A hobby shop said it’s doable but might not perform great. Has anyone done this successfully? What should I expect, and how can I get the best results?”
Add life, color, and character to your layout with these fun container ideas.
If you’re into model railroading, you probably already have a few scale model shipping containers kicking around—or maybe you’ve been eyeing some at your local hobby shop. These little metal boxes aren’t just for sitting on flatcars. In fact, they can become some of the most versatile and visually interesting props on your entire layout.
Here are 8 fun and creative ways to make the most of your scale model containers.
Let’s start with the classic. Create a container terminal scene by stacking containers in neat rows – or go for that slightly messy, lived-in look. Add a container crane or forklift, throw in some figures, and you’ve got an eye-catching intermodal scene. Mix up the colors and company logos for a more realistic feel.
Nothing says modern freight like a train full of containers. You can load them onto well cars, spine cars, or flatcars. If you want to get really detailed, add miniature chains, twist locks, or weathering to the cars and containers. It’s a small touch that adds big realism. These shipping container plans are available for download in OO/HO scale or N scale at https://www.modelbuildings.org/shipping-containers
Want to add some modern flair to your city or yard? Convert a container into a trendy pop-up shop, rail yard office, or even a quirky coffee kiosk. Just cut in some windows, paint it up, and you’re good to go. They’re great for urban or industrial settings.
Just like in the real world, containers make great portable homes. Stack one or two, add some stairs, a porch, maybe a little roof extension—and you’ve got yourself a rugged little home or worker bunkhouse. Perfect for rural or mining layouts.
Need to block off part of a yard or construction site? Line up a few containers side-by-side as a fence or makeshift barrier. It’s a fast, believable way to break up space on your layout and make areas feel more secure and enclosed.
A single container can easily become a workshop or tool storage area. Add some exterior details—like oil drums, spare wheels, maybe a ladder—and place it near a roundhouse, yard, or rural trackside. It adds charm and makes a scene feel “lived in.”
For a layout with a bit more grit and story, beat up an old container and leave it behind a factory or warehouse. Add some overgrown grass, faded paint, and maybe a dent or two. It gives your layout that subtle touch of realism and decay.
Set up a scene with a truck pulling a container trailer or a crane unloading a container from a flatcar. Even though the layout isn’t moving, this kind of action scene makes the whole area feel more alive.
Model shipping containers are small, but they pack a punch when it comes to adding detail, character, and realism to your layout. Whether you’re aiming for a busy intermodal terminal or just want to spice up an industrial backlot, there’s always a way to put a container to good use.
Got your own clever use for containers? Share it with the community – we modelers love a good creative idea.
Todd asks readers:
I’m having a lot of derailments when my trains go through the frogs on my Atlas turnouts. Both engines and cars are affected. I’ve checked the switch mechanism, but I’m not sure what else to look at. Any tips on how to stop these derailments?
Please add any comments or thoughts below to assist Todd.
When planning the track layout for your OO gauge, N scale, or HO scale model railroad, there are several important considerations to keep in mind:
By keeping these points in mind, you’ll create a more realistic, functional, and enjoyable model railroad layout.
A reader posted this question on our YouTube Channel. Please add your suggestions below using the COMMENTS tag.
“I recently purchased a Walthers Mainline GE ES44 Evolution Series GEVO diesel locomotive with DCC and sound. I am currently facing an issue when attempting to change the short address (*CV1*) from the default value of 3 to another number. I am using a Digitrax DCS52 (Zephyr Express). When I attempt to write a new value to CV1, the system shows the operation as “Done,” but the locomotive still responds only to address 3. Additionally, when I use the CV programmer menu, it successfully reads CV values, but when I attempt to write, it shows ‘no pulse acknowledge.’ I’ve confirmed proper track and wheel contact, and the other decoders program is fine using the same system. Could you please advise if there is a known issue with CV writing on this unit or if any special programming method is required for this model?”
Warren asks:
“I don’t use magnetic uncouplers so want to know the best way or tool to clip off or bend the trip pins so they can’t snag on grade crossings. I would like to hear what others have done please.”
You can share your feedback below. Click on COMMENTS.
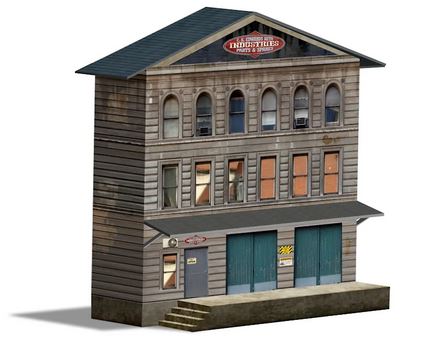
You can download the plans from this web page https://www.modelbuildings.org/6-railroad-industrial-background-ho-scale-models
Herman asks readers:
“I am using a Digitrax UT4 R throttle on a DCC power railroad, can you control a switch machine when having an opt session?”
Include your comments below.


