Everything on model trains, model railroads, model railways, locomotives, model train layouts, scenery, wiring, DCC and more. Enjoy the world's best hobby... model railroading!
Well Made Miniature Trees Add Realism To Model Train Layouts
Many model train enthusiasts make their own realistic miniature trees using a variety of materials including branches and twigs from real trees.
For others however, the option of purchasing ready-made trees is an attractive option. This is where someone like Vance Altman of fsmtrees.com (First in Scaled Miniature Trees) can help out.
This is what Vance has to say, “I supply a top quality sage brush tree armature from mother nature. These allow the modeler to add foliage for a prototype tree or use as is for a Great looking Oak tree for winter scenes or dead trees”.
Vance adds, “Our scaled Sagebrush tree armatures are stand-alone realistic oak trees or add tree foliage for superb model tree scenery. Some have knarly twisted trunks and knots that look like a real natural miniature tree. These Scaled Miniature Trees are natural pieces of real wood Armatures for model train layouts or dioramas”.
Vance supplies quality trees for all scales, N, HO, HOn30, S, O. with delicate realistic branching.
Vance has also kindly allowed me to publish the following tree making tutorial from his website.
Sagebrush Tree Construction
This tutorial will go through a step-by-step process to create realistic looking miniature trees for use in wargames, dioramas, and model train layouts.
Materials:
Sage brush
Poly fiber
AquaNet hair spray
Flock
Clothes pins or small clamp
Straight pins
Side cutters
Description of Materials:
The trickiest part of making this type of tree is finding the correct materials. Sagebrush can be found in several places including specialty hobby shops, online shops, and simply out in nature. Since I do not know of any sage growing in my area, I opted for the next easiest (unfortunately the most expensive) method of obtaining this material. A local hobby shop specializing in trains carries sagebrush for $2-3 per armature. The cost is quite a lot considering there is still a lot of work, which needs to be done to get a tree out of the deal. I do, however, prefer the look of the finished product over anything that can be bought or of any of the other attempts at tree making I have done.
The cheaper the hair sprays the better (usually). What is basically needed is a spray adhesive. Real spray adhesives such as those from Elmer’s should work as well, but I haven’t tried them. I use Unscented Aqua Net hair spray that I picked up from K-Mart and have had good results.
As with my other terrain products I use Woodland Scenics flock to add ‘leaves’ to the trees. I use Burnt Grass Fine Turf as the foundation for the trees with a touch of Green Grass Fine Turf to add a bit of highlight.
A pair of clothespins or a small clamp work well to hold the armature while working with it. When connecting two clothespins in an L fashion they also serve as a convenient stand to keep the tree upright when drying.
At the base of each tree I poke a straight pin in to help hold the tree in place when ‘planted’ on the layout. After the pin is stuck in the end is clipped off with a pair of side cutters.
A simple pair of side cutters or anything else that will cut a straight pin will work just fine.
Tree Construction Steps:
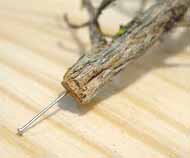
Prepare the armature. Stick a straight pin into the base of the tree to add stability when ‘planted’. Clip the pinhead off after inserting the pin.
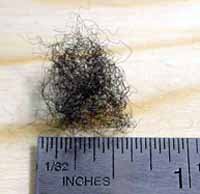
 Pull a very small amount of poly fiber from the bag. About 1/2×1/2×1/4 inch section will do. The sections do not and should not be exactly the same size -just keep them fairly small.
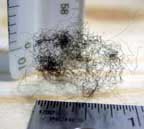
Pull the piece apart so it is the density of a three-dimensional spider web. Be sure to pull the fiber out in all three dimensions rather than making ‘sheets’.
Starting at the bottom of the armature, place the fiber on a single branch of the armature. Try not to span multiple branches – each branch should get its own fiber.
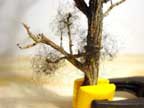
Continue the process working your way from the inside and bottom of the armature to the outside and top. Continue until all desired branches have been covered with fiber.
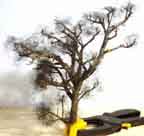
Be sure that the fiber is not too dense. It is tempting to have a very ‘full’ looking tree at this point, but after the flock is applied it will be far too thick. Over a bag or in some other environment set up to catch the overshoot, spray the fiber with the hair spray until the spray beads up on the fiber. Be careful not to blow the fiber from the branches – try to spray in bursts instead of one constant stream.
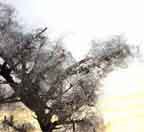
Carefully and slowly sprinkle on the flock. Darker flock can be applied to the bottom side of the fiber then apply some lighter to the top of the tree to give it a bit of a highlight. It is very important not to overdue the flock.
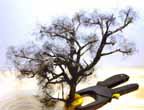
You should still be able to see through the tree after the flock has been applied. Set the tree aside to dry and admire the creation!
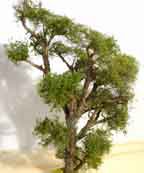
Tap off the extra flock into a container. You can use a small pair of scissors to trim offsome of the excess fibers that are sticking out that are out of place.Give the tree another light coat of hairspray to help keep the flock in place. Doing three or four trees at a time can speed up the process a bit and look nice all out together.
This trees making tutorial for model train layouts is kindly supplied with permission of Vance Altman at http://www.fsmtrees.com/


