
Everything on model trains, model railroads, model railways, locomotives, model train layouts, scenery, wiring, DCC and more. Enjoy the world's best hobby... model railroading!
An Airbrush is an amazingly useful and versatile tool for any modeler to have. The key to mastering airbrushing is to understand the relationship between the air pressure, the thickness of the paint, and the type of airbrush you are using.
Here is a basic diagram to show how an airbrush works.
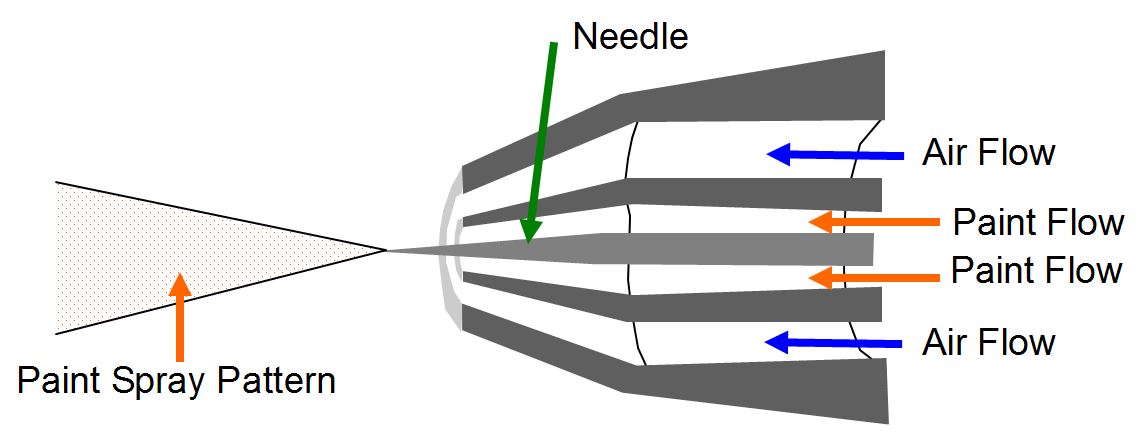
The above diagram shows how paint particles mix with air pressure. The pattern can be altered by adjusting the movable needle backward or foreward.
14 Tips To Help You Master An Airbrush
1. Choose the right airbrush for your needs. There are two main types: single-action airbrushes and double-action airbrushes. A single action airbrush is more basic as it has fewer moving parts so is simpler to clean. A double action airbrush gives more control as you can adjust the air volume and paint separately.
2. Depending on the brand and type you use, you might choose to try different needles for different jobs.
3. The air source needs to be reliable. Some people buy the air in small air propellant cans, others use a compressor, and some people even use an old car tire to dispense the air. An air source delivering 100 PSI at a constant rate is usually what’s required.
4. Airbrushes vary a little in how the paint in stored. Some use jars attached under the airbrush and others use little bowls to hold the paint at the side of, or above, the airbrush. The important point is to mix your paint to an inky liquid consistency so it doesn’t block the airbrush. Acrylic paints can be thinned with water. Inks can be used on some projects and they won’t usually require thinning. When diluting acrylic paints add only two or three drops each time until you get the consistency right. It is easier to add more water, but once you have added it you can’t take it away.
5. Adjust the paint type depending on the surface you are covering. Some paints are more flexible and less prone to cracking or damage than other paints. As an example; a less pliable and harder paint might work better when airbrushing on a metal surface.
6. Before getting started on a model train shell or airbrushing some scenery, it is wise to test your techniques and your paint consistency on a piece of scrap paper. It is a good idea to practice pressing the button control on the airbrush. It might save you from having to wipe the model clean and start over again if you make a mistake. You will be able to adjust the needle on the airbrush so that it doesn’t quite touch onto the cap, but still allowing just enough space for air to escape. The airbrush will need to be about 8-inches (20cm) from the surface you are spraying.
7. Practice, practice, practice! Get to understand how to control “atomization.” I know it is a fancy name, but it basically relates to how fine the paint particles are when sprayed. A higher pressure will result in finer paint atomization. There are several youtube videos to explain techniques. Understand how the type of paint and consistency will affect the atomization process. Try out using various paint types and consistencies to determine what works best for you. Thicker paint will require more air pressure for the paint to flow freely, whereas thinner paints (and inks) will flow easily with a lower air pressure. Adjusting the button (on the top of the airbrush) will usually provide some control of the air pressure. If paint Splutters out of the airbrush it usually means it’s too thick.
8. When using a finer needle a thinner paint consistency will be needed. A lower air pressure of perhaps 15 to 40 PSI may work best for high precision work like this.
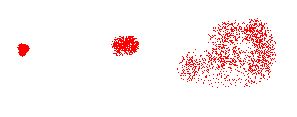
Different effects can be achieved by altering the paint consistency, air pressure, movement and distance of the airbrush from the object being sprayed.
9. Take care not to “over-spray” when using an airbrush. Horizontal stroke movements can be applied when applying the first coat of paint. After leaving it to dry a second coat or different color can be applied maybe using a vertical stroke movement from three or four feet away. For weathering structures or scenery a subtle buildup of paint layers and colors usually looks best. Complete several passes of your airbrush to create the weathering effect as opposed to applying just one thick layer. In real life, grime and dirt on a structure will usually build up over years, so airbrush weathering needs 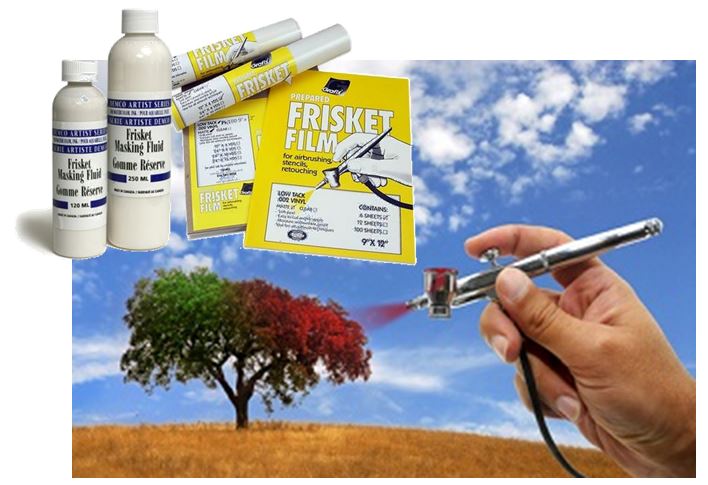 to replicate that process by building up multiple thin paint layers (grime and dirt) using the airbrush.
10. Any airbrush if it’s to operate effectively needs to be kept in “as new” condition meaning it must be kept spotlessly clean. Paint will harden if left inside the mechanism and it will cause blockages and affect the paint flow. For this reason special care needs to be taken between projects to ensure the airbrush is returned to the condition it was before it was used. The jar or bowl can be removed and soaked in water for cleaning. Blowing air through the airbrush will help wash out any paint left in the mechanism. It will also stop colors from intermixing if dregs of the last used color are still inside the airbrush. The airbrush should also be clean of any water before adding new paint to the bowl or jar dispenser. Just blow it out onto a rag. Cleaning the airbrush immediately after use will prevent many problems. When taking the airbrush apart remember to take care with the needle as that is usually the most fragile part of the mechanism.
11. Although there are no hard and fast rules with airbrushing, it is generally best to build up the color layers one layer at a time usually starting with lighter colors first, gradually adding darker colors.
12. Masking tape is a good material to stop paint spraying where you don’t want it to go. Artist Frisket (film or liquid) can be applied for masking too.
13. Any fine detailing can be achieved by using a fine airbrush needle.
14. In some instances you might want to seal the model using an artist fixative or clear matt spray to protect the paintwork.
There is a very good ebook available free as part of the package at http://www.model-train-help.com
Add you comments.


This article on airbrushing should help anybody, as jt’s very well illustrated and shows and explains clearly how to do it. The article on dry-brushing is also very good and helpful. With N Scale, I’ve done dry-brushing white on the banks of water-ways to bring out where the sun would hit.
I’m still in the process of moving, and it may take awhile yet. I don’t know what size small house I’ll move into, but hopefully there’ll be room for a 4×4 in N. Putting two 2×4 tables together gives you a 4×4, and I hope to have two levels. On the bottom level is the Seventies – two tracks, one an early-Conrail train and the other Burlington Northern. On the top level will be smaller radius curves where cars and engines will be in the Sixties, and switch to a lumber yard. Hey, Twilight Zone, two eras, but it still could work!
That’s really awesome. A lot of good info on this thread, it has helped me learn how to an airbrush. I have an airbrush and compressor.