
Everything on model trains, model railroads, model railways, locomotives, model train layouts, scenery, wiring, DCC and more. Enjoy the world's best hobby... model railroading!
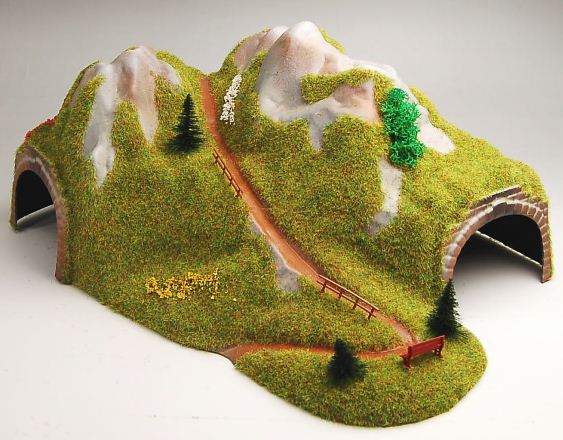 Tunnels can really add interest to a layout with trains disappearing inside a mountain and mysteriously reappearing on the other side. However, there needs to be careful planning to ensure there are no problems inside the tunnel that could potentially cause a train to derail. It is the old “Murphy’s Law” where trains will more than likely derail in the most inaccessible area of the layout. The most hard to get at place is usually inside a tunnel.
That’s why considerable thought is required in the event of such a scenario. This needs to happen at the planning stages, before the tunnel is positioned in place.
 A couple of options would be to include a removable tunnel section to allow access, or an opening in the base where your hand could reach up to retrieve the cars. An access hole in the side of a mountain can sometimes be disguised by clever positioning of scenic features like trees, grass, shrubbery, rocks etc. It could be as simple as removing a couple of strategically placed rocks that hide the access hole, and then slotting them back in position when the job is done.
Another option is to add a layer of plastic between the tunnel and the mountain structure, so that the mountain section can be lifted off in one piece, to reveal the tunnel. Then just lift up the tunnel and retrieve the cars or access the track.
If readers have other suggestions, please leave a comment for other to see.


Tunnels yes Beautiful yet frustrating if done wrong. I recently rebuilt a club module where for some reason they used ceiling tile in place of plywood deck. And as you might guess the tile material warped (Not a single train could make it through. But the hill was mounted permanent. So I cut the main tunnel scenery as a whole section and pulled it off. It was in rough condition as even the portals were broke in two places each. I replaced the deck with plywood and framed up supports to hold the mountain so to speak. Glued the portals and feathered in some plaster to blend the cracks and a little paint and no one knows But before I did I left a gap sufficient to get my big hands in from the bottom. The edge of the deck wood I mounted a 3/4 square strip along the edge of the access so derailed trains would not leave the board. I framed the supports for the scenery to set on where the piece that was to be removable would need support. I then took the scenery I had cut out and I mounted 2 drawer handles with flip down handles on them to the scenery that would be lifted off for access on the top side. I repaired the scenery and blended the permanent edges with the part that lifts off. With the handles flipped down I then took the excess ceiling tile and layered them into a couple of stacks looking rock careful to leave enough room under them to hide the handles. To Access this tunnel area just lift up the cover of stacked rocks, flip up the handles on the drawer pulls and lift and set your scenery aside. There you have full access to your tunnel area. I also used a few dowel pins that the piece of scenery holds it in it’s particular place when in position. Always fit your scenery so that you can lift off areas so you can access your tracks and wiring. Just cleaning tracks can be a chore if there is no access. It was not as hard as you might think and making the seams where they lift off look like a wet rocky crevas (Not a creak but where water might keep the area wet like a run off ditch. No one will know that it separates. Newman atkinson
Sorry I forgot to mention that when laying track in a tunnel Don’t use sectional track. That is more places to have trouble later on. I use flex track through these areas to limit connections. When laying a flex track where the connections are in the curve cut and fit the sections so they are close to the curve you want. Straighten the track and lightly solder the rail connections together (on the outside of the rail and don’t get it too hot) so when they are in a curve the connections will flex with the curve. If you just make a connection the track tends to want to straighten up and then the joint will have a small jog in it.
Newman Atkinson
The important thing is the need to maintain the track, at some time you will have to change a rail joiner, straighten a kink ir just change a track pin so make sure you can get at everything, I used a piece of drain pipe over 2 Metres long for a tunnel under the garden, but the track just slides out if I pull the rail joiners and I can slide three new pieces of flex in if it fails, likewise derailments I push the train through with drain rods. I guess this is a bit too extreme for most of you!
Indoors I have the tunnel top removable so I can get to the track, unlike Newman I like set track in tunnels, Code 100 flex doesn’t like staying curved and flat at much under 600 mm or 24″ radius so I use Set track, I could not get even 20″ set track when I laid mine so I used 18″ radius (2nd Radius) and treated it like flex and straightened it out slightly to 20″ and 22″ and it has stayed exactly as laid. I did it in really hot weather (for England) as well so I could leave small expansion gaps and leave it basically in tension. The 24″ flex curve on a friend’s layout needs constant fiddling as the track pins work loose and the ends try to straighten. Rail joiners fail / split on my outside layout, even though it is on board battery powered and they don’t carry current.
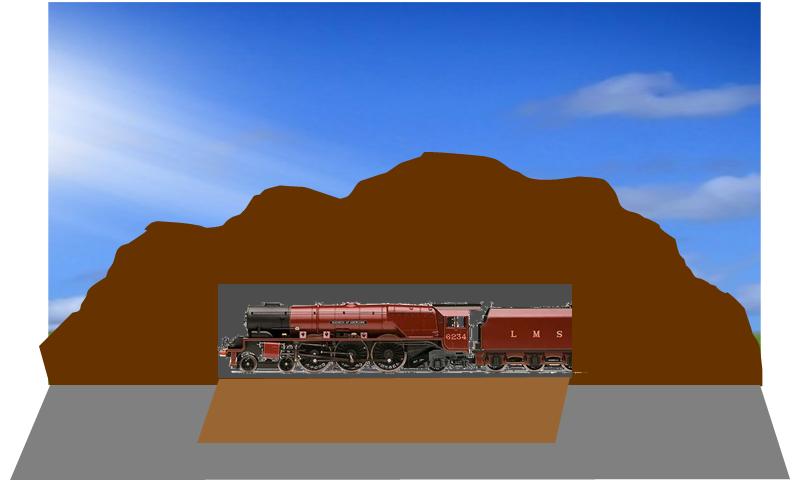
If I was modelling mountains and starting again I would make the mountains hollow, build lights into them and cut away as much baseboard inside the mountain as I could just leaving the track base and around an inch or so or vertical wall beside it to catch derailments, that way I could dive under and re rail anything or just lift it off.
Floor to ceiling scenery could be a challenge!
Ok I had to build a tunnel through a chimney in arizona (don’t ask me why we need a chimney in arizona) but I also needed to dog leg around a flue pipe to get it in there used sectional track and on portal is on a a about a 40 degree angle so I can still get my arm in there and in worst case use a can grabber to get derailments. Been running it for 5 years now and only 2 derailments. One when I found out that a bachmann forney will NOT negotiate a 18″ curve and the second when I let my nephew take the throttle (lead finger!) the last derailment was actually just exiting the portal and my scratchbuilt drovers caboose took a scale 400 foot fall off the cliff face. (Did I mention the trains are on a shelf 10 feet off a ceramic tile floor?) ever seen a grown man cry like a baby?
I just slid the sectional track in place after soldering each joint. Pull it out once a year to check for any problems and slide it back in in. Easy peasy nice and easy. The distance is about 8 feet from end to end but the dog leg added about 6 more feet makes people wonder what the necks going on when a train take twice as long as you would expect to go through a tunnel. It’s cool:)