
Everything on model trains, model railroads, model railways, locomotives, model train layouts, scenery, wiring, DCC and more. Enjoy the world's best hobby... model railroading!
How to Create Realistic Model Railroad Scenery That Looks Like the Real World
A model railroad is more than just track and rolling stock. What truly brings a layout to life is the scenery surrounding the trains. Realistic model railroad scenery creates the illusion of distance, scale, and place, transforming a simple track plan into a believable miniature world. The good news is that you don’t need professional art skills or expensive tools to achieve great results. With proven scenery techniques, careful layering, and a bit of patience, you can make your model train layout look natural and convincing.
Below are practical, beginner-friendly techniques used by experienced model railroaders to create scenery that looks realistic in photos and in person.
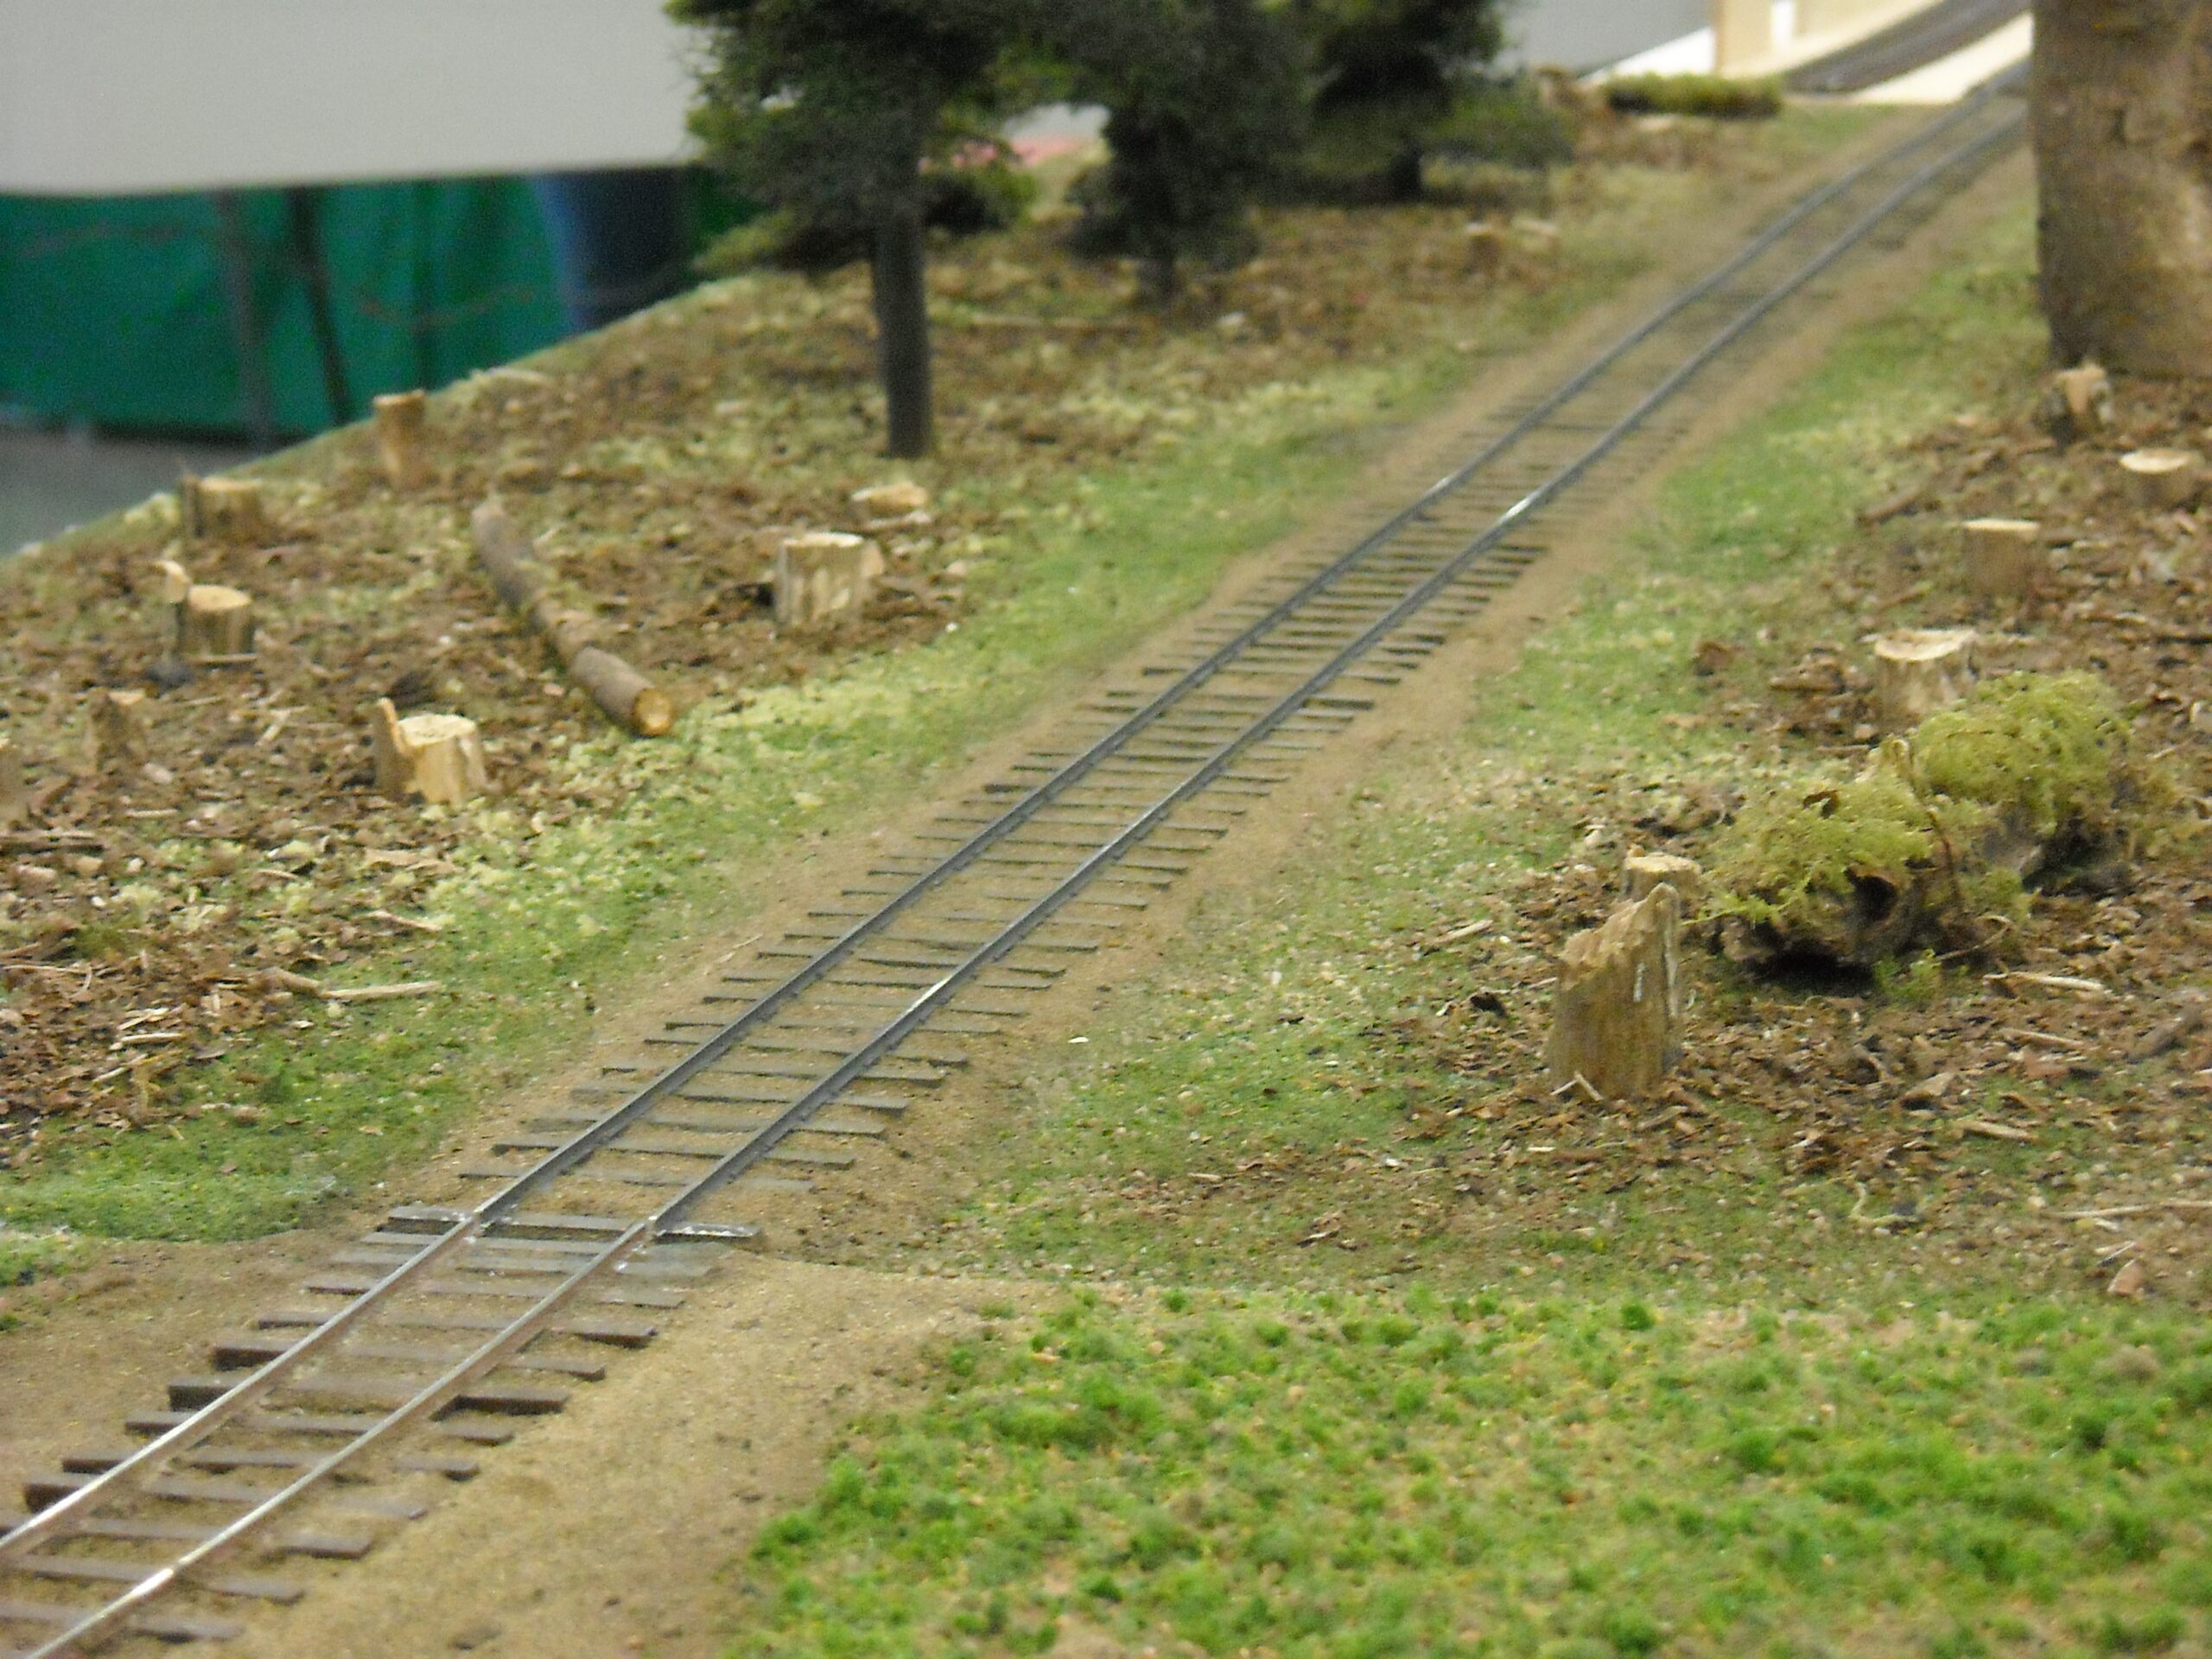
Before adding grass, trees, or structures, focus on shaping the land. Hills, embankments, valleys, and gentle slopes are the foundation of natural-looking model railroad scenery. Real landscapes rarely feature sharp vertical walls unless you are modeling cliffs or quarries.
Lightweight materials such as foam board, extruded polystyrene foam, or crumpled newspaper covered with plaster cloth work extremely well. Foam is especially popular because it is easy to carve, clean to work with, and lightweight.
Carve smooth transitions between elevated and flat areas using a utility knife, rasp, or coarse sandpaper. Subtle variations in height make a layout feel larger and more realistic than perfectly flat terrain.
One of the most important scenery tips is also one of the simplest. Always paint your terrain before adding ground cover. A flat earth-tone color such as brown, tan, or gray works well depending on the region you are modeling.
This step ensures that if small gaps appear in the grass or dirt later, they still look natural. Painted terrain prevents white plaster or pink foam from breaking the illusion and instantly improves realism.
In the real world, dirt comes before grass, and the same logic applies to model railroad scenery. Start by applying a fine layer of real dirt (sifted and baked) or commercial scenic soil products.
Spread the dirt over diluted white glue or scenic cement, then lightly mist with water to help it settle. Once dry, this layer becomes a realistic foundation for everything above it.
When adding grass, static grass provides the most realistic results. It stands upright like real blades of grass and creates natural texture. Use multiple shades and lengths to avoid a uniform, artificial appearance.
Layering is the secret to making model train scenery look realistic. Avoid using just one material across large areas. Instead, combine fine turf, coarse turf, weeds, ground foam, and natural textures.
Add small twigs, dried herbs, or leaf litter to represent forest debris. These subtle details add depth and visual interest. Nature is messy and irregular, so embrace variation rather than neat, even coverage.
Trees and shrubs are major visual elements on any model railroad. Homemade trees often look more realistic than ready-made plastic ones and cost far less.
Wire armatures, seafoam, or dried plant stems make excellent tree bases. Cover them with adhesive and apply fine turf or flocking for foliage. Vary tree heights, colors, and shapes to avoid repetition.
Bushes and undergrowth can be made from lichen, clump foliage, or teased polyfiber sprinkled with scenic foam. Group vegetation in natural clusters rather than straight lines for better realism.
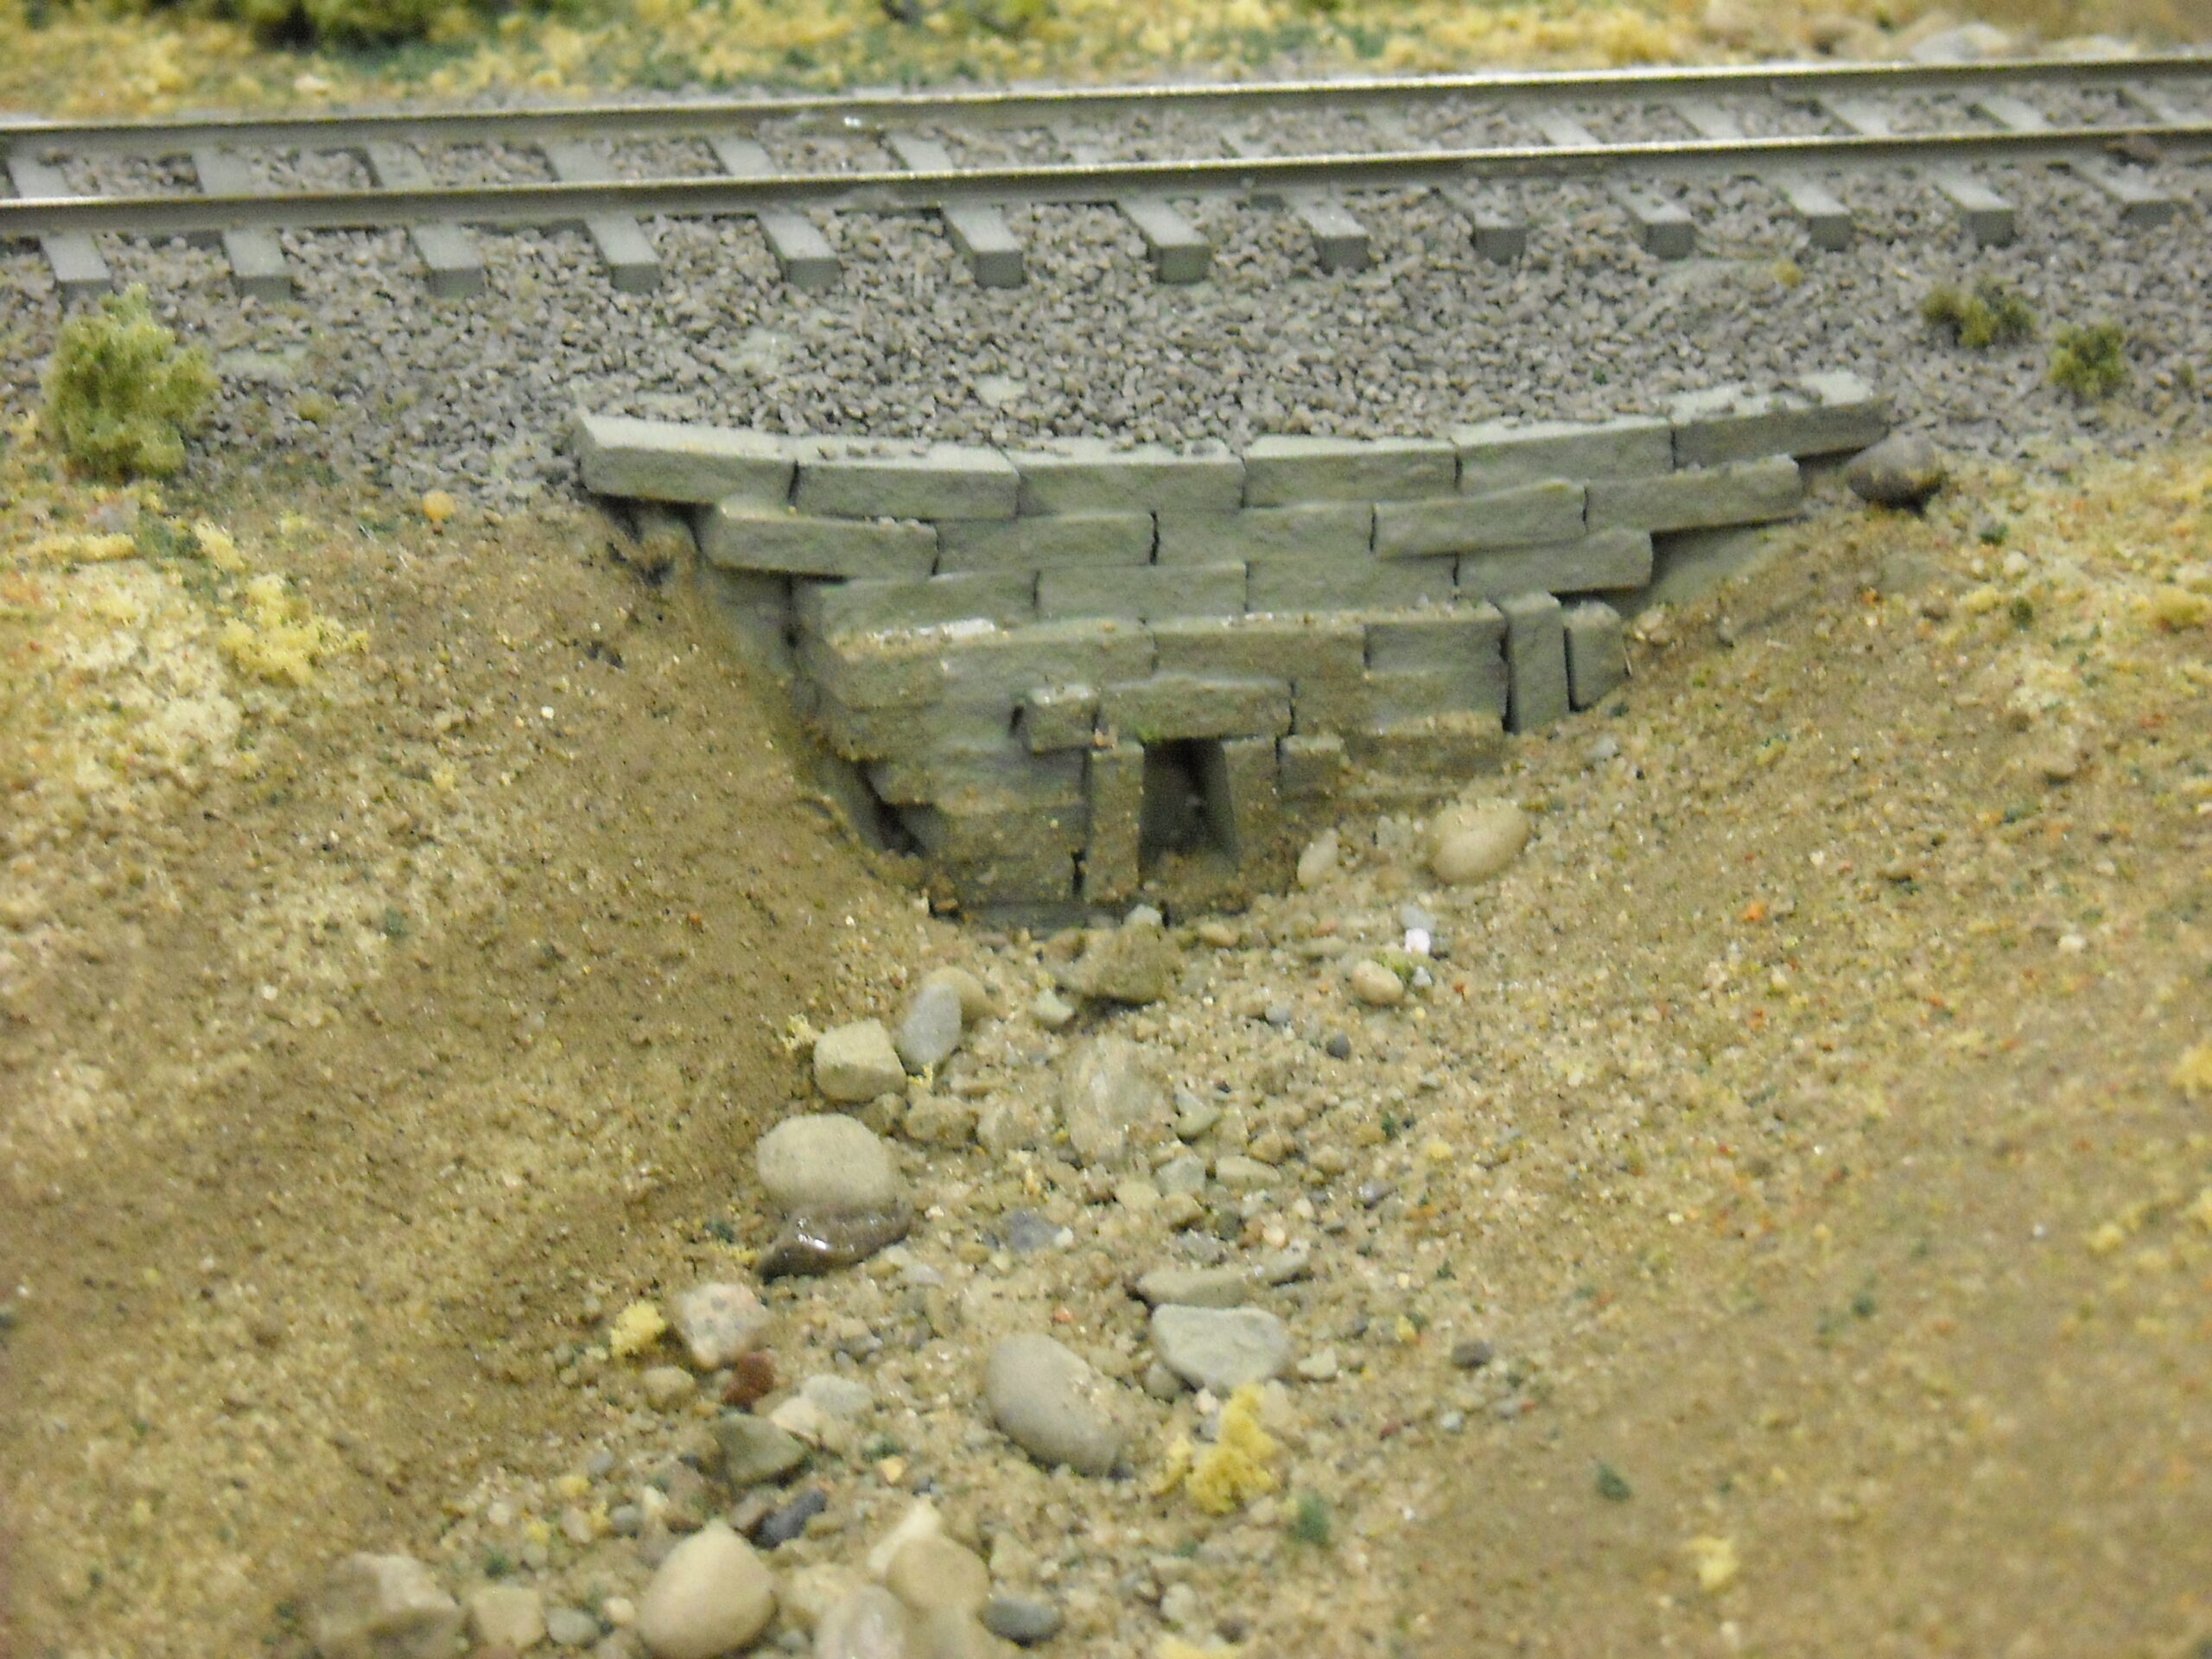
If your layout includes rocky terrain, plaster or hydrocal castings from rubber molds work very well. Paint rocks using thin washes of gray, black, tan, or brown, then dry-brush lighter shades to highlight texture.
Real stones can also be used, but scale is critical. A pebble that looks small in your hand may look enormous next to an N scale figure.
Roads can be modeled using painted foam board, sanded grout, or fine sandpaper. Add weathering with chalks or washes to simulate cracks, oil stains, and wear.
Tracksides are rarely tidy. Add cinders, weeds, spilled ballast, and discarded ties to create a lived-in appearance. Small details such as fences, signs, telegraph poles, junk piles, people, and animals bring scenes to life and help tell a story.
The final step is blending. Use weathering powders or chalks to soften edges and unify colors. A light mist of matte scenic cement locks everything in place.
Step back often and view your layout from different angles. Taking photos can reveal areas that need adjustment. With thoughtful blending, your model railroad scenery will feel natural, balanced, and realistic… just like the real world in miniature.


