Planning
Everything on model trains, model railroads, model railways, locomotives, model train layouts, scenery, wiring, DCC and more. Enjoy the world's best hobby... model railroading!

Nigel asks readers:
“I plan to build a train set up in half my double garage. Although I have quite a bit of space… enough for an HO set I think… I somehow prefer the look of smaller N scale trains. With this amount of space is N scale too small given that the cost longer term might be greater for me to fill this space with enough of the smaller track and trains, or should I just add more extensive (hopefully not too expensive) scenery like rolling hills etc?”
 Ben writes:
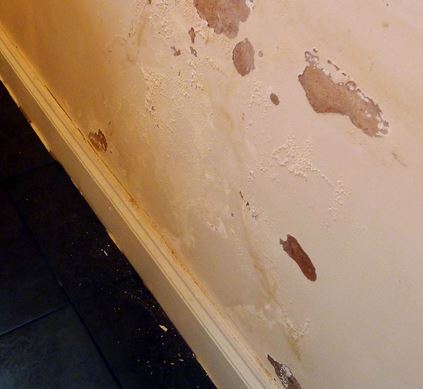
I see Dale posted a question a week or so ago relating track rust and mentioned the effects of humidity, so I thought I’d write a few words on setting up the right conditions for a layout.
One of the first things is to get the room prepared before constructing any benchwork for the layout. I know it is hard to resist just jumping in and getting started with a hammer and saw, but there are several important things to consider first apart from planning the size, shape, track configuration, scale etc.
The first job is to make the room dry. Dale mentioned his layout was in the garage and that’s a common location, as is a basement. Unfortunately basements and garages can get damp. If the space is not dry there will always be the risk of the benchwork not being stable, because humidity could cause the timber to swell. When the humidity drops the timber could dry out causing further changes or movement. This can impact on track levels and effect the sub-roadbed.
A couple of coats of waterproofing paint on the concrete block walls will help keep dampness at bay. In a lot of situations, a dehumidifier might be required to control room temperature and humidity levels. Adding insulation in the ceiling and walls will further help to keep the room dry. A drop ceiling can help with insulation and prevent dust from dropping onto the layout when someone walks across the floor on the upper level.
If the basement walls are not already insulated, start by putting up furring strips (a strip of wood tapering to nothing used in construction work) and styrofoam. Although there might only be ¾” of insulation, it will be better than having none. These furring strips can be attached to the basement walls using Tap-Con masonry screws. This will also be a help if your plan is to make your layout multi-level and intend to fix the upper layout level(s) to the wall. Using building adhesive and/or cement nails can fail over time so be careful with the weight loading. Having half your layout crash off the wall or rip wall panels loose can be disastrous. I would rather do a job once and do it right than to have to repair things after they have gone wrong.
If you have basement/garage windows you’ll need to decide whether or not to cover them with drywall or keep them accessible. Doing so would keep direct sunlight off the layout and probably mean you could include a realistic uninterrupted backdrop.
You’ll still need good lighting even if you don’t cover the windows. However, this raises another issue; the placement of the lights to be accessible and so the operators can see what they are doing. One option is to have lighting circuits finish in outlet boxes. Doing this will provide some flexibility as your layout takes shape. The lights can then be placed anywhere on the ceiling and be easily plugged in. The ceiling boxes won’t then need to be located exactly.
Whist on the subject of power circuits, it is a good idea having them along the walls usually under the layout, because running lots of extension cords is a problem waiting to happen. Being able to turn everything off at once when finishing for the day (or night) also makes sense. Having to turnoff several switches is frustrating and could result in something (like a heater or soldering iron) being accidentally left running.

Aurélio asks readers for suggestions:
“I’m trying to refurbish a last 60’s Marklin train, a legacy from an uncle and that at its time, made my cousin’s and my youth quite happy. The layout suffered several “attacks” during all this years, as you can see from the attached photo. I will try to use the base and improve the layout and the details; let’s see if I’m able to do it. Suggestions appreciated.”
Alex asks readers:
“We just moved into a smaller house and I did a lot of damage to my old HO layout deconstructing and moving it. It was harder than I thought it would be. Anyway, I decided to sell off the stuff to friend and start again in N scale because I don’t have as much space. This time I’ll build it in modules, but I’m unsure what’s the best way to join them for smooth rail joins, good connections, and easy dismantling if I do another house move?”
Club member Duncan from New South Wales in Australia sent in these planning tips to share –
I’m on to my 2nd layout so thought I would jot down some suggestions for others. Here we go…
The more carefully you think through the planning stages of building your model railway, the fewer problems you’ll have when it’s finished and operational. That’s my experience anyway.
I can’t stress enough, the importance of selecting the right track plan for the space you have available. The cars need to operate without derailing, and the railroad needs a reason to exist, because no trains run from point A to point B without a purpose. Also, I’m sure you’ll soon get bored if the layout is too restrictive, and doesn’t allow for enough operational variations.
 Based on my experience, I would say you should be 100% certain of your track plan, and lay it out on your baseboard before pinning it down. I first pin the track lightly to my baseboard which I make from exterior Water and Boil Proof (WBP) plywood. You can use other materials. I don’t use cork.
I then test for smooth operation and test that the electrics of the track are correct. I do this before starting on the ballasting. This is really important, because it’s too late if you find problems after the ballasting is done. It’s just so hard to rip it up and start again. So check track alignments, wiring etc before you ballast.
As soon as I have finished and tested the wiring, I then test my various locomotives and all my rolling stock on the track. I do this to satisfy myself that the track is laid correctly and that it allows for good running. I hope this helps someone.
Harper asks readers:
“I wish to start a garden railroad by the time I have a full paying job. I have started planning ahead and already have been looking at a suitable locomotive. Layouts have also been one thing that I have been planning ahead on. My question really, though, is… Is there anything else I need to consider or start planning on?”
Daniel asks readers:
“I am using 1″ foam on top of plywood tables. I would want to apply side boards to all sides to protect foam edges. Should it be higher than foam for other materials over foam, i.e.; ballast , grass, soil, etc? Thanks for any comments.”
Rickey asks readers:
“Hello everyone , I’m just now getting back into model railroading. I have a 9 x 10 spare bedroom that I plan using for my lay out. I want to build a logging layout and am looking for track ideas. My thought in is HO wider than on3 or will a shay or climax run on HO track.
John has a question for readers:
“I’m building a multi level OO scale layout, the first level will be a fiddle yard and the second level will be the main area. I need to know what should be the height of my supports pieces between the first level to the second level, enough for me to access the trains on the fiddle yard on the first level and also to access wires and other things?”
Hank has a question for readers:
“This is my first attempt, I want to do a module in N scale. What I’ve got is a roundhouse with 6 compartments and a non powered turn table. I am open to suggestions on how to plan and then start putting this together. Please keep it as simple as possible, do not send me any complicated diagrams for I’ll give up and my train collection will be just that a collection to show and tell. I would like a main line to the round table and then to the roundhouse.”
Hank there is a very good manual on building modules called “Confessions of a Mobile Layout Builder” available as a bonus here http://www.modelrailwayscenery.org/model-railroad-scenery.html
A reader asks:
“Has anyone built an air force base model for their train set? And where can I see pics of them?”
Gloria sent in these photos of her layout to share:
“Thank you for all the video’s and tips to you have sent me during the past year they have been very useful. I am sending you 2 photo’s of our unfinished coffee tab layout, as the moment we have not chosen a name for it. As its all based on ex GWR rolling stock and loco’s with the odd LMS locos. We have just called it a coffee table layout.”


Atul asks readers this question:
“I’m in the early planning stages for my layout. Currently, I’m leaning toward HO scale but I will consider O scale as well. I definitely want sound capability. Can someone tell me which brands are most expandable, as far as accessories available and options? Recommendations please.”
Jon asks readers:
“I am planning a layout and I am completely new to model railways. I have approx .5 mtrs long x 4 mtrs wide space, I am not too sure which scale to use. I a planning a Didcot to Oxford to Swindon/Reading layout, with a goods yard at Didcot.”

Phillip sent in some new photos of his layout. (see photos in earlier post)
“Since my last publication, I have planted some trees and installed a girder bridge doing away with the short tunnel.
I had kept an old Christmas tree that we used back in the 1970s which I did not throw out. It came in handy for making trees.
The bridge girder is just plywood cut out which I used on a previous layout. Just painted it black (only suitable paint in the garage).”


Santa Elena Station, at the highlands.
Andre from Brazil sent in these photos of his railroad.
Says Andre: We have started our first HO layout. I and my girlfriend used Brazilian made material, like 3 of 4 locos and almost all wagons, tracks and buildings. Most of that is made by Frateschi.
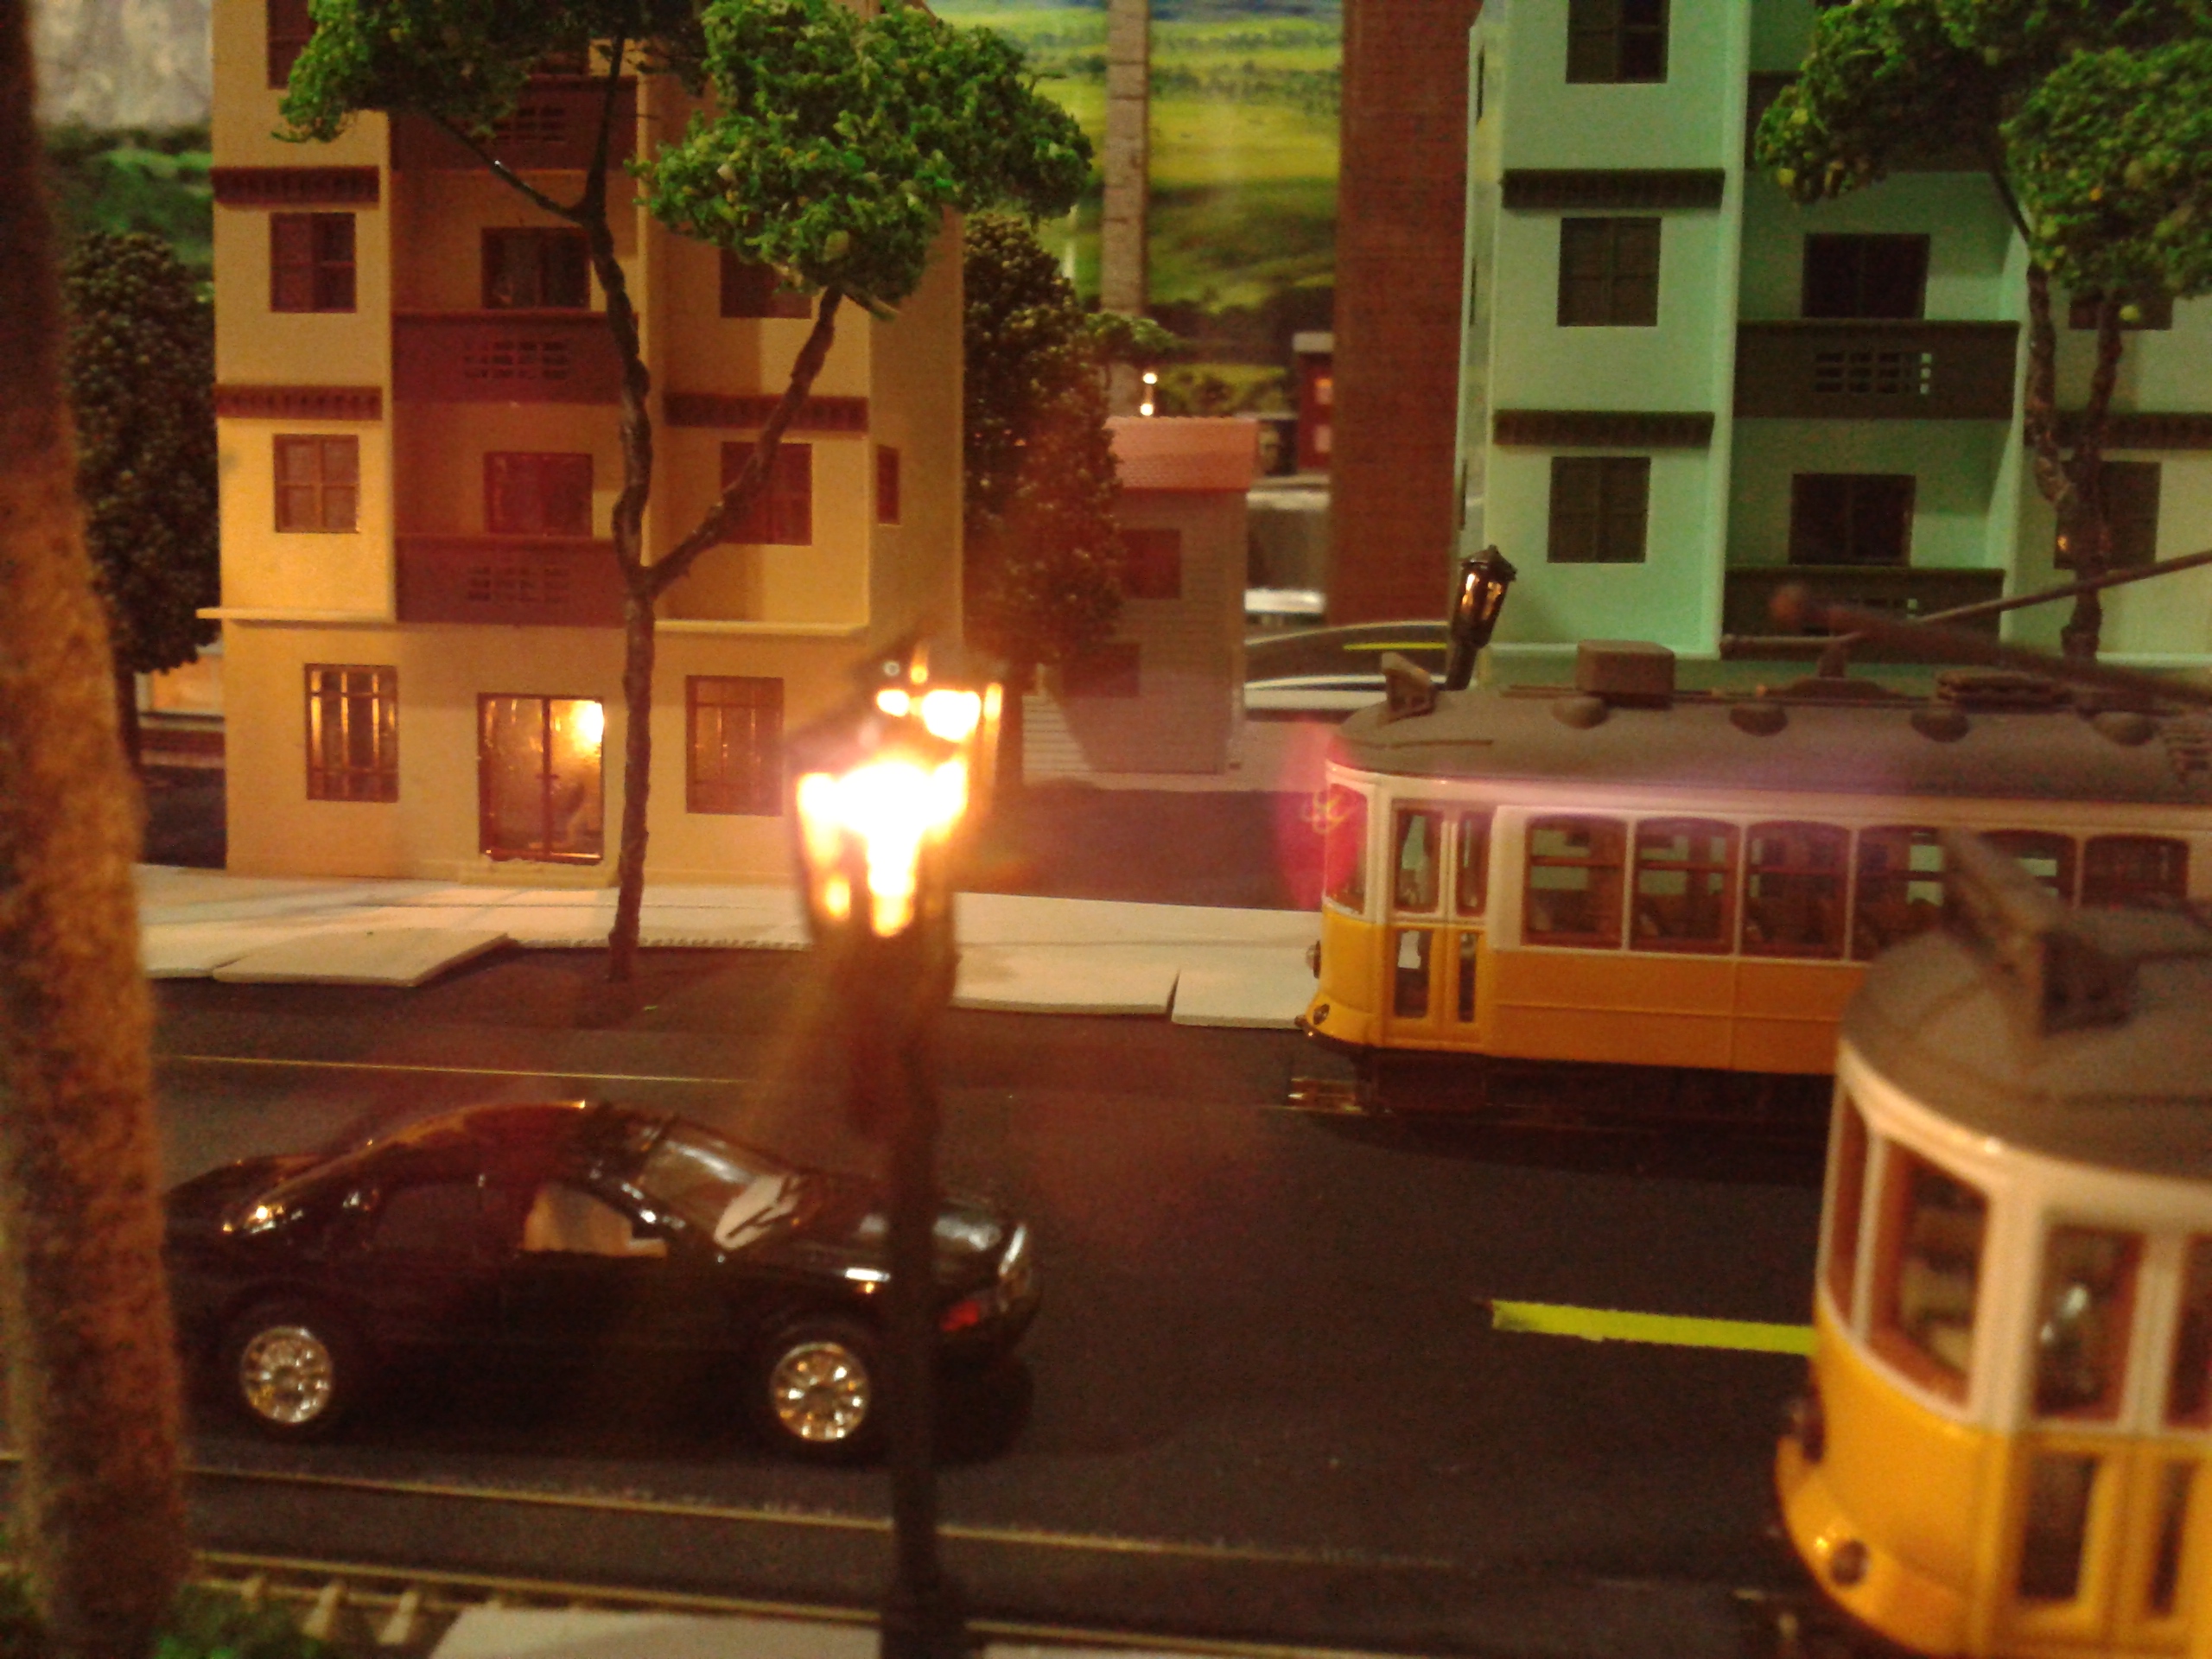
A busy street near Boa Vista Station.
There are also a loco made by Rocco and a lot of Faller and Noch stuff, and some old Majorette vehicles from the eighties.

Santa Elena Station with a EP-4, a G-12 and an old passengers train
In my figures the layout has 40 meters of track in 7 square meters. We have not put the ballast yet. We are afraid of some eventual damage to the tracks.

Manaus-Caracas Express crossing the Amazonian savanna.
We’ve planned a savanna and mountain scenery, like our state (Roraima – Brazil) in the northern frontier, near Venezuela and Guyanna. It’s the land of the “Up” animation movie (2009).
So, our layout presents a fictional railway crossing a part of Amazonia and Gran Sabana.
Phillip’s layout

The control panel
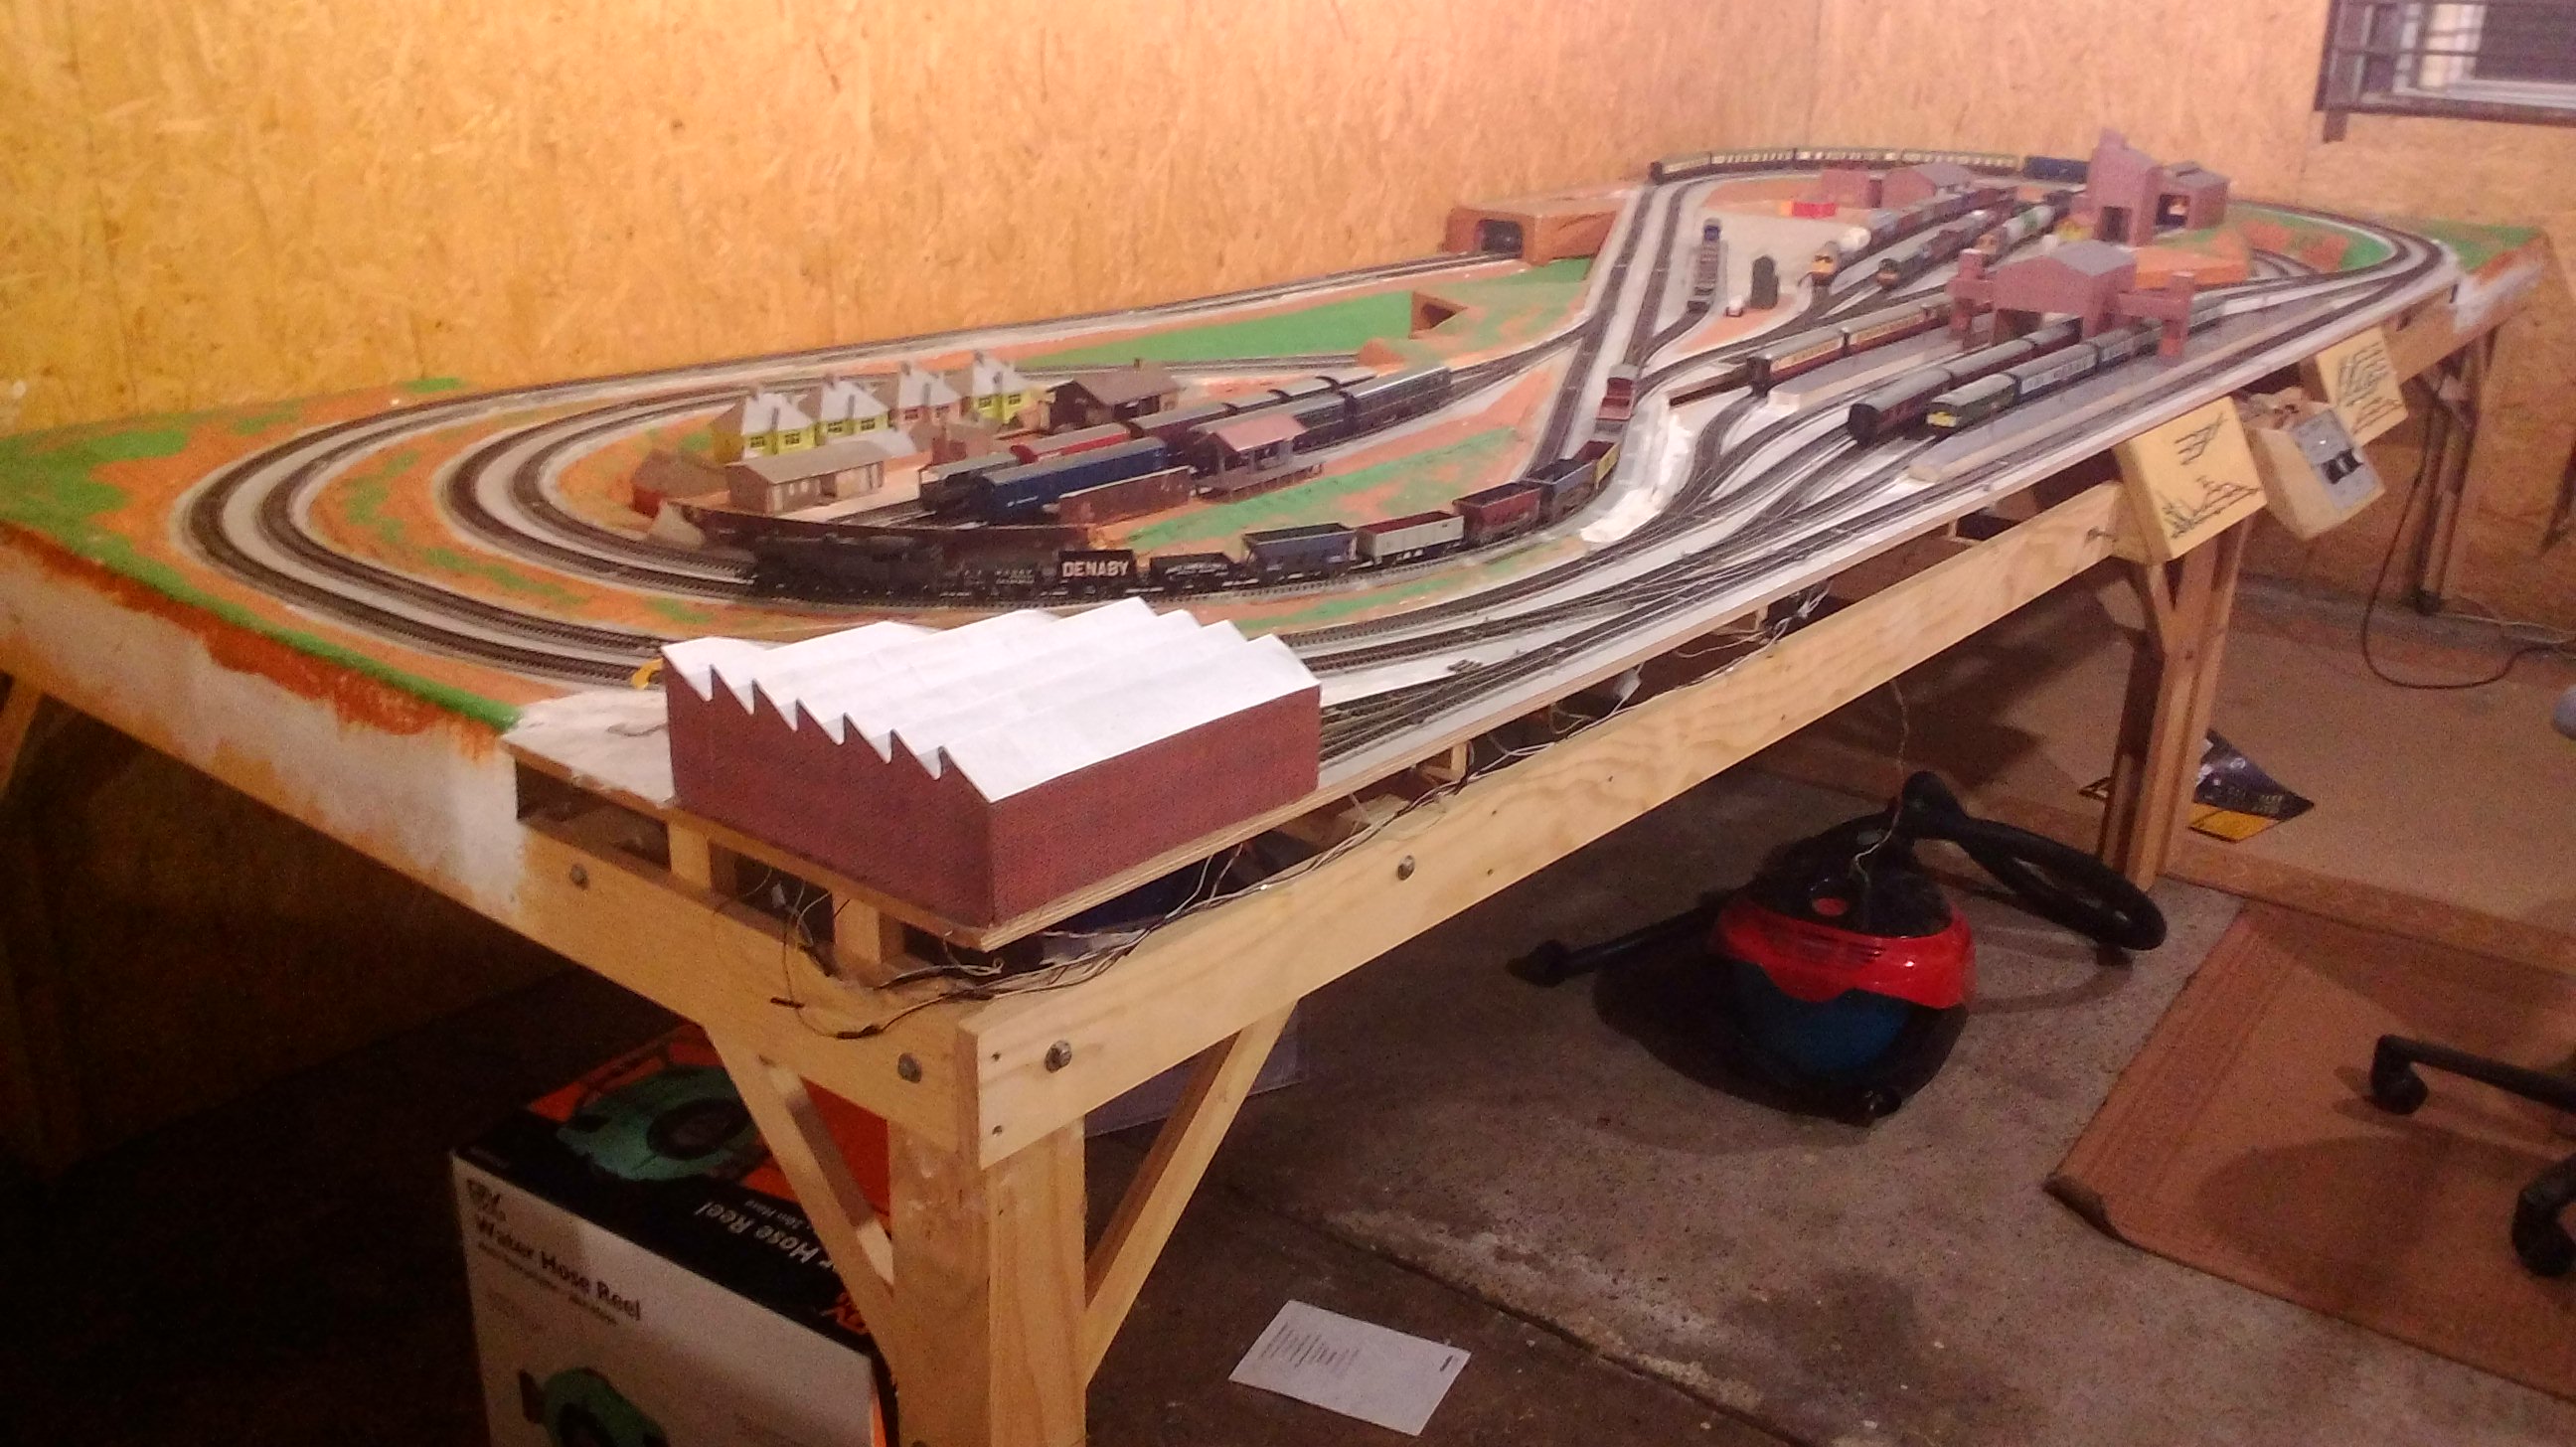
Phillip sent in these photos of his layout to share:
I have four photos of my 4.5 x 1.7 meter (15ft x 6ft) HO DC dual track model railway layout.
 I built it in two sections, 2.44m (8ft) section and 2.6m (8.5ft) section on castors so I can move out from the wall. It can be separated if needed to be moved out of the garage.
I would say it is a double 8, it goes back under the goods yard and back around as you can see in the pictures.
 I model Bachmann trains, and the diesels and steam locos are very powerful. I have a goods shed on the far left corner and a smaller goods shed on the upper level on the right.
Because the Bachmann couplers are plastic, I cannot be used with magnetic coupling devices. I have to manually uncouple the carriages with a length of flat tin to push up the coupler. You can see the piece of tin sitting above the Vector dual control unit. That is one drawback with Bachmann couplers.
I made the track control panels myself and did all the wiring up to the electric point motors and track. I have tried to keep the weight down as much as possible for portability.


