Tips & Resources
Everything on model trains, model railroads, model railways, locomotives, model train layouts, scenery, wiring, DCC and more. Enjoy the world's best hobby... model railroading!

Barry asks a question that was covered in a recent blog. Perhaps someone would like to add some comments to help Barry.
“Is there a means to move automobiles in an N Scale train track system by using electricity? I prefer to use (adapting with magnets or whatever) the inexpensive model cars.”
Barry have a look at this earier posting http://modeltrainsetshelp.blogspot.com/search?q=miniatur+wunderland
A reader has an AC/DC question for those in the know and asks:
“I have two s gauge diesel locomotives from American Models that are AC powered. I want to convert them to DC power, but don’t know where to start after I remove the electronic reverse unit from the wiring on these. One is a GP-35, and the other one is a SD-60. I plan on installing Digitrax DCC to run them more like the real train. Can someone assist please?”
Add your answer using the green Comments link below.
Jose is having electrical problems with his layout and says:
“I have a problem that I hope someone can help me with? I purchased a Aristo craft also fa1. It was on sale because it needed work. Well I love to fix things so I brought it. The problem I found out was electrical. It would short out the transformer.
So off came the cab and I check the motors. The motors attach to a circuit board, Part #22000-68. There are two connections, one for each motor. I set it on the energized track and it shorted.
I then removed one connection and the motor started. I reconnected the other motor and again a short. So I reversed the process. I then disconnected the other motor and it ran. Again I reconnected the two and again it shorted.
Well the next thing I did was to bypass the circuit board. I rewired according to the circuit board connections. Shorted again. I then rewired a basic circuit and both motors ran. I checked and rechecked the circuit board for shorts, rewired according to the circuit board again and again and still it shorts out.
Oh, I forgot to mention that I disconnected the power board from the switch board. I rewired the switch board to the power and motor wires according to the circuit board connections and pop goes the weasel. I am no electrician but I was a mechanic and no a little about basic wiring. I have spent so much time in the garage working late into the night that my wife called me a mad scientist!
Has anyone ever run across this before? Can someone tell me what I can do? I am lost as to what to do next.”
Add your feed or comments using the green comments link below. Register if you haven’t yet done this as you can then participate in future model train discussions. It takes only 2 minutes to register.
Note to Jose and other readers: Please note – feedback and comments are only opinions usually based on personal experiences. It is your responsibility to seek proper professional advice regarding electrical safety matters. We will not be responsible for any accidents, deaths or injuries based on anything that might be said on this blog.

Max has a question for those who know about voltages and asks:
“I’m building a z scale layout and need to know if Maklin locomotives and Micotrains or AZL locomotives should run on different voltage? If so, what voltage should I use, and what would happen if I use the wrong voltage?”
Add your comments by using the green Comments link below Max’s posting. After clicking the link you need to register (if you haven’t yet done so). It is quick and easy (takes about 2 minutes), and then you can participate in future model train discussions.
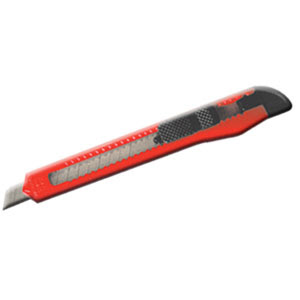 A craft knife (with snap-off blades), a Stanley knife, or a scarpel is a very useful tool for anyone doing hobby work. These tools are great for giving a clean cut through cardboard, balsa wood, polystyrene etc. However be very careful, because they are also very efficient at cutting through flesh. That’s why surgeons use scarpels in operations!
 I have found from experience it is best to make several cuts along the same line using light to medium pressure on the knife rather than pressing down hard on the knife to make one deep cut. The knife (or your grip) is more likely to slip under pressure and result in a serious cut to a finger (or damage to the object you are cutting).
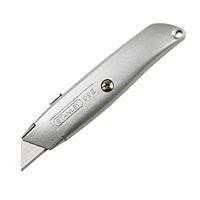 Many in the hobby prefer using a Stanley knife as they are more sturdy than the snap-off blade types. However, they are a little more bulky so it depends on the type of project you are working on, or what you prefer using. Whatever you choose be careful!
Jeremy kindly sent in these tips for readers:
Re non-shine to make things look more realistic – I use Acrylic artists paints as these are naturally matt, can be mixed (and inexpensive). In our Pound Stores (equivalent of US Dollar Stores) you can get a set of Acrylic paints (red, blue, green, black, white etc) for a pound ($1.60).
Re saw dust – besides fabric dye you can use wood dye and besides sawdust, wood flakes (hamster bedding) can be dyed and used as leaves.
Here’s a reader question some helpful enthusiast might like to assist with:
“Can Locos be wieghted so that they are firmer to the track and make better contact without damaging the grears or gearboxes? Also is there a salution to coat wheels to make better contact for DCC?”
Use the green Comments And Feedback link to submit your answer or comment for publication. The first step is to register if you haven’t already done so (it takes only 2 minutes) and then you can participate in future model train discussions.
We are all in this hobby together, so it is a good idea to help and encourage each other…especially new-comers who sometimes pull out of this wonderful hobby through frustration with lack of support or mentoring. This is a great shame, especially when there are so many well qualified and experienced model railroaders who would be happy to share ideas, but just don’t know how to go about it. Well… if you have the experience and are willing to help others, then this is your perfect opportunity to do so.
Submit your best Model Railroading Tip (s) at
http://www.model-railroad-resources.com/train-tips.html

Simply complete the form by entering your best model railroading tip(s) and I will publish the best suggestions on this Model Train Help blog site which is dedicated to helping others in the hobby. I don’t charge for people to access the site, so it is popular with many new-comers to model railroading.
Here is a sample tip received from a Richard T:
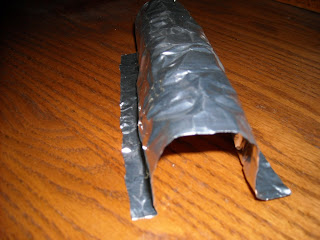
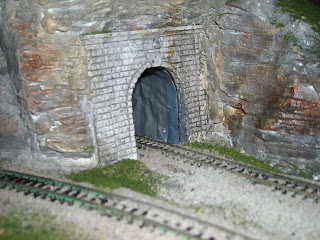
Building Tunnels Through Hills And Mountains
I made a big mistake recently when building a tunnel through a mountain and it caused me all kinds of problems. Please tell everyone as I would hate anyone to make the same mistake. I forgot to check that there was enough space for my biggest loco to run through the tunnel before I applied the paper mache to the chicken wire frame of the tunnel. You can probably guess what happened next. The loco was too high to get through the tunnel. I was so annoyed with myself as it was something I could have easily fixed and avoided hours of extra work and frustration. Please tell others!
Michael was having problem with the frogs on his layout and has found that Electrocure conductive paint forms a conductive pathway which solved his problem. Here is what Michael has to share:
“I have a tip that might be handy for other model railroaders. When older trains go over plastic frogs on points they sometimes hesitate. I painted the tops of my frogs with car rear windscreen heater repair paint called ELECTROCURE – an electrical conductor paint and it cured mine. Best wishes.”
Rick has emailed his thoughts regarding the bonus section in my Model Train Help Ebook on airbrushing and I am sure he won’t mind sharing them with you. Rick makes a really good point on avoiding damage from spray pressure on lightweight cars. Here is what he has to say:
“I’m glad to see you placing this segment on airbrush work in the book. I’ve done and still do some custom paint work and an airbrush can be a true gift if used properly. It can also be a curse if you think you can pick it up and use it like a spray can or brush. Your explaining the angle and spraying before and past the item being painted is a major benefit to all airbrush use. Also the paint thinning and proper air presure are of high importance. This is because if you don’t have an n-scale locomotive body secured properly it can be all kinds of fun chasing it around the paint booth to put the paint on, or having to completely start over, because it fipped over and messed up your paint job. Just some thoughts from learning trials.”
Thanks Rick for your useful suggestions. Airbrushing is a lot of fun and can take some time to master, but the results can be very impressive and rewarding. Airbrushing techniques can be effective on cars, structures, scenery and even backdrops.
Mike from Toronto in Canada is hoping to hear from someone who can help him with two model railroading problems. Mike asks readers:
Climate Control Around Layout
“Please advise the best climate control conditions for a layout in terms of temp humidity and the impact of adverse conditions on rail corrosion; loco damage; decoder damage.”
Computer Control Layout
“Although I have a DCC (NCE) system I would still like to have a computer control layout eg for CTC and to control both mobile and stationary decoders. Which software system would your readers recommend? I am playing around with JMRI but I am concerned about the loss of functionality using the USB interface. Would you recommend the CTI technology or the RailRoad Company (?) for computer control?”
To help Mike you can add your feedback using the Comments & Feedback link below his posting.
Can some help this reader with his locomotive question:
“I have a locomotive that is about 25 year old. Only one set of wheels will work. Can one of your readers please tell me what too look for too repair it and make it work. Thanks “
If you have submitted an question to this Model Train Help blog and if one of our other readers has kindly answered it for you, then we would like to hear from you.
A lot of readers spend a lot of their time thinking about how to answer questions clearly for those who need help. It would be really good if you would not only thank them for their help and thoughtfulness, but I’m sure they would really like to hear if the solution worked and how you are progressing with your layout.
The people who answer these question are fellow model railroaders – they don’t get paid – they just do it out of a genuine desire to help others in need.
So, please participate in the discussions on this blog and, if you can, try and help and encourage others in the hobby.
To participate in discussion simply register using the green Comments link. I takes just 2 minutes to register and then you can join in on future discussions.
Derailments are a common problem for model railroaders and many of the likely causes and solutions have been widely covered in the Model Train Help Ebook and on this blog over the past year or so. Here is the most recent question submitted on the subject:
“When my engines and certain cars come to a switch track (it doesn’t matter which one
right or left turnouts) they derail all the time. I am very frustrated and wondered if another person reading this could give me some advice please?”
To help this reader you can submit your thoughts using the green Comments & Feedback link below. We encourage readers to help each other and participate in this discussion.
A reader who has kindly answered a couple of questions on this blog has made a very valid point. Here is his comment:
“Please remind those who are asking questions to be more precise. Many are to general and leave way for too many variables.”
I certainly agree with this comment. If you want good answers (or even any answer), you need to compose a good, well thought-out question. If the question is confusing, then it is likely the answer will be less than complete.
Milan is just getting started in model railroading and is hoping some of the “old Pro’s” will give him some help and encouragement. To help Milan add your feedback using the green comments link below his posting:
“I have a couple of questions if someome would please be kind enough to help with. I am new at trains and would love to get started with n scale. The train which is making me get started in the prr broadway limited.
My dilemma is this – I don’t like the g11 that pulled this part way but do like the e8 (tuscan red) engines. I would like to run two but cannot figure out on how one will run facing forward and the other back.
My plans are to start analog and then work my way into dcc. Is there a dummy of this engine? This would make it a little cheaper. Everything that I have seen and like is is from Kato. My hopes are to do the the right thing first time around even if I purchase one thing at a time.
Also, I would like to run the v11 configuration with the double track. Maybe somewhere down the road I can get my second train and run them with dcc. Any help from anyone would be greatly appreciated.”
Peter wants information on building a portable layout and asks readers:
“I belong to a local R.R. club. We want to make a portable layout but we are not sure how to make the frame work and the size of each section. Has anyone who has made a portable layout got any ideas for a layout to help us with getting started. Thank You.”
Add your feedback to this posting using the green comments link below.


