
Everything on model trains, model railroads, model railways, locomotives, model train layouts, scenery, wiring, DCC and more. Enjoy the world's best hobby... model railroading!
Denny wants advice from others in the hobby and asks:
“Where do I lubricate my old Lionel engines (steam and diesel)? Where on a 736 do I apply oil? I added oil (light) to the shaft in cab now it smokes. Would this have damaged it?
Add your answer below.
A reader has sent in this idea:
"I have tried filament (too thin) and jelly cord (too thick and puts tension on the queen posts - its is a nice black color), and now I am using music wire which works wonders. Make a pattern and then lay it on a board, put nails where the bends are to be and bend the wire around them. Each truss rod comes out the same."
Comment below.
Rick wants some simple to understand help and asks:
“I am just starting a freelance layout and I would like to find some wiring info from anywhere. I looked on the net but they spoke in language that I don’t understand yet. Can someone point me in the right direction? Thanks.”
Add your answer below.
ALSO, if you are knowledgeable on any model railroading topic, then it would be great a great service to the hobby if you would share some of your knowledge with others. Simply write a tutorial or tips and send them to us using this link http://www.model-railroad-resources.com/submit-questions.html. If you have a supporting photo or diagram, then we can let you know where to email it after you send in your tutorial or tips.
Ron asks readers:
“Where can I purchase 5mm, Blinking Red LED lights, with volts going to 18 or 24?”
Add your answer below.
For those who don't know, a catenary is part of the overhead wiring on railroads, which hangs in between the supporting masts, and from where the dropper wires are hung.
Guillermo, from the Patagonia Argentina asks readers:
"I am looking for to make an HO non operating catenary system for part of my layout. Do you have idea where could I find information for about it."
Add your answer below.
Joss an 11 month member of my online Model Train Club has posted this idea at the club.
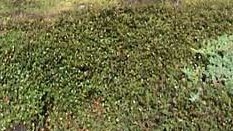
I know you can buy ready-made ground cover, but I’m a bit old fashioned and like to make my own. I gather up dead leaves and crush them in a kitchen blender. I then gently bake the moisture out, or I thoroughly air dry the mixture (don’t start a fire in the oven!). I then use a sieve to sift the baked material to look like tiny fragments of dead leaves (which is what it really is). Apply some ground goop to your surface area and sift on the leaves to bond them to your forest floor. Leave it to dry. I haven’t had any problems with the leaves showing any signs of decay or mold, and I first used this method a few years ago.
Razza a keen member of my online Model Train Club posted this idea in the members area.
You can either buy telegraph poles from a hobby shop or you can make your own. The bought ones are usually molded in one color so you might need to paint them a bit so they look more real. The ceramic insulators on telegraph poles are not usually vivid white and on a real pole they are likely to be off white or greyish in color. So touching them up with some paint will take away the unreal starkness.
You can also add more details. For example (depending on where you live), the poles might have a band around them to stop possums climbing the poles and causing a power failure. Some poles will have a guard to stop mice and other rodents climbing or attacking the poles. The telegraph poles might have a styrene plastic sheet wrapped around towards the base of the pole to stop vermin climbing up. You can replicate this by wrapping on a small piece of heat shrink insulation and then lightly applying heat to help it grasp the pole. Have a look at some telegraph poles in your area, or search images on the net, to see what details you can include to add realism.
There are hundreds more helpful ideas in the members area at the online Model Train Club.
I’m sure you’ll find the results of the last poll fascinating. I total of 860 people responded, with a staggering 43 % having eleven or more locomotives in their collection. Here are the detailed results:
1 = 16 votes (1%), 2 = 46 votes (5%), 3 = 57 votes (6%), 4 = 68 votes (7%), 5 = 60 votes (6%), 6 = 63 votes (7%), 7 = 55 votes (6%), 8 = 36 votes (4%), 9 = 29 votes (3%), 10 = 40 votes (4%), 11+ = 375 votes (43%), I don’t have any locos yet 15 votes (1%)
John has kindly sent in this article which he hopes will be helpful to others in the hobby.
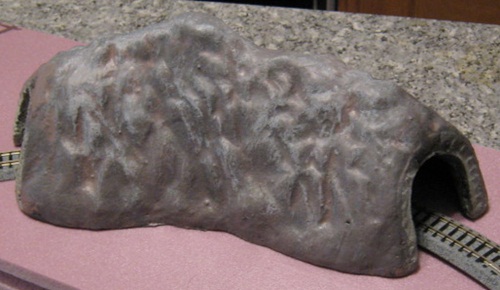
A tunnel is always an important part of our layouts, as it serves multiple purposes. On bigger layouts, a tunnel breaks up the train as it “disappears” inside the mountain for a short time, while on smaller oval or switching layouts a tunnel can serve as an area that leads to a place outside the layout itself. The only problem is that, if you don’t build the tunnel yourself, an inexpensive type of tunnel can look just like it is – a toy that has the basic shape but does not look realistic. However, there is a way to remedy this problem with a few cans of model paint, and the following is one type of example.
I used a very inexpensive small, curved N-Scale foam tunnel which was factory painted green, brown, and white, and all-white inside. First of all, tunnels are dark places where only trains and adventurous people dare to go, so the entire inside was painted black. It would be a good idea to also paint the roadbed a dark color, because when you look inside, the only things that should be seen are the locomotive headlight and the reflection on the rails.
The next step would be to paint the entire outside a gray color or even a combination of grays. When that dries completely, make a brown wash (to simulate earth) and spray or paint it on so it flows between the ridges in the rocks. Then paint the tunnel portals a concrete color to make them stand out somewhat from the rocks. After this, let the whole tunnel dry for a day or two, and to make sure you like the way it looks before going on.
When all the paint is dry, dry-brush all the rocks (especially the rocks on top of the tunnel) to simulate the effects of nature and sunlight. Dry-brushing, if you haven’t done it before, takes some practice. I have all the manual dexterity of your average water buffalo, yet learned how to dry-brush by trying it out on articles that won’t be used on a layout. The important part is not to use too much white paint, just enough to make the rocks stand out. If you do put too much on, immediately wipe it off and try again.
The final steps are to paint a bit of black in the center of the tunnel portals to simulate engine smoke, and to put on lichen, ground cover, trees, etc. The example in the accompanying photo was left lichen-less because the tunnel will be used on a holiday layout, and will be covered in snow. But the primary consideration is to have the tunnel look exactly like the surrounding environment. As railfans know, a tunnel is built so trains can go through it rather than go all the way around a mountain, and as modelers we should try to recreate this fact.
Thanks John for your excellent contribution. It would be fantastic if other experienced model railroaders did the same.
Aidan has a question for experienced model railroaders and asks:
“I am starting to lay tracking and wire the layout. It’s not DCC, it is common return. The wiring plans say that the power should be fed at the toe of the points. I have one point directly behind another so I’m unsure of where it should be fed from. Any help would be appreciated. Thanks.”
Add you answer below.
RB asks readers:
“I would like to hear from anyone who has wired up and used the Sensa Trak ll IR sensors from TCH TECH and the tortoise switch machine for automatic turnout control.”
Add your comments here.
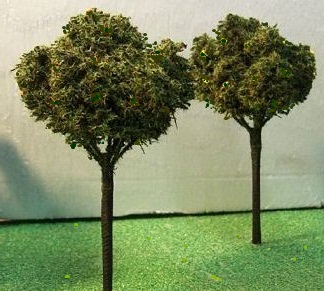
Jack is also a member of the online model train club and sent in this tip:
“Most people buy the white or red grapes to snack on. They are a healthy snack. However they are more. Be careful pulling them from the stem. Dry the stems (usually 24 hrs is enough) put some school glue, hot glue or almost any adhesive and apply the ‘moss’ available in most any craft or mega stores for very few dollars. The trees look natural and no two are alike.”
There are hundreds more member tips inside the members area at the online Model Train Club.
Jamie, a keen member of the online model train club sent in this tip:
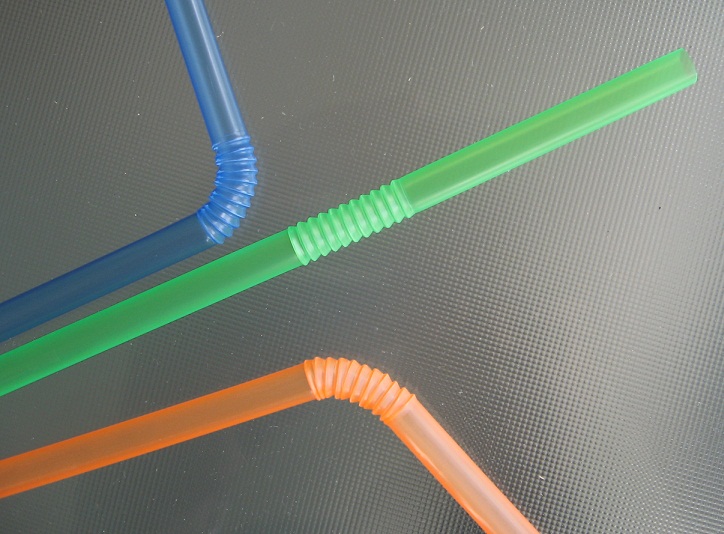
“I use those little tubes available for garden sprinkler systems as sewerage and drainage pipes. I cut them into short pipes lengths of 1″, 1 1/2″ or even up to 2″. I then paint them a steel or concrete color. For culverts, I bought a pack of those bendy drinking straws the kids love to use. Because they bend they work well as corrugated parts on some culverts. Obviously I paint those too.”
It is really handy to be able to easily move your layout (or sections of it) if required. Most people discover this when they move house. Moving the furniture is easy, but moving a layout can be problematic.

This informative manual describes how to build a mobile model train layout, so you don’t have to begin again when you move house. You can read how a modular train layout can save you money as well as taking up less space.
You’ll really enjoy this! It includes photos, tips and a layout plan included. Get it now for free when you join my online Model Train Club.
Here are the results of the last poll. A total of 445 people participated so that’s a good number to get a fair result.
When asked “Do you make the trees on your layout?” people answered:
Yes, I make them all (18%)
Yes, I make some (33%)
No, I buy them ready-made (26%)
I don’t have a layout yet (21%)
William asks readers:
“I currently have a room that’s 14 x 20 feet that I can use for a RR layout. HO seems to small for me to work with since I have an ON-30 train and have problems even setting it on the track. I remember how easy it was to set my Lionel cars on my 0-27 when I was a kid so I think I’d like to go with an O gauge layout. I want to keep it a little bit realistic so I wouldn’t necessarily want another 0-27 unless the toy like look of them has changed that much over the last 50 years! I don’t want a huge layout, just something to play around and tinker with in my retirement. Do you think I could do this with O scale trains in the 14 X 20 area I spoke of?”
Add your comments below.
Dennis asks readers:
“I have an HO controller (Tech4 MRC260) with accessory output of 18.5v. I’m looking to buy lighting for the buildings and the Model Power MDP491, MDP492 lights are rated 12-16 volts. Do I need to step-down the output voltage so as not to blow the bulbs? If so where can I get something like that? Or do I need higher rated lighting?”
Add your answer below.


