model railroad weathering techniques
Everything on model trains, model railroads, model railways, locomotives, model train layouts, scenery, wiring, DCC and more. Enjoy the world's best hobby... model railroading!

One of the fastest and most affordable ways to improve the realism of a model railroad is through weathering. Whether you model in HO scale, N scale, or OO gauge, adding realistic signs of age, dirt, rust, and wear can transform a layout from looking like a collection of toys into a miniature world that feels authentic and believable.
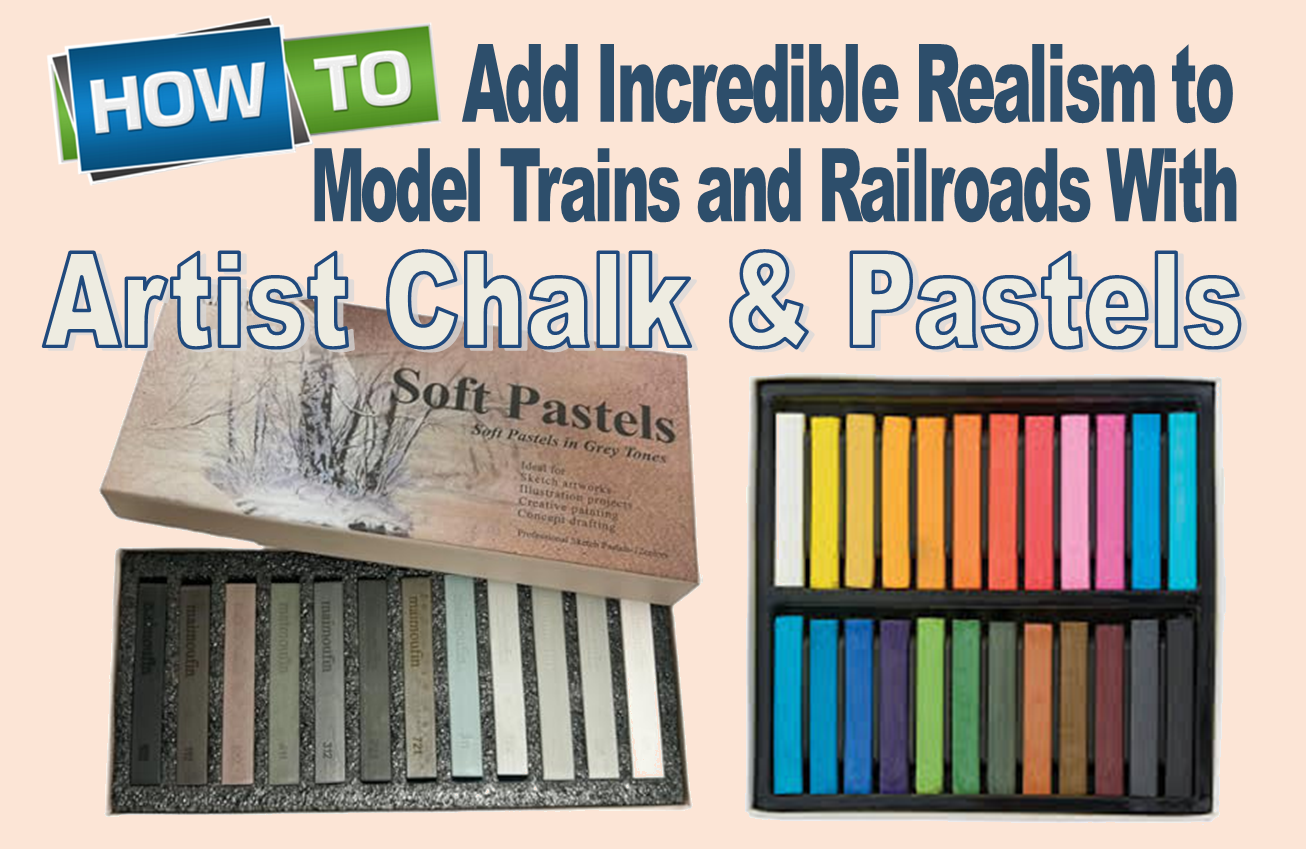
Among the many weathering methods available, artist chalks and weathering powders remain popular because they are easy to use, inexpensive, forgiving, and capable of producing outstanding results.
Take a look around the real world. Very few buildings, vehicles, railroad cars, or industrial structures remain perfectly clean and shiny for long. Sunlight fades paint, rain leaves stains, dust accumulates, and metal surfaces rust.
The same principle applies to model railroads. Brand-new locomotives, freight cars, buildings, and scenery often look unrealistic because they lack the subtle signs of everyday use. Weathering helps capture the character of the real railroad environment.
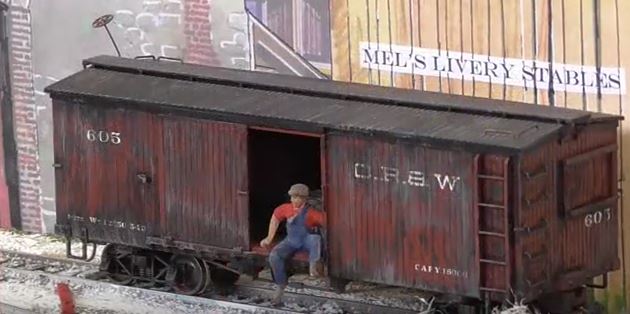
A lightly weathered freight car, a rusty corrugated roof, or a dirt-stained engine shed instantly adds visual interest and realism to a scene.
Before getting started, it helps to remember two basic weathering principles:
Nature tends to mute and soften colors over time. Most weathering effects involve shades of brown, gray, black, rust, dust, and faded earth tones.
Bright colors can quickly make weathering look unrealistic.
Real railroad equipment is usually dusty, dirty, faded, or weather-beaten. Glossy finishes often create a toy-like appearance. A flat or matte finish generally looks much more convincing.
Artist pastels are available from most craft and art supply stores and come in a wide variety of colors. For model railroad weathering, focus primarily on:
Weathering powders are another excellent option. Unlike traditional chalks, many commercial weathering powders contain ultra-fine particles that closely resemble real rust, dirt, soot, and grime. Many products also include binding agents that help the powder adhere to surfaces more effectively.
Both options can produce excellent results.
Most modelers use artist chalks in powder form rather than applying them directly from the stick.
Creating powder is simple:
Preparing several colors at once allows you to blend different shades and create more natural-looking weathering effects.
Weathering works best when applied gradually. A soft, fine-tipped brush gives excellent control over where the powder goes.
Begin by studying photographs of real trains, railroad buildings, bridges, or structures similar to the model you’re working on.
Notice where dirt naturally collects:
Apply small amounts of powder in these areas first.
The beauty of chalk weathering is that mistakes are easy to correct. If you’re not happy with the result, simply wipe it away and try again.
Different colors create different weathering effects:
Use reddish-brown and dark rust shades around:
Tan, gray, and earth tones work well for:
Black and dark gray powders are ideal for:
Building layers gradually creates a much more convincing finish than applying a single heavy coat.
Weathered buildings add enormous realism to any model railroad scene.
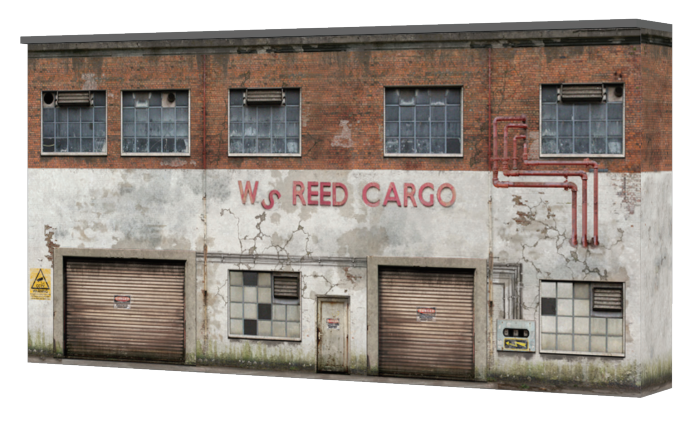
Real structures rarely remain perfectly painted. Roofs fade, walls accumulate grime, and water stains develop around windows and gutters.
Use weathering powders to create:
Even subtle weathering can make a structure appear decades older and much more realistic.
Artist chalks and powders aren’t limited to trains and buildings.
They can also enhance:
Adding subtle color variations helps eliminate the uniform appearance often found on new layouts.
Once you’re satisfied with the results, seal the weathering using a flat clear finish such as Testors Dullcote or a similar matte spray.
This helps:
Some modelers apply multiple light coats during the weathering process, building layers gradually until the desired effect is achieved.
Weathering with artist chalks and weathering powders is one of the easiest and most effective ways to improve the realism of a model railroad. Whether you’re working on HO scale locomotives, N scale freight cars, OO gauge buildings, or entire scenic areas, these simple techniques can dramatically enhance the appearance of your layout.
The best part is that weathering is highly forgiving. Start slowly, study real-world examples, and experiment with different colors and effects. With a little practice, you’ll be amazed at how quickly chalks and powders can transform ordinary models into realistic miniature replicas that bring your railroad scene to life.
Simple Model Railroad Tips to Improve Train Operation, Realism, and Layout Building
Model railroading is one of those hobbies where small improvements can make a huge difference. Whether you’re building your first HO scale layout, experimenting with N scale scenery, or upgrading an OO gauge railroad, a few practical techniques can help your trains run smoother, look more realistic, and save you from frustrating problems later.
The great thing about model trains is that you never stop learning. Even experienced railroaders continue discovering better ways to lay track, wire layouts, improve scenery, and fine-tune rolling stock. The following tips are simple, beginner-friendly, and easy to apply, but they can dramatically improve the way your model railroad performs.
One of the biggest mistakes beginners make is trying to build a huge layout immediately. Large layouts take time, money, and planning. Starting with a smaller railroad allows you to learn valuable skills without becoming overwhelmed.
A compact layout also lets you experiment with scenery, wiring, weathering, and operations before expanding later. Many successful layouts began as simple starter projects that evolved over time.
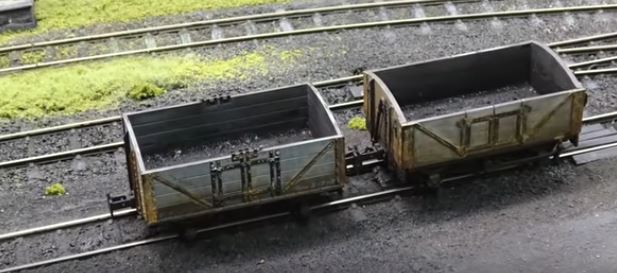
Good planning prevents expensive mistakes. Before laying a single piece of track, sketch your ideas on graph paper or use model railroad planning software.
Careful planning helps you avoid:
Even a rough plan will improve your layout dramatically and make construction much easier.
Coupler problems are one of the most common causes of derailments and uncoupling issues. Inspect each coupler carefully and make sure they sit at the correct height.
A coupler height gauge can help ensure consistency across your rolling stock. Also check for:
Smooth, correctly aligned couplers help trains operate reliably through curves, turnouts, and grades.

Lightweight rolling stock often wobbles, bounces, or derails easily. Adding extra weight improves tracking and stability.
For best results:
Properly weighted cars run smoother and look more realistic when moving through curves and switches.
It’s tempting to jump straight into scenery work, but complete your electrical wiring first. Test all rail joiners, feeders, and power connections before applying ballast or glue.
Trying to repair electrical faults after scenery is finished can become frustrating and messy. Careful preparation now saves major headaches later.
Fresh track often looks too shiny and toy-like. After ballasting, add weathering effects such as:
A little weathering instantly gives your HO scale, N scale, or OO gauge railroad a far more authentic appearance.
One simple but effective trick is using an old toothbrush to flick muddy paint onto freight cars, trucks, and lower body panels.
This creates realistic dirt splatter and road grime similar to what real trains collect over time. Use brown, dark gray, or earth-colored acrylic paint for best results.
Subtle weathering almost always looks more realistic than heavy over-weathering.
Many beginners rely too heavily on rail joiners for electrical power. Unfortunately, rail joiners can loosen over time and create voltage drops.
Instead, install feeder wires every few feet and connect them to a main power bus beneath the layout. This helps:
Reliable wiring is one of the foundations of a dependable model railroad.
It may not seem exciting, but labeling wires is one of the smartest things you can do.
As layouts grow more complex, identifying wiring later becomes difficult. Small labels or colored wiring systems make troubleshooting far easier and help prevent mistakes during future upgrades.
Dirty rails quickly lead to poor electrical pickup and jerky train operation. Dust, oxidation, and grime build up faster than many hobbyists realize.
Regular cleaning with:
will help maintain smooth and reliable operation.
Clean track equals happier trains.
Never assume newly laid track is perfect. Run locomotives and rolling stock slowly over each section during construction.
Watch carefully for:
Fixing problems immediately is much easier before scenery and ballast are added.
Small screws in couplers, trucks, or motor mounts can gradually work loose from vibration.
A tiny dab of clear nail polish on the threads helps keep screws secure while still allowing removal later if needed. It’s a simple trick, but surprisingly effective.
Perhaps the most important tip of all: don’t rush.
Model railroading is meant to be relaxing, creative, and enjoyable. Every layout improves with time, patience, and experience. Mistakes happen to everyone, even longtime hobbyists.
Take time to experiment, learn new skills, and enjoy the building process. The journey is just as rewarding as the finished railroad.
Whether you model HO scale, N scale, or OO gauge trains, these simple model railroad tips can help improve reliability, realism, and enjoyment. Small upgrades like better wiring, careful planning, realistic weathering, and smoother trackwork can transform an ordinary layout into something truly satisfying to operate.
The best layouts are not always the biggest or most expensive. Often, they’re the ones built carefully, thoughtfully, and with attention to the small details that bring a miniature railroad to life.