
Everything on model trains, model railroads, model railways, locomotives, model train layouts, scenery, wiring, DCC and more. Enjoy the world's best hobby... model railroading!
 There are several ways to make artificial water for a model railroad, and some are more permanent and realistic than others. Epoxy resin products are a popular choice for many as they dry hard and clear (although color can be added to the mix). Regular epoxy resin is available art & craft stores in a twin bottle pack. One bottle contains resin and the other is the hardener which causes a chemical reaction when mixed together. The mixture warms up and dries rock solid. When dry it cannot be molded or melted, but it can be sanded. There are also several branded products available for making artificial water including Realistic Water, and E-Z Water.
 Making the water look real
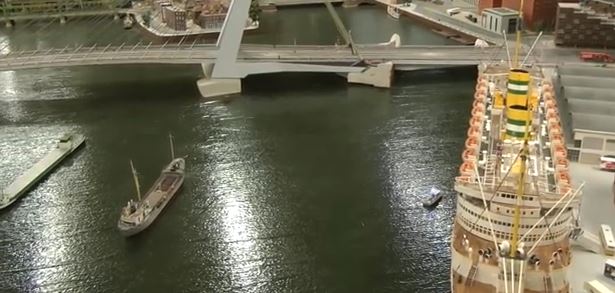
In real life water changes color due to reflections on the surface, and/or the clarity of the water, and/or the depth, and/or the movement/stillness, and/or the rocks/debris/sand color on the bottom. So water is not always blue (as you can see from these model railroad photos).
Rivers often have a high particle content so look brown in color. On the other hand a river might be relatively clean, but be discolored in places due to outfall pipes from factories or input flows from another stream. So to look real the clarity and color might not be consistent.
More info on making water for model railroads.
Model the bottom first
When creating a water area on a model railroad, the first job is to model and shape the bottom remembering that is unlikely to be perfectly smooth. Little stones and vegetation can be added depending on the intended water depth. The bottom will require painting prior to pouring the resin mix. The color choice is important and needs take into account the various factors mentioned earlier. Greens, browns, and blue tones are a common choice. Boats, watercraft, vegetation etc is often added to the liquid resin before it hardens. Plants such as fallen branches, reeds, brushes, grasses etc. can be added along a river bank.


I wish I were able to watch the videos, from this site, on my Kindle Fire HD.
Danny, you can see them at youtube https://www.youtube.com/channel/UCgoDMRLidfm2Yk87gcHF0AA
This is awesome! Thanks for the tip. I think this is a more difficult aspect of model train building for people to conquer – the surroundings. Tracks may be easy, but water and grass? That’s a whole other story!
I just found a really cheap and easy way to model water or ice effects. I don’t like the idea of mixing chemicals, colors, etc., but I needed to add a frozen pond area to my layout.
My solution? Head for the kitchen, grab some clear food wrap (like Saran Wrap or similar). Lay down your landscaping (in my case, snow), color if necessary, then fasten the clear wrap over the base using landscape cement. You can make it smooth or easily add ripples. The end result looks like a frozen lowland area, reflecting light and looking for all the world like real ice. I couldn’t be more pleased.