Others
Everything on model trains, model railroads, model railways, locomotives, model train layouts, scenery, wiring, DCC and more. Enjoy the world's best hobby... model railroading!

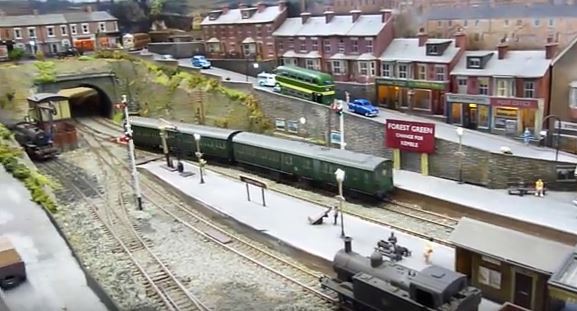
The South Bay Historical Railroad Society is located in the historic (built 1863) Santa Clara Depot in Santa Clara, California, USA. Within the Depot is an HO and N scale model railroad layout depicting various railroad eras. The N scale layout in this scene is 11ft wide by 52 ft long with 3 mainlines, and helix’s at both ends to service all 3 lines.
This scene shows the residential area and part of the passenger station (right). The layout looks impressive, but I’m not sure I would like to be in one of those vehicles when that double header diesel roars through the town so close to the road. Looks like an amazing layout.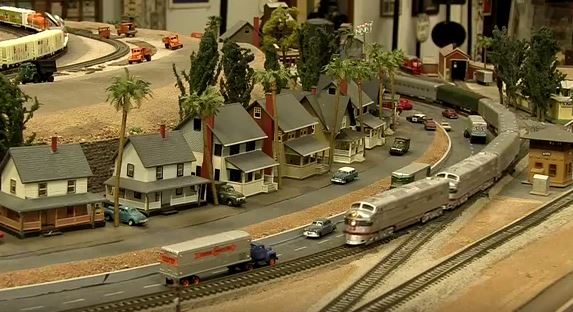
Another photo from Damien of the Sileby Model Railway Exhibition in the UK. This is a busy scene some excellent natural weathered effects like the color of the track ballasting. Despite its compact size, the scene has a lot of perspective both height and distance. The low relief buildings add to that effect as does the photo backdrop with more terraced houses.
The response to our first SPOT THE DIFFERENCE photo a couple of weeks ago was amazing. In the reader poll a whopping 84% said they would like to see more spot the difference photos on the blog. So, here is a second photo which has 7 differences. Can you spot them? Click the COMMENTS link to list your solutions.
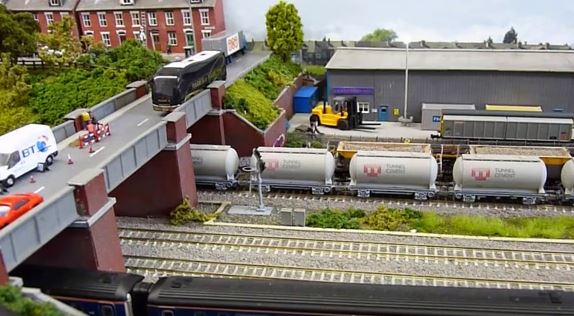
Damien from the UK sent in this photo he took at the Sileby Model Railway Exhibition. It looks like British Telecom (BT) are do some work on the phone lines – great detail.
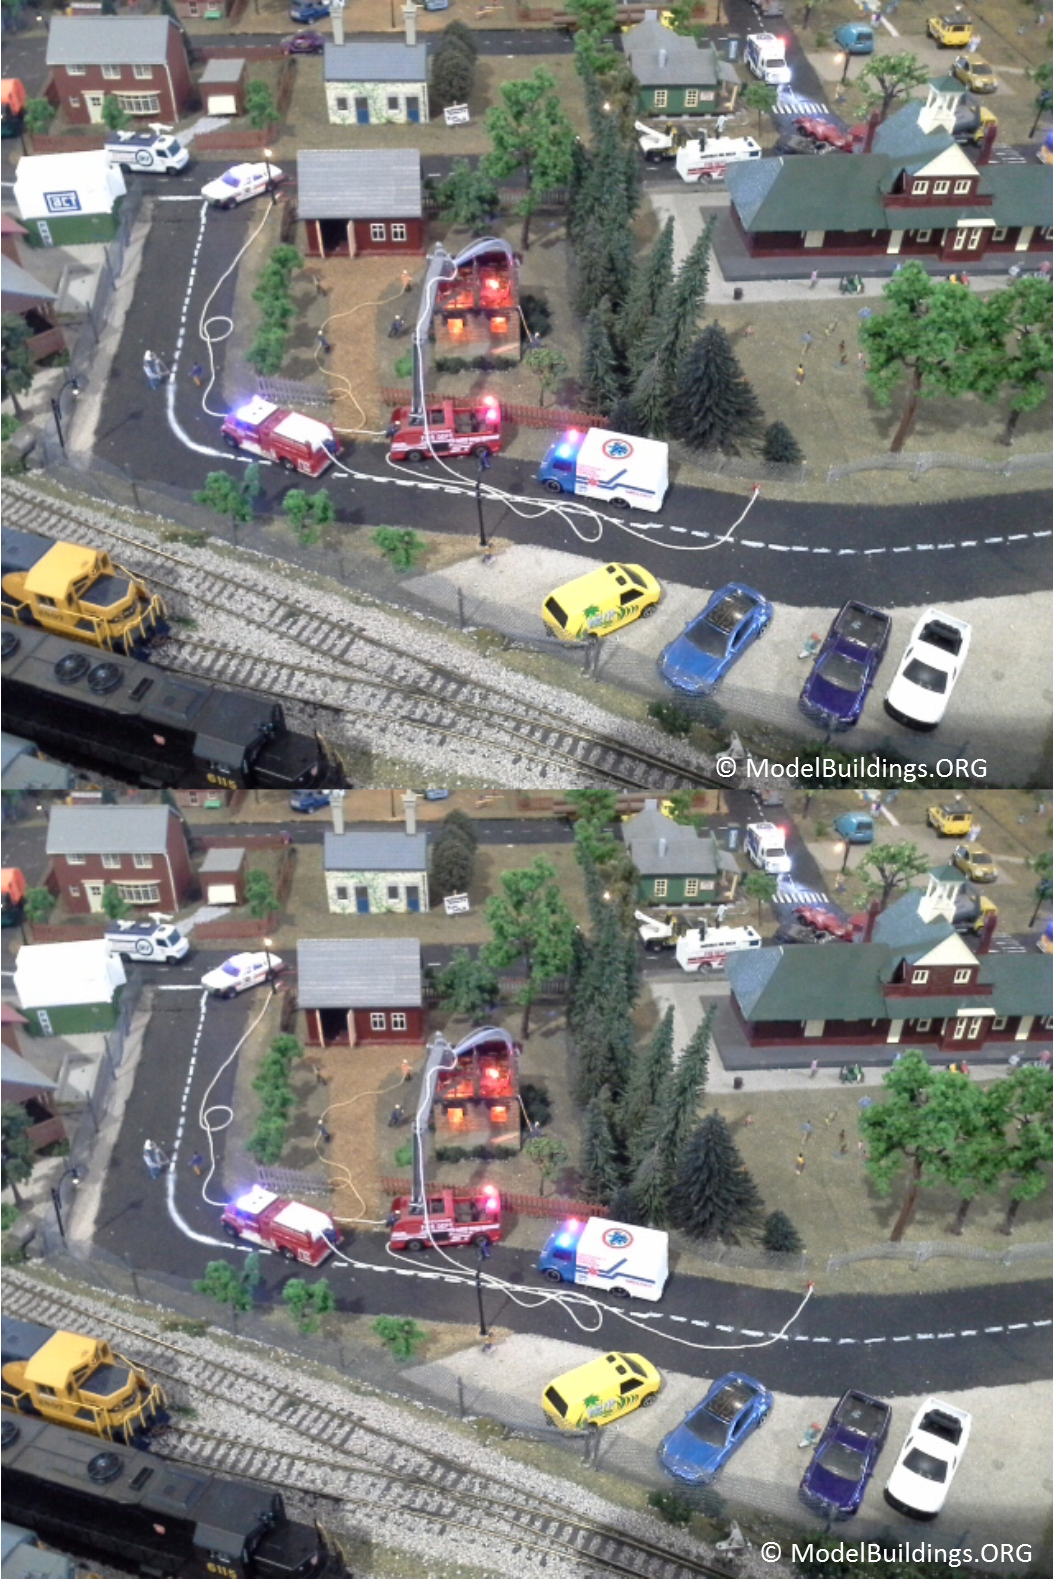
Remember as kids playing “spot the difference” between two cartoons or drawings… well, why shouldn’t we have the same fun a few years on?
The two photos below of a model layout scene look the same, but there are actually 6 subtle differences between the two. Can you spot them?
 If you want to be the first to supply the 6 answers, you can submit them using the “Comments” link below.
It would also be good to get your feedback (using the “Comments” link). Would you like to see more “Spot the Difference” photos added in future weeks?
Reader poll results since posting these photos showed 84% wanted to see more “Spot The Difference” photos in coming months, so YES will bring you more.
Congratulations to Carl, Ron, Mickael, Lou, Ken, John R, Gordon, William, and Newman who were the first to correctly spot all 6 differences. You can see their answers in the comments (see below).
 Here’s a clever idea sent in my Mike:
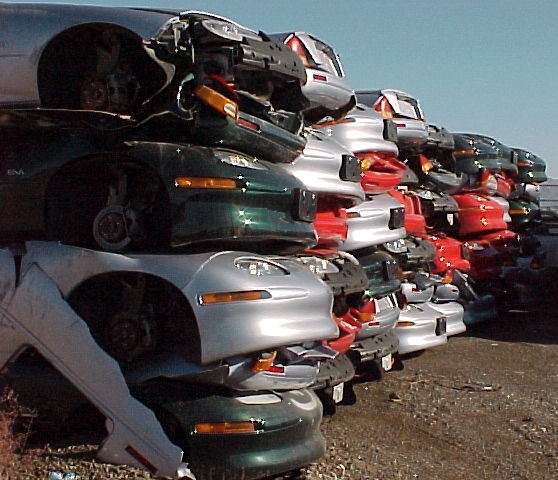
“When trying to make up loads for flat cars I came up with an idea for making scrap cars being crushed and sent to be recycled into new steel. I take a scale model car (I model in HO) and cover it with aluminum foil and press it to form the shape of the car and trim the excess foil off.
I then remove the foil and paint it with a rust colored paint and then repaint in another color that is common for that vehicle leaving some of the rust showing. When the paint dries I flatten the shape slightly to make it look like it wash crushed down so more can be loaded for shipping.
I use silicone caulking to fasten the car shapes together then tie them on to a flat car.”
Thanks to Mike for sharing.
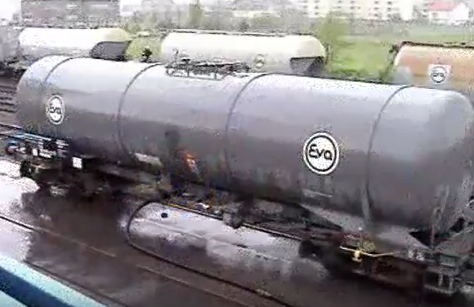
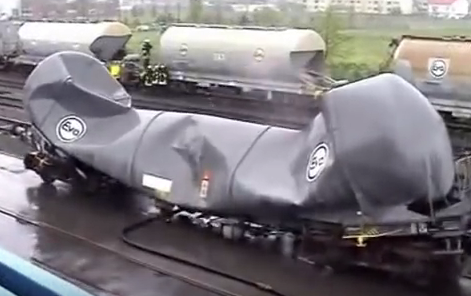
What caused this steel tanker car to get crushed like a thin aluminium pop can?
It was air pressure.
There was enough difference between the air pressure inside the tank car and the pressure of air surrounding the tank car… enough to cause the steel in the tanker to implode inwards.
Fortunately, that won’t happen on a model railroad!
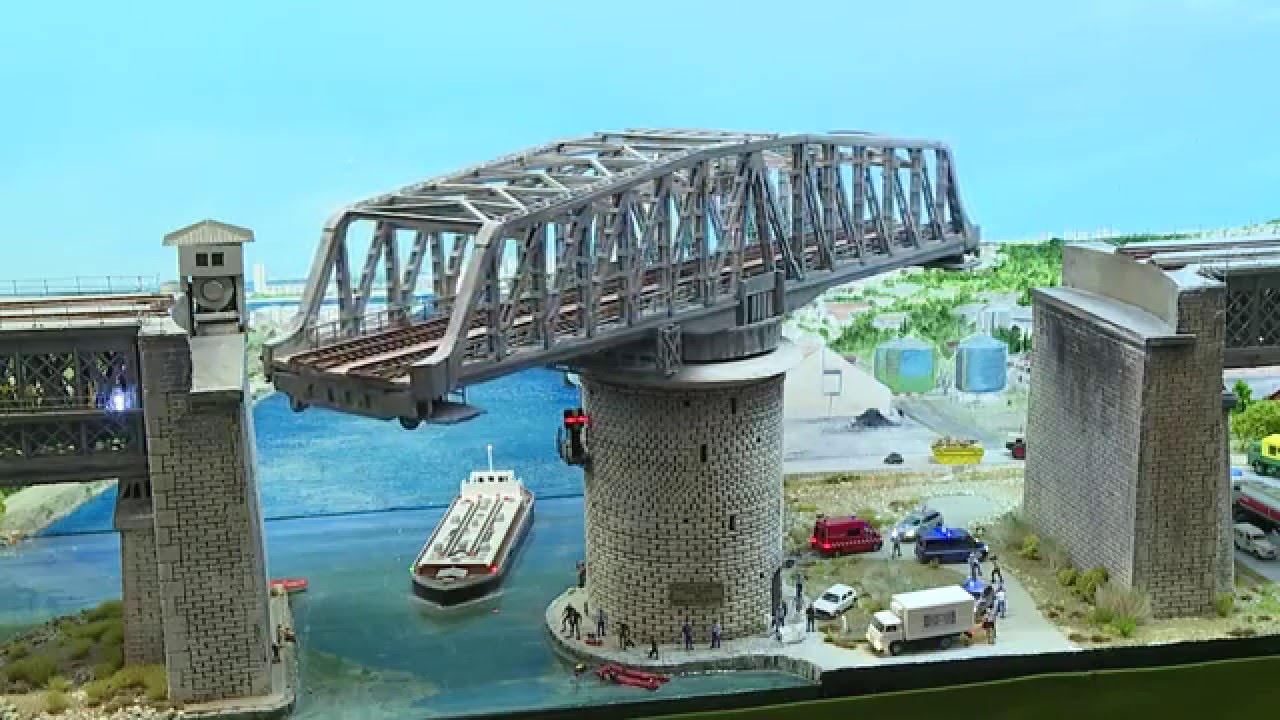
This photo was taken at the Rotterdam Train Show which is the largest model railroad exhibition in the Netherlands.
 Here are three different body styles seen on Pacific National diesel locomotives. In front is the cab unit; the middle is the hood unit; with the box cab at the rear. Sure to bring back some memories for some.
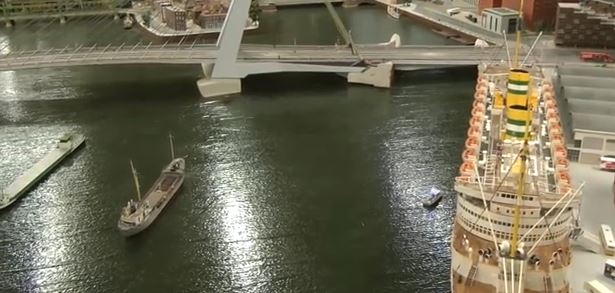
Last week Fred sent in a couple of photos of the model container ship (1/550 scale) he made. This week he supplied a video showing the radio controlled action. Although the intermodal containers are recommended for use indoors on model railroad layouts, Fred only got a couple of water droplets on the containers, so he has spray them with matt varnish to seal them.
“The supplied containers were very heavy plastic which would make it very top heavy. That is why I wanted to use yours. Thanks for a neat product.” Fred K.
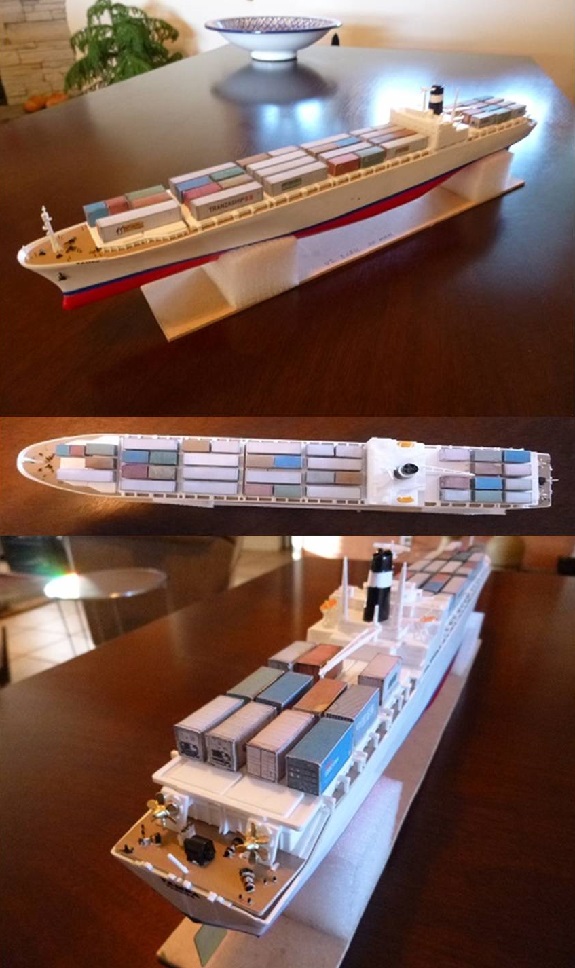
Fred sent in these impressive photos showing the container ship he constructed and fitted out using the photo-realistic downloadable container plans at http://www.shippingcontainermodels.com
Les asks readers:
“I’m setting up a train table. I like to know how to set up a trolley that will run on a separate track. That it will go so far and when it get to the end and it stops and goes back where it came from. Where can I find out about that?
The results of our latest poll are in. The question asked was:
Which of the following do you prefer to build yourself from either a kit, download, or from bought parts & accessories – RATHER THAN purchase a completed “ready-made” manufactured product?
A total of 613 model railroaders voted with some selecting multiple answers. Here are the results:
Jim asks readers:
“Our new model railroad club, the London Bridge Model Railroaders, is building the Needles subdivision in HO. We are having a lot of trouble finding our centerpiece, El Garces Hotel in Needles, Ca. We would love to find a kit or at least plans for the building. Any suggestions would be appreciated.”
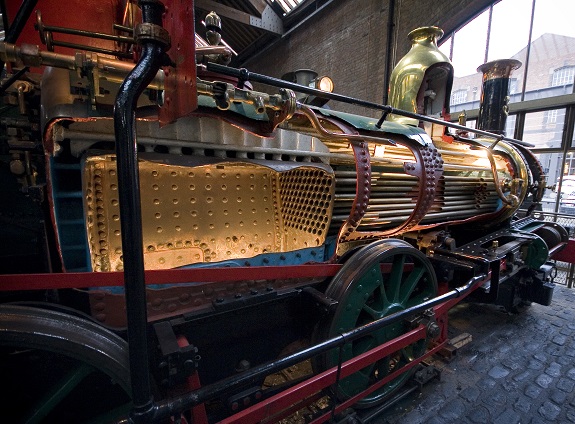
This fascinating photo shows a steam locomotive with its firebox (left) and boiler exposed.
Geoff sent in these photos to share:
Your readers may be interested in the pictures (sent by my brother) taken in Pietermaritzburg (50 miles inland from Durban, South Africa) altitude 2500 ft. The gauge is 3’6” to accommodate the hilly country. The line runs to Johannesburg (6000 feet) so the engines were big.
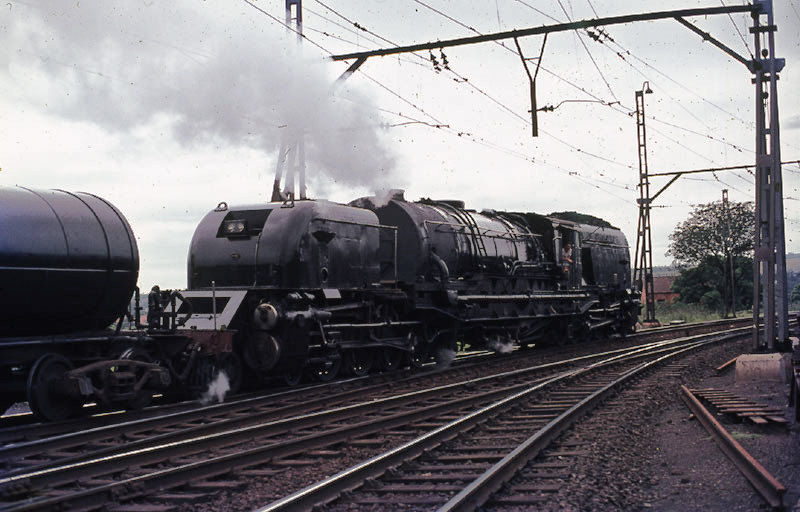
I am not sure when they were taken but probably in the late 1960’s early 1970s.