Scenery
Everything on model trains, model railroads, model railways, locomotives, model train layouts, scenery, wiring, DCC and more. Enjoy the world's best hobby... model railroading!
We are looking for someone who is highly skilled with DCC to write some informative articles.
If you think this is something you could do; simply use the “Click To Add A Comment” link under this posting to submit your details (and maybe a sample). The blog moderator will be in touch via email. The articles will be used to help others in the hobby learn more about setting up and operating a DCC system. There will be payment for your work.
You might even know someone who might be interested. Please refer them to this blog posting.
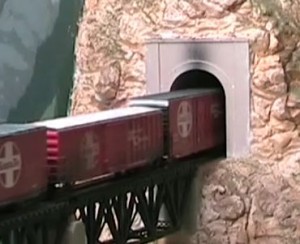 There are various ways to construct scenery. This method for making mountains has been sent in by Harold who has been following this blog since 2005, and who has been involved in the hobby for 35 years:
Model railroads are deemed incomplete without background scenery. Build landscapes at home to reduce costs. A simple mountain with a tunnel can be built by following the steps below.
Add your comment below.
More MODEL TRAIN TIPS
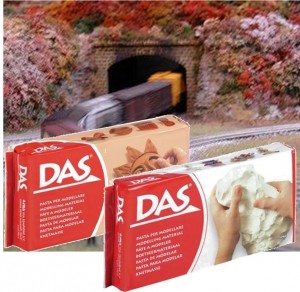 I don’t generally promote particular brands or products, but this is product I have used with success. Das is a cold-cure modelling clay ideal for constructing the base for groundwork e.g. indoor floors, areas of outside land etc. It is also useful for constructing buildings and structures. No baking is needed (it air dries), it is easy to smooth, and can be painted (it comes in white or a terracotta color). White is probably best if you are going to paint it in light color shades.
I would be interesting to hear what other products people use, and what uses they have for Das or other clay products. As I said at the beginning, I am not here to push any one brand over another, so if you can suggest something better I would be interested in your comments.
Add your comment below.
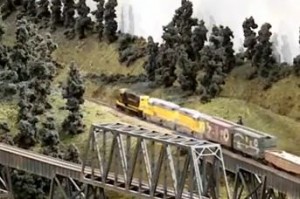 The further away you stand from an object in the real life, the duller (or grayer) and less clear it appears. The viewing distance for models doesn’t usually vary much with their scale, so the smaller the scale, the duller the colors need to be. You can achieve this scale effect by mixing colors (full-strength) with varying amounts of light gray, white, or gray-blue.
Keep a note of any special paint mixes you make up. This is really helpful if you think you might need the exact same color again. You can do this by spraying or painting the color onto a scrap of white card and recording the details alongside.
There are more scenery ideas in the members area of the online Model Train Club.
Gary has a question for readers:
“I have two track spans, both about 3 feet long. One is single track, the other, double track. These are elevated so they need bridges or a trestle. I can’t find anything commercially, so I would like to build it from scratch. This will be my first scratch building effort. Where can I get info on plans and materials available to use for such a project?”
A reader asks:
“I am considering adding an airport and aircraft (static) into my model N gauge layout. Can anyone offer me some guidance, particularly with respect to aircraft size to be compatible with the railway.”
Comment below.
Thomas asks readers:
“Where can I get a footbridge which will span more than two tracks?”
 Tom has a question for readers:
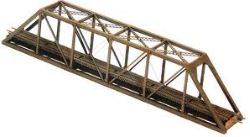
“I need help on installation of N scale bridges. I specifically require help on preparing the roadbed, bridge abutments, and pier foundation. I recently completed a Pratt Truss Bridge kit, and two deck bridges. Can someone advise please?”
To guide Tom, please add your comment here on this posting.
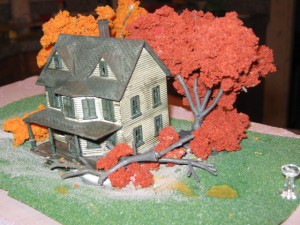 John has very kindly contributed this article to help others in the hobby…
Halloween is almost here, and there’s no better time to add an old/haunted house to your train layout. What’s better, you can do so at little cost, and even use materials that can be found outside, such as broken-off tree branches, weeds, moss, etc.
I used an N-Scale Model Power built-up Haunted House shown in the photo. The house itself comes a bit off-kilter, making it perfect for this purpose, though the exterior is a cream color with green shutters and a black roof. To weather the bright colors I used some black paint cut with a small amount of water, and blackened the exterior of the house to simulate dirt, grime, and overall wear, making it look like it should be torn down and rebuilt. The fall colors are in season, and Woodland Scenics trees are great for this, as well as fallen branches.
You can add a lot of detail if you work in the larger scales like HO or O. Put in broken windows, leaves, doors off their hinges, and ghosts, bats, and various beasties that go bump in the night. But the main purpose is that a modeler can use any house for this if you “beat it up” and make it look misused and run-down.
By putting a haunted house on your layout, it’s certain that a slow-moving freight train will go a lot faster as it passes the house, not sure of who (or What) lives inside!
Click the link if you would like to add a comment to John’s posting.
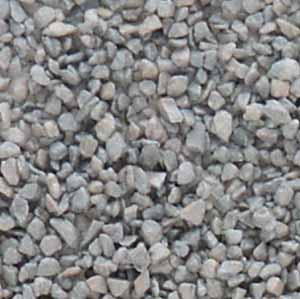
Track ballast will vary in color depending on its age and usage. If the track has had trains sitting regularly in one spot the ballast might for example have oil stains where the locomotives have been.
Roger P sent in this short article for publication:
Your railroad can showcase track weathering as a result of poorer care on the spurs and sidings. You may find more rust on these sidings which usually is light gray or grayish brown, whereas the mainline will reflect a good condition with dark brown or black in color.
When it comes to track weathering you might find very little ballast on the siding but you’re more likely to find cylinders. The mainline on the other hand will have regular purchased ballast from specific quarries. It is best to use granite or limestone as ballast on the railroad wherever possible. If you could consider these details as you create your prototype you can end up with a very realistic and well crafted railroad.
Click the link to post your comments on Rogers posting.
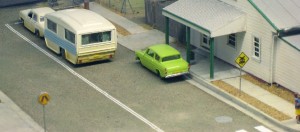 Attention to detail and determination can work wonders in creating model railroad scenes and a good example is using automobiles and people on roads. Avoid keeping empty cars, buses and vans on roads but take the extra effort of decorating them with custom painted figurines. There is nothing more unrealistic than ghost driven automobiles on a street!
The same way, try to paint the missed details on automobiles, streets, sign boards and roads to bring realistic effects. Using advertising banners and hoardings can add to the beauty of model railroad scenes.
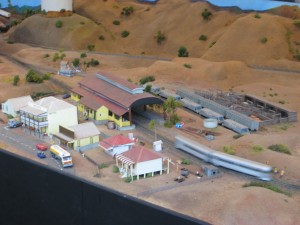 Although, desert layout scenery for model railroads can be bought online, you can build better layouts with a little bit of DIY knowledge. Deserts around the globe are dramatically different in color schemes and landscapes, and this should be taken into consideration while working on a plan.
It is imperative knowing the different between warm and cool colors: cool colors will make your landscape feel farther while warm colors will make it look closer. Deserts usually have warm colors, so it is a great idea to add Sky detail or other scenery elements in cool colors to make your desert layout scenery bigger than it actually is!
This scene features the dry Australia outback.
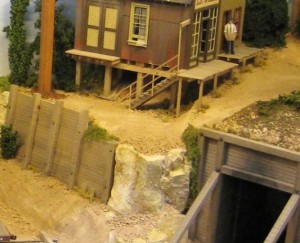 Our dads and granddads built model railroads with fewer resources and technology than we have access to and this shows how lucky we are. It is much easier to build a stunning model railroad terrain nowadays than the past because there are quite a few ways to find an inspiration.
Start browsing stock photography sites like Shutter Stock for inspiring landscape pictures and try to find a high resolution version of them on the internet. There is also Google Earth to get an aerial view of rail yards. Combine a few landscapes and draw a map to plan how to design your entire railroad and execute your ideas with the right materials (and WOW! what selection of materials there is today when compared to days gone by).
We have al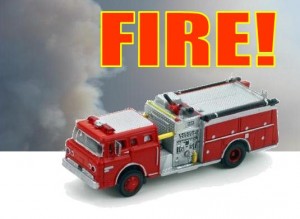 ready talked about some ideas for creating a fake fire scene on your layout. The smoke unit and all the LED lights will help bring the scene to life and can all be controlled by one switch. Remember not to leave the smoke unit on too long as the smoke fluid could dry up and damage the smoke unit. To add even more reality you can blacken some of the windows in the burning building or at least dirty them so that some look damaged or broken.
You can complete the scene with fire trucks, a crowd of bystanders, fire hoses spread in all directions, and some sounds of fire crackling and / or siren sounds. There are various sound modules available to provide the sound effects including: Maxx Traxx, Dreamplayer by Pricom, HQ Sound Modules manufactured by ITTC, RAM digital sound devices, and Surroundtraxx sold by Soundtraxx.
Ted has a question for others in the hobby:
“I am trying to make a large evergreen logging forest and would like to make my own evergreen trees of 3 to 8 inches in height similar to those from Grand Central Gems. I would appreciate any tips. Thanks.”
Please add your comments.
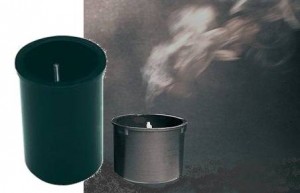 Smoke effects can be generated by using a fixed smoke generator – Vollmer, Faller and Seuthe manufacture units of various kinds. One of these units may helpful if you want to create a simulated fire scene in a house or building.
You can begin by making a rough hole in the roof and have some charred burnt visible boards visible as though they are ready to collapse. Areas surrounding the hole and above the windows etc., can be airbrushed with a flat dirty black paint-wash to simulate the soot. It is usually best to paint the complete interior of the building flat black, so the fire won’t show through the walls, as this could look unrealistic.The smoke generator and flickering lights and sound effects can bring the scene to life.
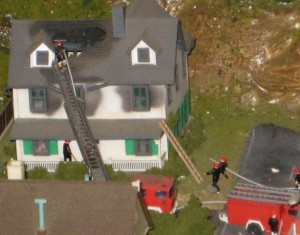 Modeling a fire scene for model railroad can be done in many ways. LED can add a dramatic effect as can fake smoke and animated fire vehicles or crew. I once heard of someone constructing an entire area with fireproof materials and make a setup for a real fire; however that is potentially dangerous and NOT recommended. It could damage the entire network and pose serious security threat to house and family.
The safer option is to use Circuiton Firelites Flickering Flame Circuits (depending on which of three units you use) for fake fire effects. The FF-1 unit is for smaller fires and utilizes only 1 amber bulb. The FF-2 unit uses red and amber bulbs. The FF-3 can have up to 20 bulbs, which is perfect for a larger fire in a structure, or perhaps even a forest fire.
GRS Micro Liting manufacturers the Micro Flamemaker ideal for small fires requiring 6-12v AC or DC. The Super Flamemaker is for bigger fake flames and is 16-20v AC only. The grand daddy of them all is the Ultimate Flame Master, which is ideal for larger fake fires or even to simulate burning embers. It is 12-20v AC or DC and uses up to 6 – 3volt bulbs. Connecting an AM radio to one of the units is one way to simulate flickering effects.