Scenery
Everything on model trains, model railroads, model railways, locomotives, model train layouts, scenery, wiring, DCC and more. Enjoy the world's best hobby... model railroading!

Joe sent in this photo of a Sunday Concert taking place on his HO layout.

Add your comment.
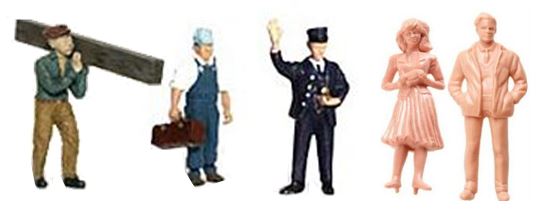
Model figures of people and animals can be used to give a realistic look when designing a railroad system. A layout doesn’t usually look complete until figures are added. My opinion is you can never have too many people on a model railroad layout. You can have people positioned on station platforms, working on farms, walking the streets, coming out of shops, working alongside the track… and not forgetting, driving vehicles. After all, a vehicle driving down a road without a driver looks a bit strange, and sometimes it is the little details (or lack of them) that can be the difference between a realistic looking railroad scene and one that just looks like an artificial model.
Figures are available in many types and forms. They can be made out of plastic and sometimes wood. Some of them are painted in a factory, some are hand painted and some are just unpainted so that you can choose your own colors. The passengers, ticket man, traffic controller, driver, guards and all others are available from various model railroad suppliers at reasonable prices.
The figures are manufactured according to common scales such as HO scale (1:87). Some companies also sell figures in non-standardized ratios.

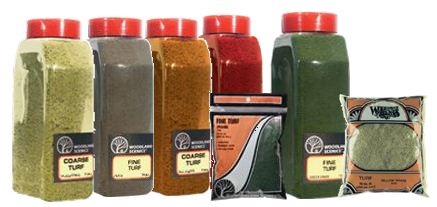 The layout ground cover is basically the ‘vegetation’ or landscape that covers the outer surface of your model train layout and is intended to hide the plaster, wires and form that coat your terrain. Layout Ground Cover is a very important part of your scenery and is vital to bring out the realism in the whole project.
The layout ground cover is divided into – low, medium and high. The low area incorporates the coloring of the surface with small elements like grass, and other plants. Medium includes taller plants like weeds, medium sized vines and bushes. High on the other hand includes tall grasses, larger bushes and shrubs.
A great tip in creating layout ground cover is to use a variety of textures and shades to bring a much more realistic outlook than the use of a single shade of color. The realism of the layout ground cover totally depends upon the imagination of the modeler.
Gil sent in this question for readers:
“I have access to a large amount of Florist Foam (Green). How do you break this down to make a decent and cheap ground cover or if possible Trees and Shrubs?”
Add your comment.
This impressive photo was kindly supplied by Ron.
Carl sent in this tip to share:
Just before I talk about how I make roads for my layout I want to mention Bragdon weathering chalks which I use to simulate oil stains and car tire marks. I use soot black and grimy black colors. I like Bragdon chalks because they stick to most surfaces, are self-sealing (no drying, or curing is required), and you only need to use a little. They also come in a good range of colors. Rub them on the surface and they release a bonding substance so the chalk won’t come off the model and get all-over your fingers. The trick to using chalks is to build up the effect slowly.
Now, back to the road construction:
–> I use Hydrocal for most of my road surfaces
–> I wait until the Hydrocal road is almost dry, and then I use a thin piece of wire to scratch out some little cracks in the roadway
–> When it’s dry I paint the road using a concrete color, but vary the shades a little
–> I then use an India Ink/rubbing alcohol mix (or thinned black acrylic paint) to carefully fill each crack using a thin artist’s brush
–> Lastly, I use chalks (soot black and grimy black) to simulate oil stains and vehicle tire marks.
As a point of interest, I also use chalks for weathering vertical streaks under window sills (where rain has washed down) and on roofs.
More clever scenery tips available at http://www.modelrailwayscenery.org/model-railroad-scenery.html
Wayne sent in this little tip to share:
Here’s a clever but simple idea I saw used. This guy had spray painted some left-over circuit boards with dark gray paint. He then cut them up to fit inside an industrial building. He added some lights and three little model figurines of workers to create a factory scene. Last I heard he was adding a lighting circuit (flashing arc lamp) to simulate someone welding.
For more clever scenery techniques go to http://www.modelrailwayscenery.org/model-railroad-scenery.html
If you have a tip you would like to share with others in the hobby go to http://www.model-railroad-resources.com/train-tips.html
Art sent in this tip to share:
A great way to make asphalt roads is to mix beach sand into a container of black paint then trowel it on. By laying down styrene or wood strips along the roadway edges, the paint will flow to the curbs. The black top goo should be pretty stiff, but still liquid enough to self-level.
For more scenery ideas http://www.modelrailwayscenery.org/model-railroad-scenery.html
 Adding fences can add realism to a layout whether it is a wooden fence, a steel fence, or just a wire fence. To make it look real you might not want it to look to new or in perfect condition. It might even have some graffiti scrawled on it, or be broken in places. Here are some tips for adding effects to a wooden fence:
— cut the boards along the top to make the fence slightly jagged
— maybe vary the spacing, break some boards, remove some, and split some slightly
— a pounce wheel is a good tool for making nails holes and little grooves prior to gluing, painting and weathering. You can also use the back of a hobby knife to gouge out some little knot holes
— make some of the boards look almost new to look as though they been recently replaced
— weather your fence to suit the scene. If it is alongside a new building then maybe it needs to look in reasonable condition. If it is on a farm or near a factory, then maybe it could look a bit neglected.
— add some suitable signage
Ralph sent in his 4 golden rules for creating realistic backdrops:
1. Lower objects appear to be further away.
2. Higher objects seem closer
3. Distant objects have softer edges
4. Distant objects appear to be grayer
Follow these golden rules and your backdrop will look realistic.
Use the link in the right hand column to send in your tip or article for publication.
When you think about it, a backdrop can have just about as much surface area as the model railroad itself. That’s why a backdrop is an integral part for any layout. Having a perpendicular orientation to your line of sight requires special thought.
In real life we view things in 3D, yet when you add anything extra to a backdrop (apart from blue sky), there is always the risk the backdrop will lose the 3D illusion. Painting clouds, mountains, and structures onto the background can look effective when viewed straight on. When viewed from a different angle however, the illusion of 3D can suddenly be lost.
Here are some tips for creating effective backdrops:
Keep the horizon low and make sure anything that is supposed to be vertical is vertical eg. telegraph poles, people, trees, buildings etc. Avoid abrupt horizon lines. Use trees, buildings, hills, or bridges to hide the meeting line where the vertical backdrop meets the horizontal layout. Avoid deep or bright colors for the sky. Light muted shades can work best. Soften and lighten the distant colors.
Although you won’t want everything to look artificially perfect, you also won’t want the eye to be drawn to something that looks out of place e.g. a dark blue sky. Vehicles need to be correctly positioned in the streets and not be cocked at strange angles.
Buildings painted on a background can sometimes look okay when there are other buildings or features in front of them. Otherwise it is best to design the buildings to stand out from the backdrop in low relief with the front and part of a couple of the sides showing. This can help achieve a credible 3D effect.
For more scenery tips http://www.modelrailwayscenery.org/model-railroad-scenery.html

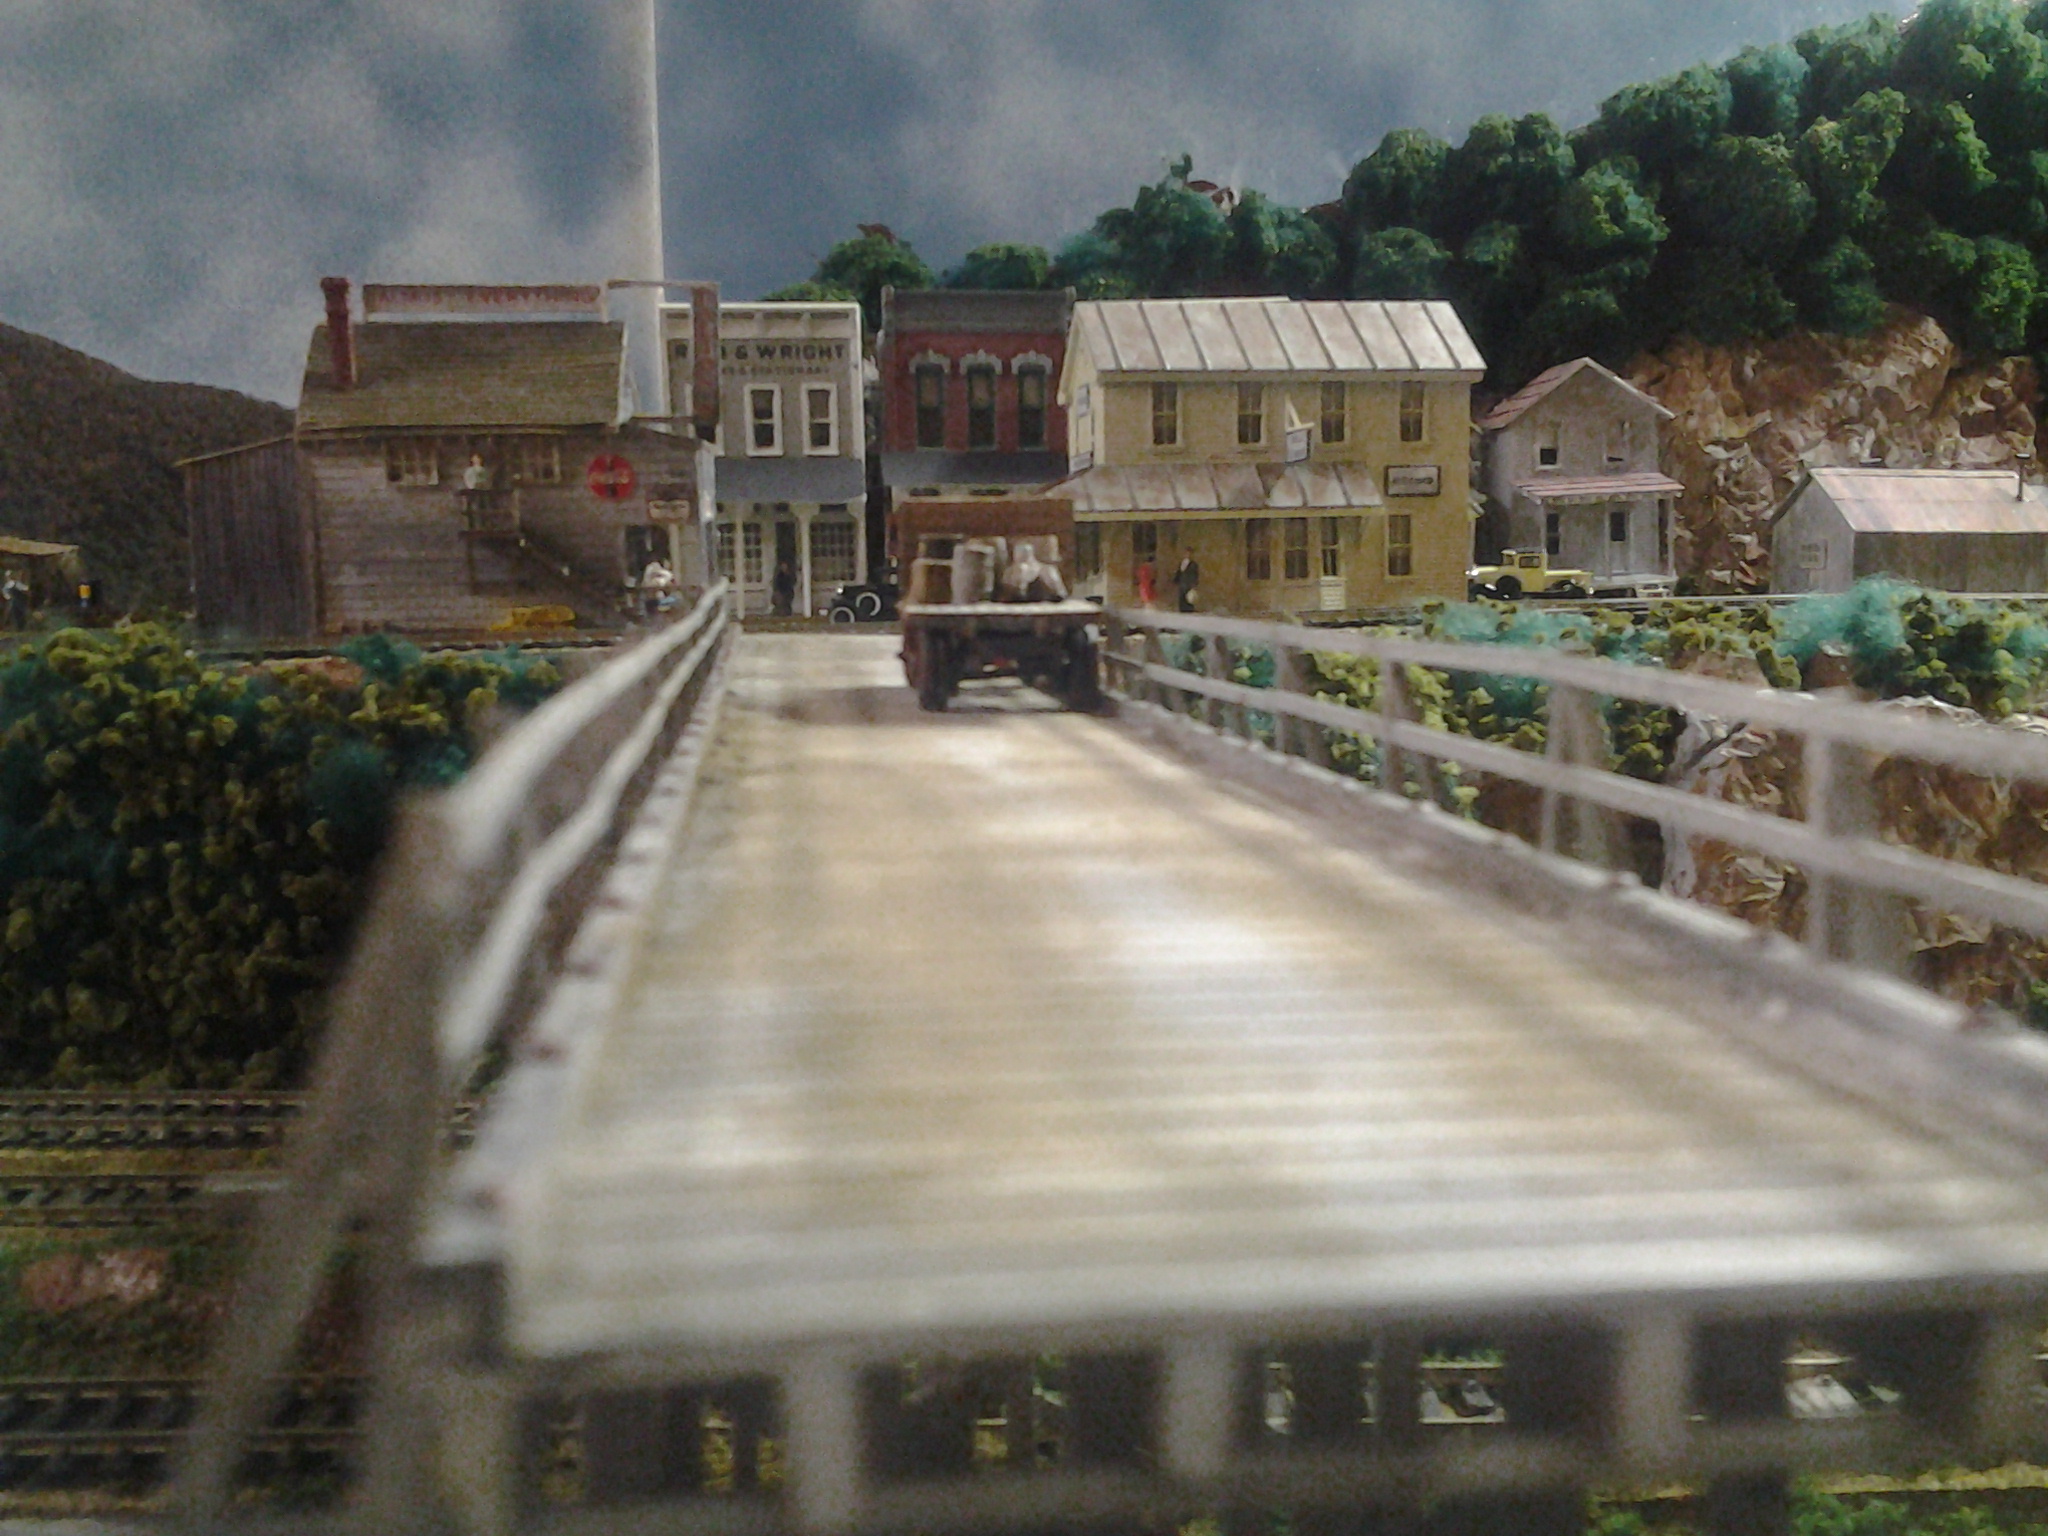
The buildings shown here are low relief buildings made from core flute. Foam core can be used instead. Both materials are very inexpensive to buy and are readily obtainable from Hardware DIY stores.
To get a close-up look at the detailing on the buildings in this town scene http://www.modelbuildings.org/low-relief-buildings.html
Add your suggestions.
John has a question for readers about glues:
“Elmer’s white glue is great for laying down track with ballast and roadbed attached, but takes awhile to set, so for figures it’s almost useless. They always fall over. Does anyone know of a modeling glue that sets up fast and is good for figures?
Add your suggestions/comments to this post.
Brian Miller’s Model Railroad Scenery Construction Techniques e book is well worth a read if you are building a model train layout. He covers all the basics from applying ground cover, constructing rocks and cliffs, bench-work construction, to making streets and sidewalks, creating rivers and pond etc. Brian has a great grasp of the topic and his experience shines through.
His ebook is available now from http://www.modelrailwayscenery.org/model-railroad-scenery.html
Leon asks readers:
“Hi, would anyone have pictures, tips, ideas for winter scenes in model railroading? I’m in S scale but the scale is not important here.”
Add your comments.
Background scenery enhances a model railroad. It’s better to leave it for the end because it’s easier to visualize the picture once all the 3d structures and models have been put up. Although, in saying that, you will need easy access to work on the background. You may choose to draw anything on the backdrop but a few points should be followed in all cases.
>>> The horizon line should be painted low to give a more natural effect.
>>> Paint the background images first and then put in the foreground details. This gives a 3d effect.
>>> Objects which are closer should be drawn larger.
>>> If the backdrop is close to the trains, add details. If it’s far, keep the image blurry and smudged.
Ron has this question for others in the hobby:
“I am getting ready for some scenery on the layout. I was going to use paper wads under plaster cloth but a recent article said that the paper might absorb moister over time. What can I use other than paper?”
Add your answer below.
Gil has a question he is hoping and experienced N scale modeler will know the answer to:
“I would like to know the measurement of Main Roads, and secondary Roads for N-Guage”
Add your answer below.
 Landscaping a layout can be as easy or as difficult as you want to make it. Personally, I enjoy working on scenery, so I choose the difficult option and take my time adding intricate details to every scene. However, if you prefer to spend more time on other aspects of the hobby, you can choose the easy route. As an example; you can apply ordinary acrylic house paint (using a 2” or 3” brush) to quickly cover large areas of the landscape. House paint is relatively inexpensive. A light brown or tan color would probably be a good choice – not that you would want to paint the scenery all the same.
You could then sprinkle on some fine and medium Woodland Scenic’s ground foam in various tones of green. When it is dry you could add some more ground cover and some bushes to add realism to the scene. The main thing is to avoid using dark brown’s for your base color, because soil only looks really darkish brown when it’s turned to wet mud.
Members can click this link to log in and get more model railroad scenery ideas.
Woodland Scenic’s have a range of liquid pigments if you want to use those. They have an Earth Undercoat which you can thin with water, and they have other shades available for rock painting and other uses.


