Scenery
Everything on model trains, model railroads, model railways, locomotives, model train layouts, scenery, wiring, DCC and more. Enjoy the world's best hobby... model railroading!

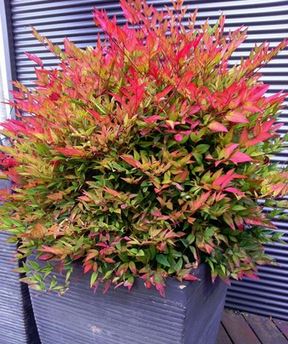 David just sent in this suggestion to share:
“This morning I pruned my daughter’s Nandina (sacred bamboo) plant, being careful to set aside the spent seed bracts. They make great tree armatures very similar to sea-foam and crepe myrtle. I have 2 shopping bags full of trees which I am donating to one of the local hobby shops for use on their layout or giving to customers.”
Harry asks readers:
“Does anyone else use lay-in ceiling tile for making of cliffs and ridges in their landscape? I need tips on proper ways of painting the edges of the tiles so they look more natural. I have found the ceiling tile edges when broken and stacked look just like the road cut-thru’s in the mountains done by road makers in the north east US.”

Santa Elena Station, at the highlands.
Andre from Brazil sent in these photos of his railroad.
Says Andre: We have started our first HO layout. I and my girlfriend used Brazilian made material, like 3 of 4 locos and almost all wagons, tracks and buildings. Most of that is made by Frateschi.
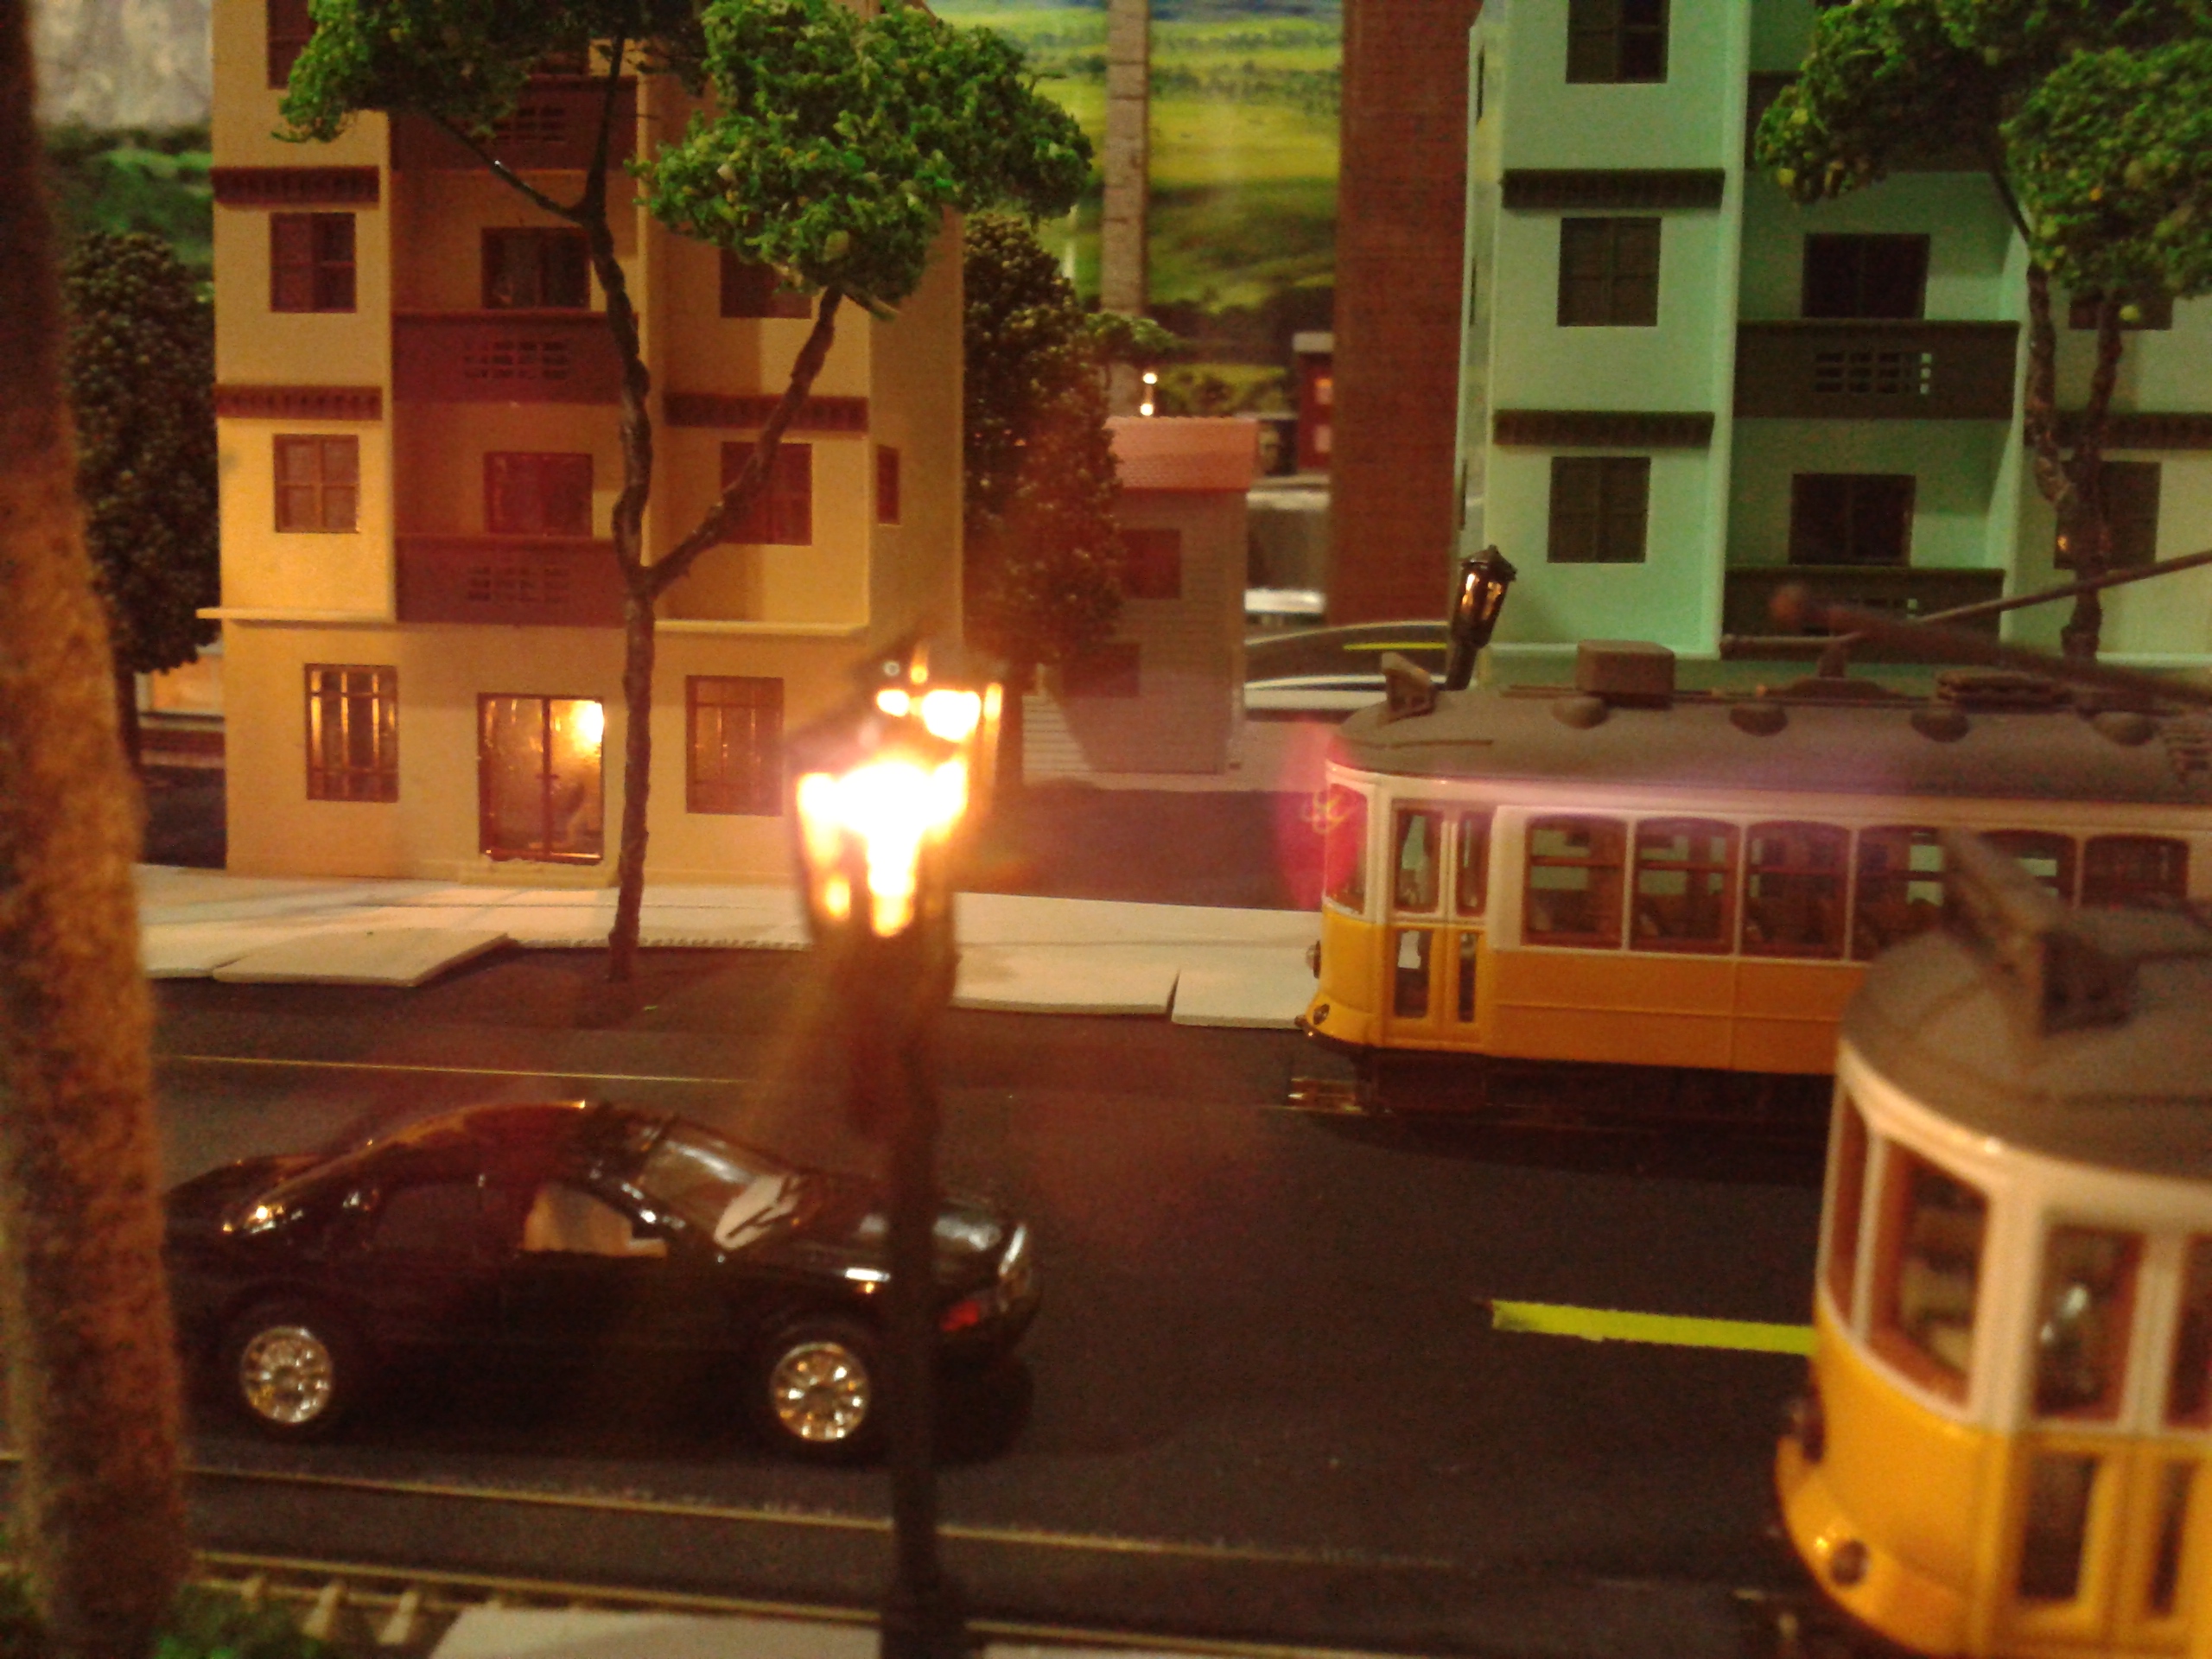
A busy street near Boa Vista Station.
There are also a loco made by Rocco and a lot of Faller and Noch stuff, and some old Majorette vehicles from the eighties.

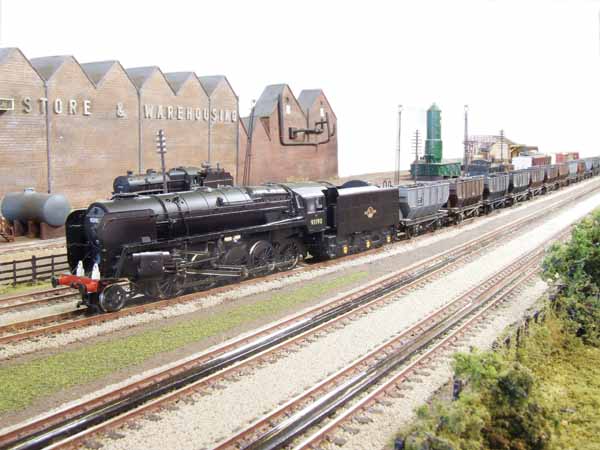
Santa Elena Station with a EP-4, a G-12 and an old passengers train
In my figures the layout has 40 meters of track in 7 square meters. We have not put the ballast yet. We are afraid of some eventual damage to the tracks.

Manaus-Caracas Express crossing the Amazonian savanna.
We’ve planned a savanna and mountain scenery, like our state (Roraima – Brazil) in the northern frontier, near Venezuela and Guyanna. It’s the land of the “Up” animation movie (2009).
So, our layout presents a fictional railway crossing a part of Amazonia and Gran Sabana.

Model railroaders are known to be ingenious when it comes to constructing, creating, and improvising. Creating water effects is a good example of this. Various techniques get used to create ponds, rivers, streams, and even beaches and harbors.
Although it can be cheaper to use an old mirror, a discarded pane of glass, or just gloss paint – it’s not usually as effective as using one of the many epoxy resin based products available from hobby or craft stores.
 Resin products dry hard and clear so the surface under the resin still needs to be sealed and painted to add the illusion depth. However the final effect can be extremely realistic and closely resemble real water.
 Products available include: Realistic Water by Woodland Scenics, Magic Water by Unreal Details, Aqua Water by Busch, KraftKote by Klockit. Other products are EZ Water (I’ve heard some bad comments about this product so would be interested in reader feedback), and Envirotex Casting Resin.
These 3 photos show how altering the base color can can dramatically change the perceived water depth.
If you would like to add your tips or comments on water making just click the comments link under this posting.
Barbara asks readers:
“What is the correct dilution rate of water to Elmers glue that will spray in a fine mist and stick?”
Ernie has a question for readers:
“I am getting ready to build scenery on my layout and thought of using wads of paper under the plaster cloth. However I’m not sure what to do now after reading somewhere that paper will suck in moister over time. Is this true? What could I use instead of paper?”
Barbara asks readers:
“I poured Woodland Scenics Realistic Water on my drainage ditch and it fractured the paint underneath. Can this be fixed or should I dig the water out and start over? Any idea of the cause?”
 Ken asks readers:
“I see some pretty amazing backdrops on RR’s, but not much discussion on how to make the picture. I’m no Rembrandt. I thought about large format printing. But where do you get a photo that will cover the distance in HO. Panoramic? Also the era? What paper or plastic type? Glue to what board for minimum warp. Etc???”
Readers can upload a photo of their backdrop using the ‘Comments’ link.
Space limitations are a problem for most model railroaders, so the use of every square foot needs to be well thought out, from both an operational and visual view point. There’s nothing worse than a layout that looks cluttered.
Several clever visual techniques can be applied to provide the illusion of space and distance. Although the following tips seem logical, they are sometimes overlooked by many in the hobby.
1. Where appropriate, sort your objects into sizes placing the bigger objects towards front and the smaller objects behind. I appreciate this is not always practical, especially if you plan to position a big industrial building against the backdrop (that would make sense).
The point I’m making is that if you have, for example, residential houses, the ones at the front should look bigger than the one’s in the far distance. If they are all the same size – the layout can lack perspective. A big advantage of downloadable kits (over plastic kits) is they can easily be reduced in size by 5%, 10%, or even more, so buildings that are supposedly miles away can be smaller than those in the foreground.
2. Be aware that bold colors standout, whereas objects with softer colors and tones fade into the distance. A light, muted, object with grayer shades and soft edges at the back of a layout can appear to be located miles into the distance. Strong, bright, vivid, sharp objects against the backdrop will look much closer. So, to make bushes, trees and other vegetation recede into the distance; make the colors less bold, less sharp and less detailed.
3. Objects that are lower will appear as though they are further away, whereas higher objects will seem closer.
4. Position thin ‘low-relief’ buildings up against the back of the layout, as they will require less space, yet still add illusion of perspective and distance to the scene.
And tips added by readers:
5. Judicially placed mirrors can also create the illusion of a bigger layout (thanks Denis)
6. Road positioned at angles disappearing in the distance behind vegetation, buildings, or hills makes the layout look longer and wider (thanks Bud)
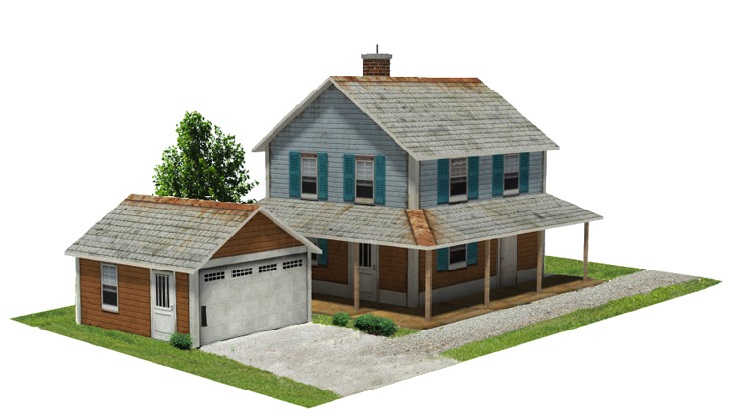
Yes, you can make a model house just like this and impress visitors to your layout.
This very real looking scale model house is one of 8 in the latest series of downloadable buildings. It even has a garage!
As you can see the standard of weathering and detailing is first class, and the good thing is that the weathering is already done for you, so the model you make will look as real as this. These models are easily scaled to H, N scale, or OO, and no painting or airbrushing is required to achieve the realistic weathering effects. Enlarging the designs to O or G scale is not recommended as the printing clarity reduces when they’re scaled to large. See the other 7 house here.
 There are several ways to make artificial water for a model railroad, and some are more permanent and realistic than others. Epoxy resin products are a popular choice for many as they dry hard and clear (although color can be added to the mix). Regular epoxy resin is available art & craft stores in a twin bottle pack. One bottle contains resin and the other is the hardener which causes a chemical reaction when mixed together. The mixture warms up and dries rock solid. When dry it cannot be molded or melted, but it can be sanded. There are also several branded products available for making artificial water including Realistic Water, and E-Z Water.
 Making the water look real
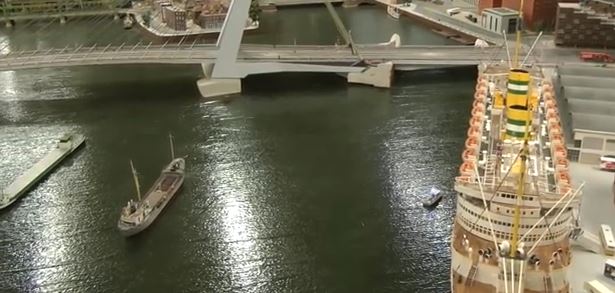
In real life water changes color due to reflections on the surface, and/or the clarity of the water, and/or the depth, and/or the movement/stillness, and/or the rocks/debris/sand color on the bottom. So water is not always blue (as you can see from these model railroad photos).
Rivers often have a high particle content so look brown in color. On the other hand a river might be relatively clean, but be discolored in places due to outfall pipes from factories or input flows from another stream. So to look real the clarity and color might not be consistent.
More info on making water for model railroads.
Model the bottom first
When creating a water area on a model railroad, the first job is to model and shape the bottom remembering that is unlikely to be perfectly smooth. Little stones and vegetation can be added depending on the intended water depth. The bottom will require painting prior to pouring the resin mix. The color choice is important and needs take into account the various factors mentioned earlier. Greens, browns, and blue tones are a common choice. Boats, watercraft, vegetation etc is often added to the liquid resin before it hardens. Plants such as fallen branches, reeds, brushes, grasses etc. can be added along a river bank.
Richard asks readers:
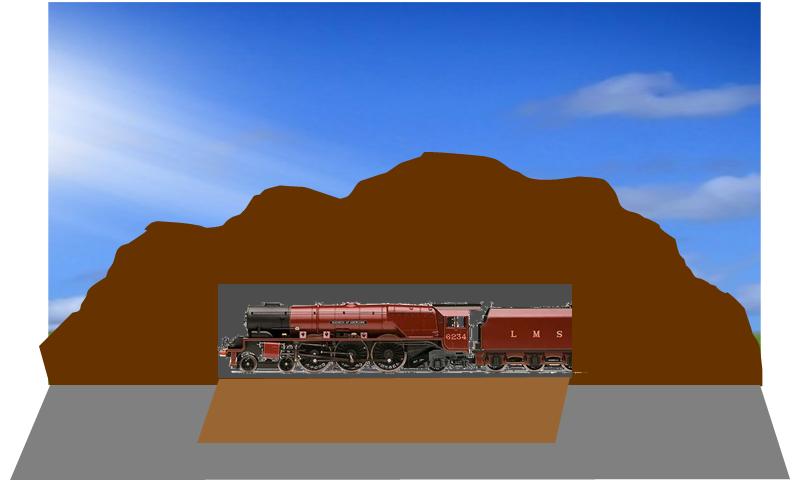
“I want to build a couple of mountains on my HO scale layout. How do I know what height to make them so that it doesn’t look ridiculous when I eventually put them on the layout?”
Miles asks readers:
“I was wondering if anyone has any tips about model hills that I can have a train go around.”
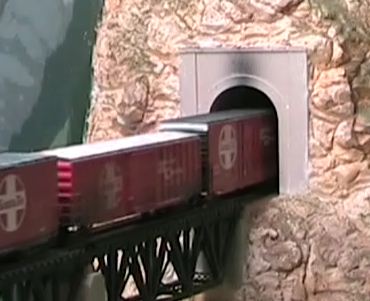 Model train tunnels are generally a necessity on mountainous layouts, but they can also add greatly to the realism of a scene.
A tunnel is an excellent device for making a model railroad seem to be much bigger than it actually is. A tunnel will hide the train for part of its journey, leaving the viewer to imagine it has departed the area for a distant destination. When the train mysteriously reappears out the other end of the tunnel, it is easy to imagine it’s a completely different train coming from somewhere else. When model trains are constantly in view, realism can suffer.
Here are 5 quick tips for better tunnels:
1. Blacken the insides of your tunnels. A flat black acrylic paint can be used for the interior roof, walls, and floor. An unpainted “plywood-colored” tunnel interior will look unnatural, and lack the dark and mysterious appearance of a real tunnel.
2. Place ballast on both sides of the track inside your tunnel portal. Continue the ballast for as far as the eye can see.
3. If you are not experienced with making your own tunnel portals, they are reasonably inexpensive to buy. Ready-made tunnel portals sometimes are pre-weathered, but you can add your own weathering effects with gray wash, chalk etc. to add more realism. Smoke and exhaust smudges look good towards the top of the portal. Ready-made portals are certainly more realistic at the entrance to a tunnel than is a roughly cut hole.
4. Allow plenty of clearance inside the tunnel for your longest and tallest trains to navigate safely. There also needs to be adequate clearance for track and trains to the left and right of tunnel entrances. Although this won’t necessarily stop all derailments, it will ensure your trains don’t come to a sudden stop each time they try to enter the tunnel. Also, you’ll want enough space to put your fingers, or a tool (pair of long forceps or tweezers) inside the entrance if a train derails.
5. Allow access to the tunnel interior, because you can almost guarantee your trains will want to derail in the most hard to reach location on your layout, especially inside tunnels! Derailed trains can usually be retrieved easily from inside short tunnels, but longer curved tunnels can be problematic. This is why creating another access point is a good idea, either from underneath the track, or through the side of the mountain. Another option is to make your mountain (or tunnel) as a lift off section.
One quick idea is to build an old photo frame into the scenery. Chuck out the glass and use the frame and backing (face down), in the scenery. When a train derails you simply remove the backing sheet of frame to access the inside of your tunnel. You can hide the frame using bushes, trees, fences, or other scenery props.
 Ron B sent in this article to share:
The world is far from perfect especially when it comes to everyday scenes. It is not uncommon to see trash, litter, and junk lying around streets or in fields. That’s why adding trash to a model railroad scene can add realism and bring a scene to life.
And, it can be a lot of fun making the items for a junkyard scene. It could include damaged or abandoned vehicles, a rusty old shipping container, perhaps lots of spare parts and oil drums scattered around, and maybe a dilapidated broken down old fence of some kind surrounding the yard. The yard will most likely be overgrown with weeds or vegetation, so that will be another way to add realism.
The good thing is; you don’t necessarily need to use expensive model vehicles for this type of project, because you’ll probably want to cut them apart, repaint and weather them. Junk car sets are available from companies like Walthers as well as piles of ready-made junk, piles of tires and scrap metal bales. However that said; I personally prefer to make my own and enjoy doing so.
If you are including abandoned automobiles, remember to choose models that are older than the setting of your scene. After all, it is likely they have been abandoned for some time, especially if they are covered in rust. When it comes to adding the rust effects, I use powdered pastels in various colors, although you can use an airbrush to apply rust colored model paints.
 The powdered paints have tiny particles of pigments that get into the gaps and the effect can be altered depending on what color combinations you use and how much you apply. I finish off with a really thin film of rust-colored powder, but take care not to apply it too thickly as you’ll want the darker deep-seated old rust areas to still be seen. The lighter shades will usually indicate patches of newer rust. I sometimes mix very fine sand with the powders to give a rougher rusty surface in some places.
I use some long nosed pliers or tweezers to hold the model in place so I can dismantle or cut a vehicle into sections. I use a motor tool with a fine tooth saw to remove doors, hoods, and/or fenders. I usually remove the parts before painting them to ensure the cut edges match. When I glue them back in place with Super Glue (cyanoacrylate adhesive), the joins usually look quite rough which adds to the effect. I also scratch the surfaces of the bodywork with a craft knife which can look like the paint is damaged. Dents and scrapes add extra realism.
Care is needed when positioning vehicles in the junk yard. It’s unlikely they would have been lifted in by a crane, so they could be positioned at odd angles. There will probably be old auto parts, axles, doors and wheels leaning against the bodywork. Grass and weeds may be spouting through some of the windows and around the wheels. The scene can be completed with a couple of people or a dog in the yard. Use your imagination, because the possibilities are endless.
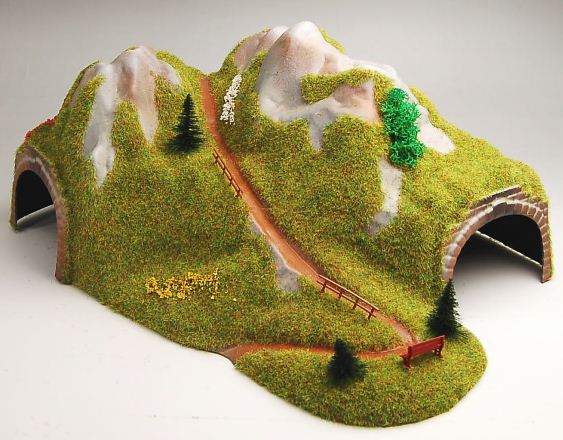 Tunnels can really add interest to a layout with trains disappearing inside a mountain and mysteriously reappearing on the other side. However, there needs to be careful planning to ensure there are no problems inside the tunnel that could potentially cause a train to derail. It is the old “Murphy’s Law” where trains will more than likely derail in the most inaccessible area of the layout. The most hard to get at place is usually inside a tunnel.
That’s why considerable thought is required in the event of such a scenario. This needs to happen at the planning stages, before the tunnel is positioned in place.
 A couple of options would be to include a removable tunnel section to allow access, or an opening in the base where your hand could reach up to retrieve the cars. An access hole in the side of a mountain can sometimes be disguised by clever positioning of scenic features like trees, grass, shrubbery, rocks etc. It could be as simple as removing a couple of strategically placed rocks that hide the access hole, and then slotting them back in position when the job is done.
Another option is to add a layer of plastic between the tunnel and the mountain structure, so that the mountain section can be lifted off in one piece, to reveal the tunnel. Then just lift up the tunnel and retrieve the cars or access the track.
If readers have other suggestions, please leave a comment for other to see.
Ray asks readers: “I am wanting to know the best method for building roads that’s not too difficult for a beginner like me. I am progressing well with my 4ft x 8ft HO scale layout and have more space to expand it in the future. Also, how do I go about building crossings where the tracks meet the roads?. Also how wide should I make the roads for single lane and two lane roads? Thanks in anticipation.”
Not everyone wants to build their model railroad layout from scratch. In fact some prefer to buy something that requires less work and can be operational in a quicker time. The Woodland Scenics HO Scale Grand Valley Layout Kit 4ft x 8ft layout is an example of just such a layout. It comes with all of the sub-terrain, as well as the terrain and landscaping features needed to construct the layout.
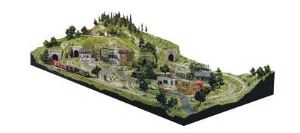 You can use some risers and some inclines to make the mountains, hills and the lower-lying sections of the layout. Foam sheets are used to create flat and elevated areas for the towns and structures. You cover it using plaster cloth to make the hard terrain cover. The next thing is to create and install the rocks and then add the tunnel portals and the culverts. You can then landscape using a wide range of trees, ground cover, details and other scenic products to complete a great layout.
As I said this type of construction is not for everyone, and many serious modelers would consider it cheating, but not everyone has the time or interest in creating everything from scratch. The concept is particularly good for someone starting off as it is a way of learning some of the required skills, which can then be used on their next layout… which they’ll probably want to make from scratch.
Woodland Scenics also do an N Scale Scenic Ridge Layout Kit
Add your comment.


