Weathering
Everything on model trains, model railroads, model railways, locomotives, model train layouts, scenery, wiring, DCC and more. Enjoy the world's best hobby... model railroading!

 Club member Alex sent in these tips to share:
Model trains are weathered to give them a realistic look. Follow the tips below to get the best results.
For more scenery and weathering tips http://www.modelrailwayscenery.org/model-railroad-scenery.html
Sebastian from Norway sent in this weathering idea:
No model train layout should look too perfect. It is usually most natural when objects appear random rather than manicured in place. A stone wall is a good example of this. If the wall is too perfect it will look unnatural as if it was made by a machine. A stone wall can be weathered to look handmade. The stones can be random shapes or spaced irregularly. You can also paint the stones randomly.
I use acrylic paints and start by painting some of the stones in one color – maybe every third or fourth stone in the same color – vary it. I then choose another shade to paint some of the other stones. Then I select another shade for some more stones. I use about 5 different colors in all. I vary the color sequence to give a random pattern. I finish off the wall by toning down the colors with a weak wash of India ink or grimy black paint. The end result looks really natural.
Add your comment.
More weathering tips from http://www.modelrailwayscenery.org/model-railroad-scenery.html
Sent in by Rod:
Another trick I discovered, is to gently dribble some bleach over a cliff face using an eye dropper. You need to be careful not to get bleach on your clothes as it will take the color out, but when dribbled down a cliff face it will settle in the cracks and give a good weathered look.
I also use dry brushing on cliff faces and rocks. For those that don’t know; dry brushing is the technique of dipping a stiff paint brush into paint before brushing off most of it from the bristles. You lightly drag your brush over raised rock surfaces to deposit a very small amount of paint to highlight the raised-up sections only. I dry brush a little white paint to highlight the rock edges. I dry brush to slowly add a little hint of color to the rock work.
Add your comment.
More weathering and clever scenery tips at http://www.modelrailwayscenery.org/model-railroad-scenery.html
Marcel, a member of the Online Model Train Club for 3 years, sent in this tip to share:
“It’s the little details that can add authenticity to a model railroad scene – like a few little scratches, some random graffiti, some rust marks, water stains, oil stains, aged peeling paintwork etc. One little trick I discovered is adding black tar in a few spots such as at the bottom of a chimney. I mix some dark gray (or black) paint with some white glue to make the tar. I then apply it dribbling it off a piece of wire.”
Add your comment.
 Jeff asks readers:
“Does anyone here know the ratio of alcohol to india ink to make an india ink wash for use on model railroad building, rolling stock, scenery etc?”
Add your answer.
There are various brands of acrylic model paints including Testor, Tamiya, Polly Scale, and Accu-Flex and they are easy to use, and clean up afterwards. The other benefits are that they work well in an airbrush, they dry quickly, and stick well to most surfaces. The main downside with acrylic model paints is you need to be careful with traces of oil from your fingers or from lubricants as that can repel the paint. After all, oil and water don’t mix. To avoid this, properly clean your plastic model with water and detergent before applying the paint. A toothbrush can remove dust and oil from recessed detail areas.
Paint flow can also be a problem in some situations. The trick is to add a wetting agent to the acrylic paint when diluting it. Add a couple of drops of dish-wash detergent in a pint of water.
John kindly contributed this article for publication:
 An old structure, a paper plate with water in it, a paint brush, and some black paint are all you need for this short and easy project. I used a very inexpensive N-Scale Imex Maintenance Shed (built-up), but you can use any structure that you don’t know what to do with. The shed comes in dark red with a dark gray roof, and all you have to do is dilute the black paint so that it slightly “puddles” on the structure where dirt and grime caused by years of use (as well as passing engines) would form on the walls and roof. Start with the roof and work down with the diluted black paint, and let it all dry when you’ve “weathered” it enough.
One thing about this structure – by itself, when the black paint dries, it looks bad enough to throw in the garbage and start on something else, or else put a coat of new paint on it instead of weathering. But put in on an old sidetrack on your layout, surround it with trees and weeds, and it looks fantastic! It’s really hard to beat a weathered structure, freight car, or locomotive!
Another way to inexpensively fill out a layout is to make your own signs using your computer and a printer. This gives you a choice of fonts, colors, and sizes. The paper to be used is heavyweight white sheets, available at office supply stores. Full-size (8-1/2 x 11″) paper with backing on it that gets peeled off is also ideal for signs on store-fronts, as it’s put on carefully and then pressed in so the adhesive on the back sticks to the structure. Remember to always work in your scale and don’t make the signs too big or so small that one has to use a magnifying glass to see what it says.
As with the Raccoon Lodge sign on the shed, I’m about 3/4 of the way making a small 2×3 in N-
Scale. The layout will be based on the old TV show The Honeymooners starring Jackie Gleason, who always had a lot to say. To make signs of his sayings that are not attached to buildings, I use wooden barbecue skewers to mount the sign in whatever height is needed. Seems to work pretty good, but not as good as the show itself, which will never be outdated!
Good Railroading!
 Ashley sent in these tips:
I use a wash of thinned black leather dye or India Ink mixed with rubbing alcohol (also called 70% isopropyl alcohol). Don’t add too much to start off – it is better to gradually add the color to the alcohol rather than add too much color and end up having to throw it away and start again. I start by adding a few drops to a measuring cup. I test the dilution on a scrap piece of plaster first. I then gradually add a few more drops of color at a time until I obtain a color shade close to what I’m looking for. I then leave to see what shade it dries before making the final color decision. It is always much easier to make it a little darker rather than trying to lighten the color by adding more plaster. I use similar mixtures as a wash for structures and wood ties. The following is my dilution guide:
For more model train scenery help log in to the members area of the online Model Train Club.

Michael has sent in this contribution:
I started off painting war game figures, as time went on I went back to my basics of model railways, and started to paint model figures. I have in my short time enjoyed doing what I can do. I have also done some work for other people. One which stand’s out is cliff hanger which was at the NEC MODEL RAILWAY SHOW IN THE UK. The line represents the Lynton to Barnstaple line which is narrow gauge in 009 and the route that was chosen was Lynton to Minehead route which was planned but never built. The era for the layout was set in the 1930’s which was some fun to research clothing and getting the right colour for the clothes. This has lead me to do it for other as well.
 Mixing paint colors can be a bewildering task for most model railroaders. That’s why hobby stores carry usually carry such a big range of colors (to save the problem of mixing). However, with experience you can get really proficient at mixing your own colors (without wasting lots of paint in the process). The key to color mixing is to begin with the lightest colors and gradually add a drop or two of the darker color(s) until you have the shade you want. Don’t do this the other way around, otherwise you will waste a lot of paint trying to get the color you want. Mix the colors frequently, and then let the paint dry on a piece of white card so you can judge the color accurately.
If you are using an airbrush you can gradually build up the colors. More details for you in the members area of the online Model Train Club.
Acrylic paints work great in an airbrush, but they can also do a lot of damage. Leaving even tiny amounts of acrylic model paint residue in an airbrush can clog it up temporarily or for ever. If the paint dries inside the airbrush it can be impervious to water. Since the cleaning solvent with acrylic paints is usually water, you may need to add a little ammonia or denatured alcohol to try and shift the dried up paint that is blocking the airbrush. The lesson in all this is simple; it is easier to thoroughly clean an airbrush immediately after use, than to try and remove dried up paint afterwards.
You might want to buy a color wheel from your local art store. As a general rule, you should try to combine the fewest number of colors to achieve the color you want for the model. This will help keep the colors from becoming muddy.
Ryan has put together this helpful tutorial for avoiding derailments on a model train layout. The video includes some excellent layout scenes. Feel free to pass it on to friends. Enjoy!
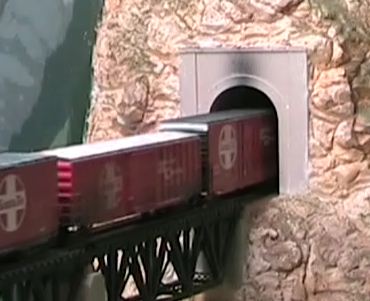
Weathering (showing signs of wear and tear) can add to the realism of any model train set, but it needs to be done carefully. One, often overlooked, important consideration is the age of the individual freight wagon being weathered. Not all wagons on a freight train are necessarily of the same vintage or have experienced the same weathering conditions. A freight train could comprise a mix of fairly new and considerably old wagons.
For example a model train layout depicting a mid 1960′s railroad might comprise mainly of wagons built around 1950. That would make most of the wagons around 15 years old.
Compare this to a freight train on a modern day railroad layout. Today’s freight train might include several brightly colored newish wagons along with a couple of 35-40 year old wagons built around the mid to late 1960′s. Weathering of the older 1960′s wagons would be different to that seen on the newer wagons.
So, always consider that a freight train is made up of several different wagons of different ages and backgrounds rather than all the wagons on a train being constructed at the same time and experiencing the same weathering conditions.
John comments:
“A modeler (like myself) might not think about weathering a wagon (freight car) of the same road name in a different way, due to varying outdoor conditions.
A good example, using a U.S. road, is modeling the early-1960’s Erie-Lackawanna (the hyphen in the name appeared until around 1967). The EL was the result of the 1960 merger of the Erie Railroad and the Delaware Lackawanna & Western, and since the EL kept many of their merged freight cars, it would take a lot of careful and different weathering of cars that haven’t been repainted yet. For the locomotives, the black of the ERIE and the gray and the black of the DL&W should be weathered. The newer EL engines, such as the Geeps and SDs, should appear new or fairly new.”
It is really handy to be able to easily move your layout (or sections of it) if required. Most people discover this when they move house. Moving the furniture is easy, but moving a layout can be problematic.

This informative manual describes how to build a mobile model train layout, so you don’t have to begin again when you move house. You can read how a modular train layout can save you money as well as taking up less space.
You’ll really enjoy this! It includes photos, tips and a layout plan included. Get it now for free when you join my online Model Train Club.
Rudy asks readers:
“Is there any such thing as rust colored paint? I have been unsuccessful trying to blend paint to simulate rust on my stock. It doesn’t look realistic. I would appreciate any ideas. Thanks.”
Add your answer below.
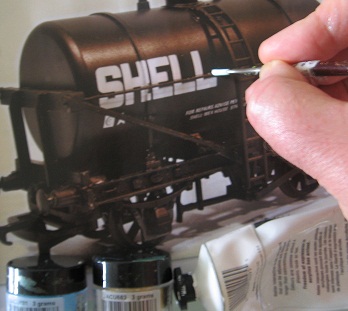
Here is a tip supplied by RussellM who is a member of my online Model Train Club:
Have a go at using a small piece of wire to dab on spots of rust paint. Let dry a little before you lightly brush it down to simulate the rust running down the sides of the car. You simply use a single strand of stranded wire.
Here is one of the hundreds of useful tips available to members of my online Model Train Club.

Toning Down Colors
Here’s something I’ve discovered. I no longer use white or black paint on my layout without mixing in other tones. I find pure white and pure black a little stark and unreal as those colors stand out too much! I also stick with matt paints (not gloss) on most things. Gloss might look ok on a shiny new loco, but it looks too unreal on most things. To tone down black or white paint I usually add a small drop of another color such as diluted brown just to take the starkness away. Remember with white to just add a tiny dab of another color, because if you add too much you’ll have to add a big quantity of white to overcome the problem. If you add too much brown for example, you might be best to pour it out and start mixing again.
Here is a tip sent in by a member of my online Model Train Club. There are hundreds more inside the members area. To join see the link in the right column.
I took some digital photos of the displays in some local shop windows and reduced them on my computer and printed them out so they fit the scale of my buildings. I glued them in place and covered them with some clear acetate to represent windows – you could use recycled clear plastic lids.


