Everything on model trains, model railroads, model railways, locomotives, model train layouts, scenery, wiring, DCC and more. Enjoy the world's best hobby... model railroading!
The answer basically depends on how realistic you want your train operations to be. Obviously faster trains will have more chance of derailing especially around tight bends than slower trains; however speed is not the only reason why trains derail… but that’s another topic.
Most keen modelers will strive for realistic train speeds to better represent the true prototype operations you would see on a real life-size railroad. It’s only when we get a bit over enthusiastic (or maybe when we are still learning) that we operate our trains at unrealistic speeds.
For anyone new to operating model trains the first piece of advice would usually be to SLOW DOWN. To look real, model trains need to operate at scale speeds, not like performance racing cars.
 In HO scale (1:87) a 40ft boxcar is typically about 5.75 inches long.
Positioning a YARD RULER alongside a straight stretch of mainline track is a good way to practice running trains at various scale speeds. Practice accelerating as well as braking at scale speeds that resemble prototypical stops and starts.
Below is a table that shows prototype speeds and the required seconds needed for your model train to move from the start point of the yard ruler to the end point.
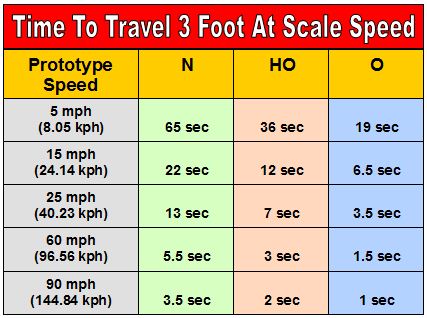
So based on prototype speeds in HO scale it would take a model train 3 seconds to run 3ft if it was operating at 60mph. In N scale the train would take 5.5 seconds to cover the same distance.
If you are performing switching operations then 5 mph is a typical speed to aim for. Yard movements are below 15 mph whereas mainline running could be anywhere between 25mph to 60 mph depending on the track condition and train type.
More info about scale speeds inside the Online Model Train Club.
 Branch lines are side tracks off the main railroad so work well as a quiet alternative to the main line. The main lines connect major points on the layout so are generally carry faster through traffic. Subsidiary tracks are added to insert more routes and extend the layout. They also induce flexibility in the design and at times require fewer components. Each line is likely to have at least one station, freight depot, or destination point so that trains can load and unload cargo or drop off passengers. A branch is will often include a passing loop or sidings to allow trains to pass or perform other tasks.
Branch lines may permit designers to build a more realistic prototype. Countryside scenes or city views can be added to the layout along the length of several side tracks.
An Airbrush is an amazingly useful and versatile tool for any modeler to have. The key to mastering airbrushing is to understand the relationship between the air pressure, the thickness of the paint, and the type of airbrush you are using.
Here is a basic diagram to show how an airbrush works.
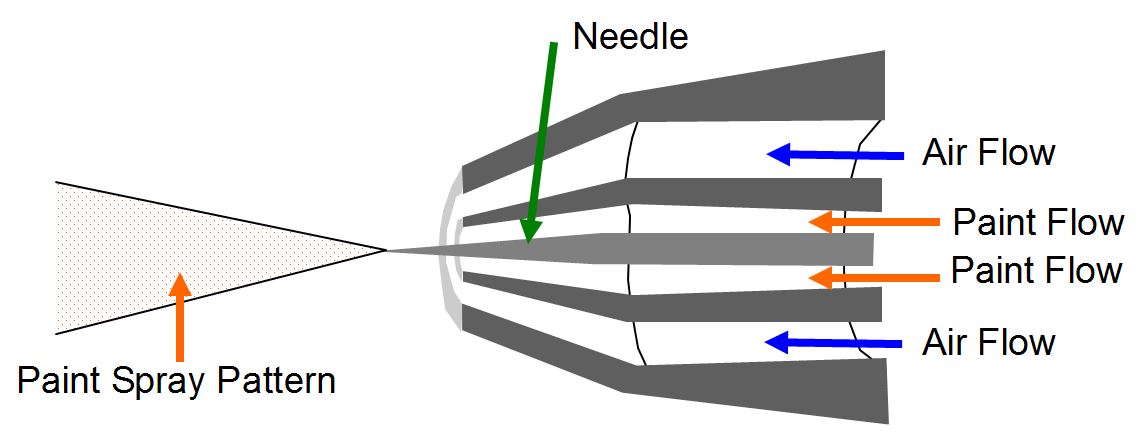
The above diagram shows how paint particles mix with air pressure. The pattern can be altered by adjusting the movable needle backward or foreward.
14 Tips To Help You Master An Airbrush
1. Choose the right airbrush for your needs. There are two main types: single-action airbrushes and double-action airbrushes. A single action airbrush is more basic as it has fewer moving parts so is simpler to clean. A double action airbrush gives more control as you can adjust the air volume and paint separately.
2. Depending on the brand and type you use, you might choose to try different needles for different jobs.
3. The air source needs to be reliable. Some people buy the air in small air propellant cans, others use a compressor, and some people even use an old car tire to dispense the air. An air source delivering 100 PSI at a constant rate is usually what’s required.
4. Airbrushes vary a little in how the paint in stored. Some use jars attached under the airbrush and others use little bowls to hold the paint at the side of, or above, the airbrush. The important point is to mix your paint to an inky liquid consistency so it doesn’t block the airbrush. Acrylic paints can be thinned with water. Inks can be used on some projects and they won’t usually require thinning. When diluting acrylic paints add only two or three drops each time until you get the consistency right. It is easier to add more water, but once you have added it you can’t take it away.
5. Adjust the paint type depending on the surface you are covering. Some paints are more flexible and less prone to cracking or damage than other paints. As an example; a less pliable and harder paint might work better when airbrushing on a metal surface.
6. Before getting started on a model train shell or airbrushing some scenery, it is wise to test your techniques and your paint consistency on a piece of scrap paper. It is a good idea to practice pressing the button control on the airbrush. It might save you from having to wipe the model clean and start over again if you make a mistake. You will be able to adjust the needle on the airbrush so that it doesn’t quite touch onto the cap, but still allowing just enough space for air to escape. The airbrush will need to be about 8-inches (20cm) from the surface you are spraying.
7. Practice, practice, practice! Get to understand how to control “atomization.” I know it is a fancy name, but it basically relates to how fine the paint particles are when sprayed. A higher pressure will result in finer paint atomization. There are several youtube videos to explain techniques. Understand how the type of paint and consistency will affect the atomization process. Try out using various paint types and consistencies to determine what works best for you. Thicker paint will require more air pressure for the paint to flow freely, whereas thinner paints (and inks) will flow easily with a lower air pressure. Adjusting the button (on the top of the airbrush) will usually provide some control of the air pressure. If paint Splutters out of the airbrush it usually means it’s too thick.
8. When using a finer needle a thinner paint consistency will be needed. A lower air pressure of perhaps 15 to 40 PSI may work best for high precision work like this.
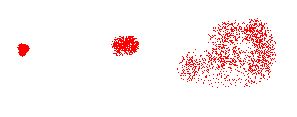
Different effects can be achieved by altering the paint consistency, air pressure, movement and distance of the airbrush from the object being sprayed.
9. Take care not to “over-spray” when using an airbrush. Horizontal stroke movements can be applied when applying the first coat of paint. After leaving it to dry a second coat or different color can be applied maybe using a vertical stroke movement from three or four feet away. For weathering structures or scenery a subtle buildup of paint layers and colors usually looks best. Complete several passes of your airbrush to create the weathering effect as opposed to applying just one thick layer. In real life, grime and dirt on a structure will usually build up over years, so airbrush weathering needs 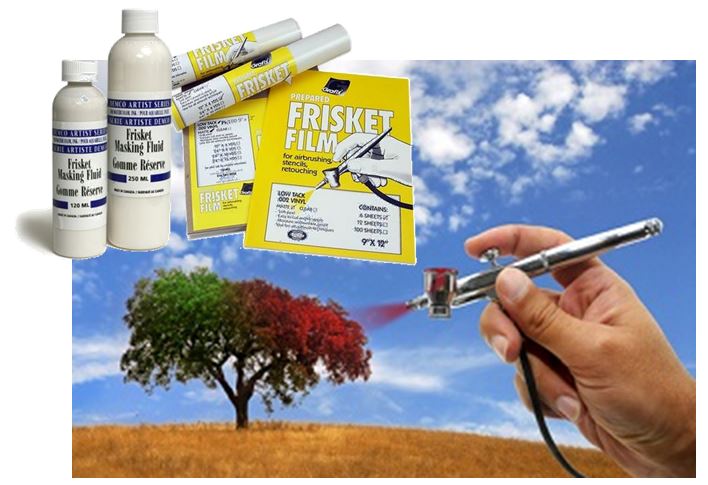 to replicate that process by building up multiple thin paint layers (grime and dirt) using the airbrush.
10. Any airbrush if it’s to operate effectively needs to be kept in “as new” condition meaning it must be kept spotlessly clean. Paint will harden if left inside the mechanism and it will cause blockages and affect the paint flow. For this reason special care needs to be taken between projects to ensure the airbrush is returned to the condition it was before it was used. The jar or bowl can be removed and soaked in water for cleaning. Blowing air through the airbrush will help wash out any paint left in the mechanism. It will also stop colors from intermixing if dregs of the last used color are still inside the airbrush. The airbrush should also be clean of any water before adding new paint to the bowl or jar dispenser. Just blow it out onto a rag. Cleaning the airbrush immediately after use will prevent many problems. When taking the airbrush apart remember to take care with the needle as that is usually the most fragile part of the mechanism.
11. Although there are no hard and fast rules with airbrushing, it is generally best to build up the color layers one layer at a time usually starting with lighter colors first, gradually adding darker colors.
12. Masking tape is a good material to stop paint spraying where you don’t want it to go. Artist Frisket (film or liquid) can be applied for masking too.
13. Any fine detailing can be achieved by using a fine airbrush needle.
14. In some instances you might want to seal the model using an artist fixative or clear matt spray to protect the paintwork.
There is a very good ebook available free as part of the package at http://www.model-train-help.com
Add you comments.
This new video features a guy airbrushing and I’m sure you’ll agree he makes it look easy.
http://www.modelbuildings.org/background-building-plans.html
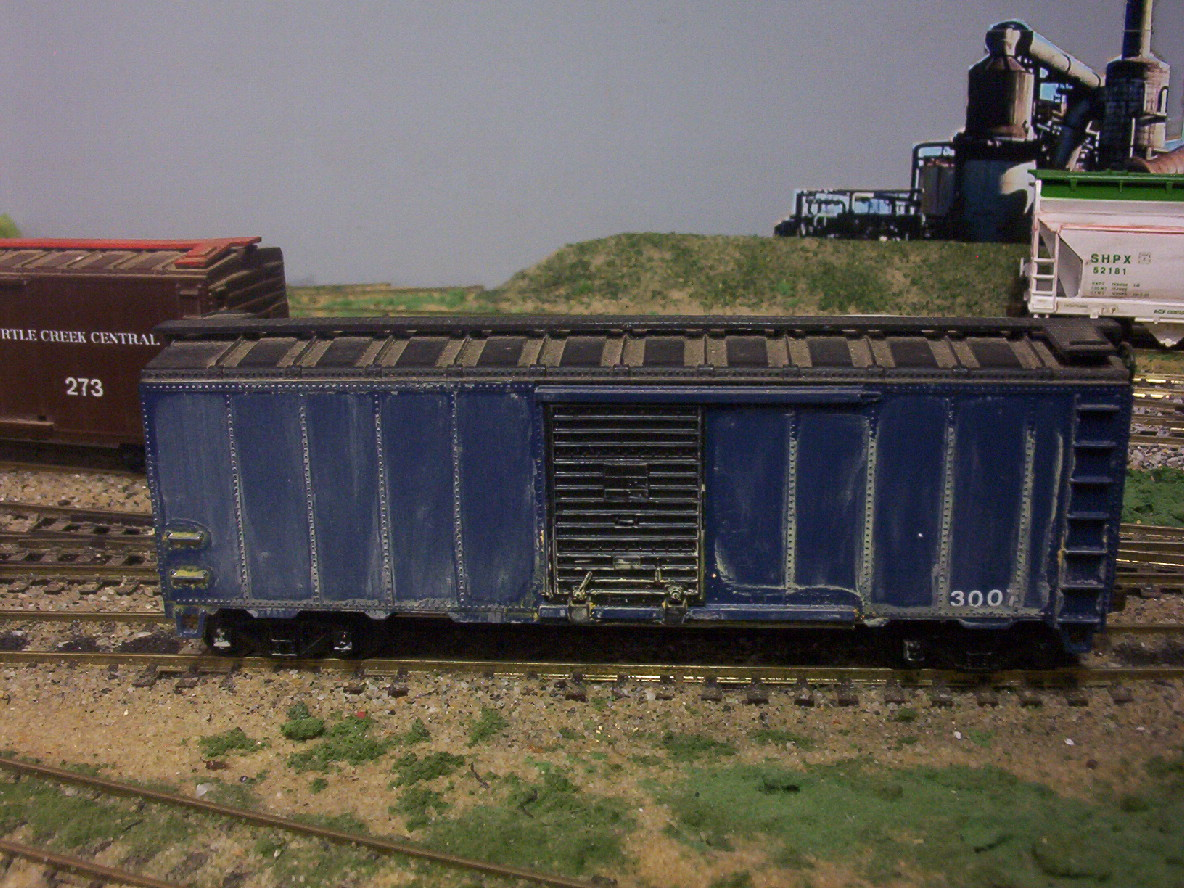
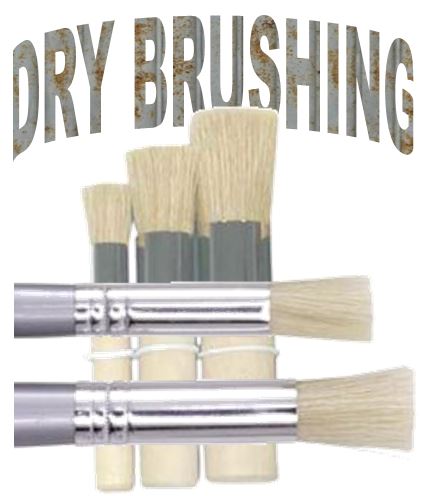 The dry brushing technique is used widely on model railroads to improve realism and provide extra dimension to a surface. It can also be used to highlight raised surfaces and small details that might otherwise be lost. Modelers often use dry brushing to give train models a rusted appearance to achieve a more realistic weathered look. Use an old brush (preferably one that has short stiff bristles) or buy a cheap one from stores for this technique.
1. Dip the brush in paint.
2. Wipe all extra paint onto a paper or towel. The dry should have some paint on it but not appear to be wet (hence the term “dry brush”).
3. Drag the paint brush across the model to despoit small amounts of color pigment. You might need to have several goes until you master the technique of applying the right amount of paint to just highlight chosen details.
4. The process can be repeated after each layer is dry to build up layers using color variations to add dimension.
Dry brushing is used to paint rust marks, oil stains and smoke marks. It can also be used to add details to landscapes.
Add your comment
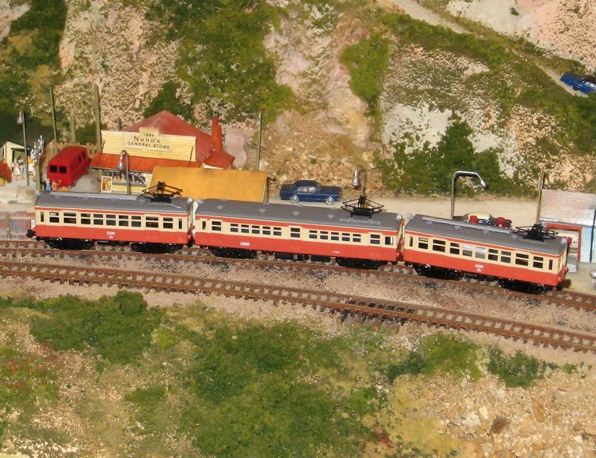
 Diesel Multiple Units (DMU) is relatively new technology, which is gaining popularity worldwide. It allows trains to run onto branch lines without any electrification in the tracks. A diesel engine is fixed on board, and transmits power to the wheels hydraulically, electrically or mechanically. This classifies diesel trains into three main categories.
DMUs offer several advantages. They operate at lower costs and consume less fuel at faster speeds. These trains generate a reduced amount of noise pollution. Their disadvantages, which include higher maintenance costs and increased air pollution, are obvious when the traffic volume is large so they are used for light traveling purposes.
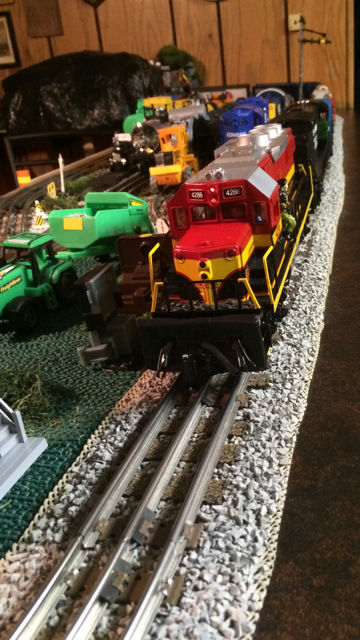 Reader Bill sent in this photo of his railroad to share.
It features the KC Southern GP40 running down main line using ballast king medium rubber ballast with rubber cabinet shelf liner underneath which keeps ballast in place. The 027 track is detailed with pieces of cork board used to simulate railroad ties giving an inexpensive look to make old track look more like super track.
Add your comment.
The results of our latest reader poll are (in my opinion) somewhat surprising with 56% not really interested in applying prototypical operations on their layout. I thought that figure would have been lower, so it seems I was wrong in my assumption.
429 readers voted in our recent poll which asked “Do you enjoy prototypical operations on your model railroad? (with switchlists, waybills, regulations, timetables etc.)”
Results are as follows:
–> NO – that’s not really me (56%, 242 Votes)
–> YES – sometimes I do (15%, 63 Votes)
–> YES – definitely (10%, 45 Votes)
–> YES – most of the time (7%, 28 Votes)
–> I haven’t got a layout yet (12%, 51 Votes)
Add your comment.
There are plenty of things to consider when planning and building a model railroad layout and it pays to take your time considering the numerous options and possibilities before getting too advanced with your project. In fact it’s usually best to begin with the end in mind by visualizing what you want your finished layout to be like before you get started with anything.
That’s not to say you shouldn’t be flexible throughout the construction process… you should! After all, you might discover a better way of doing things, or think of a great addition that could make your layout even better. You might even decide to eliminate a facet of your layout that isn’t really contributing to the overall design or operation.
I liken the planning and building of a layout to a long railroad journey. You start at Station A with the intention of arriving at your destination Station B (which represents the ultimate layout you dreamed of having).
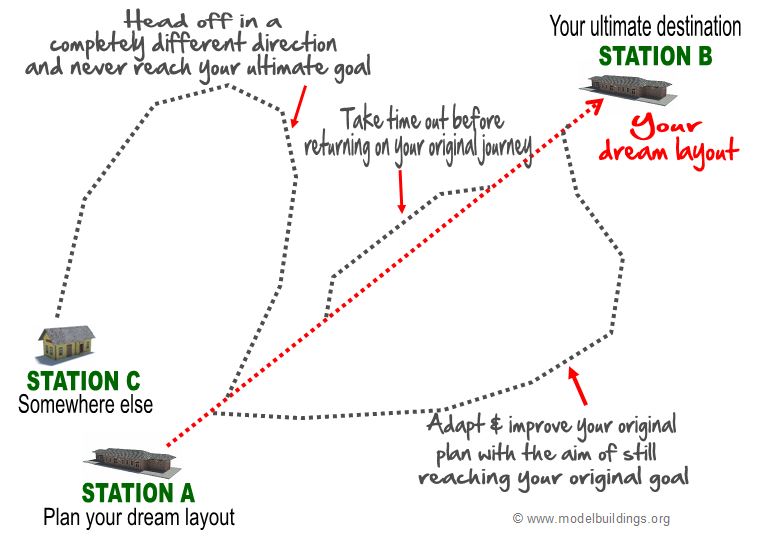
Now along the way you can take different routes, or pause on a siding for a while, but the end goal should always be to get to Station B.
If on your journey you get diverted and decide to head in a different direction, then that’s okay as long as you eventually end up at Station B (your ultimate layout). What you don’t want to do is suddenly head in a different direction and never actually reach your ultimate goal (Station B).
If you want time out from your project then pause your journey on a siding for as long as you need, before recommencing your journey to Station B.
If you do decide to take a completely different route such as changing scales, then that’s okay (because it’s your layout and you get to decide), but you will need to accept you’ll likely arrive at a different destination (Station C). So, don’t be disappointed if you never actually get to where you originally intended. You might be happy with a different destination, because your ideas and goals may have completely changed. The decisions you make are entirely over to you. You’ll eventually end up somewhere, and as long as you enjoyed the journey, well that’s what really matters.
Planning and building a layout will require compromises along the way, so it’s not a bad idea to write down and prioritize what you really want (and what you could do without). Ruling up three columns on a sheet of paper like this is a good idea.
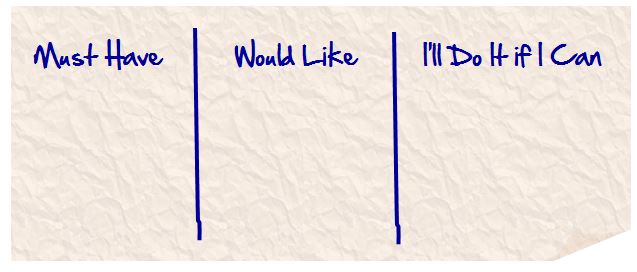
So many things can influence how a layout looks and operates. That’s why it makes sense to draw up a list of things to consider such as: benchwork designs, control systems, operating schemes, and scenic features. Include any other special wants, likes, dislikes, or desires such as “must be child-friendly,” “plenty of tunnels,” “lots of switching.” These are all worthy goals to consider at the planning stage.
I guess what I am saying is this:
–> Building a layout requires careful planning from start to finish
–> Begin with the end in mind
–> Although you will need a disciplined approach to keep on track, you may need to compromise on some ideas in order to get where you want to go. Time, budget, space, and your skill levels will affect what can be achieved.
–> Apply some flexibility to adapt and improve along the way. Be prepared to take different routes if necessary to get you to the same destination. There will be many options available, and multiple ways to get you where you want to go. You might not be able to alter the key elements of your layout plan, but that shouldn’t stop you from being creative in the way you work within the constraints you have. You may need to frequently revisit your list of priorities as you proceed along the journey.
–> If you want to throw the rule book out the window then that’s your choice. It’s your layout so do what you want to do.
–> Most importantly…. have fun along the journey!
Click here for more ideas on planning your dream layout.
Tell readers all about your layout here. Send in one good photo with a caption so readers can see what you created.
Add your comments.
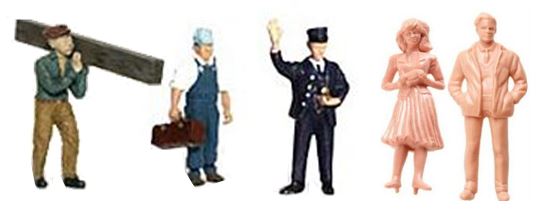
Model figures of people and animals can be used to give a realistic look when designing a railroad system. A layout doesn’t usually look complete until figures are added. My opinion is you can never have too many people on a model railroad layout. You can have people positioned on station platforms, working on farms, walking the streets, coming out of shops, working alongside the track… and not forgetting, driving vehicles. After all, a vehicle driving down a road without a driver looks a bit strange, and sometimes it is the little details (or lack of them) that can be the difference between a realistic looking railroad scene and one that just looks like an artificial model.
Figures are available in many types and forms. They can be made out of plastic and sometimes wood. Some of them are painted in a factory, some are hand painted and some are just unpainted so that you can choose your own colors. The passengers, ticket man, traffic controller, driver, guards and all others are available from various model railroad suppliers at reasonable prices.
The figures are manufactured according to common scales such as HO scale (1:87). Some companies also sell figures in non-standardized ratios.

Try the new ZOOM tool to have a close-up view of these photo realistic model railroad buildings.
The purp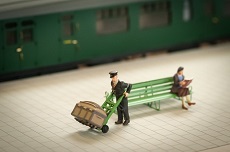 ose of any railroad (real or model) is to transport freight and/or passengers efficiently from one place to another be it a port, railway station, or a rail yard where the freight can be delivered directly to a local industry.
There are various car forwarding systems available for railroad modelers to use, ranging from simple colored tabs attached to the cars through to to electronic waybill systems. There are advantages and disadvantages for each system and much depends on personal preferences. Some systems will allow for a “random flow” of cars whereas other systems work to maintain a “disciplined flow” of a specified car numbers in or out of particular zones as a way of balancing the traffic.
The system you use is really over to you, so it is best to choose the system that best meets suits your railroad or your own preferences based on what interests you most.
A waybill and car card system is very easy to set up. The basic steps are as follows:
–> Start by making a complete inventory of all your rolling stock
–> Print the car cards
–> Draw up a chart listing the various interchanges and industries
–> Decide the capacity of your layout and the best way of balancing the rolling stock
–> Print your waybills
–> Set up the car cards and waybills
–> Get the system working and start operations
Try and create a system with records you can keep and maintain through the time you have your layout. This is because when you buy new rolling stock, or alter the layout track work, it will potentially affect the dynamics of the system you have in place. Record any deletions, additions, or changes and change your waybills accordingly to ensure the system continues to operate efficiently.
A simple computer spreadsheet is suitable for listing the details. If you don’t have a computer spreadsheet you can draw up some tables on paper and keep them in a ringbinder. Keep accurate records and a system you can continue to use in years to come.
You can record the road name, road number and initial, the car type and description, along with any additional information such as the manufacturer, the cost etc.
If you prefer to use a more automated system, there are switch list systems that generate lists of freight and passenger cars to switch to allow you to achieve realistic train operations.
Manfred sent in this photo of his layout to share:
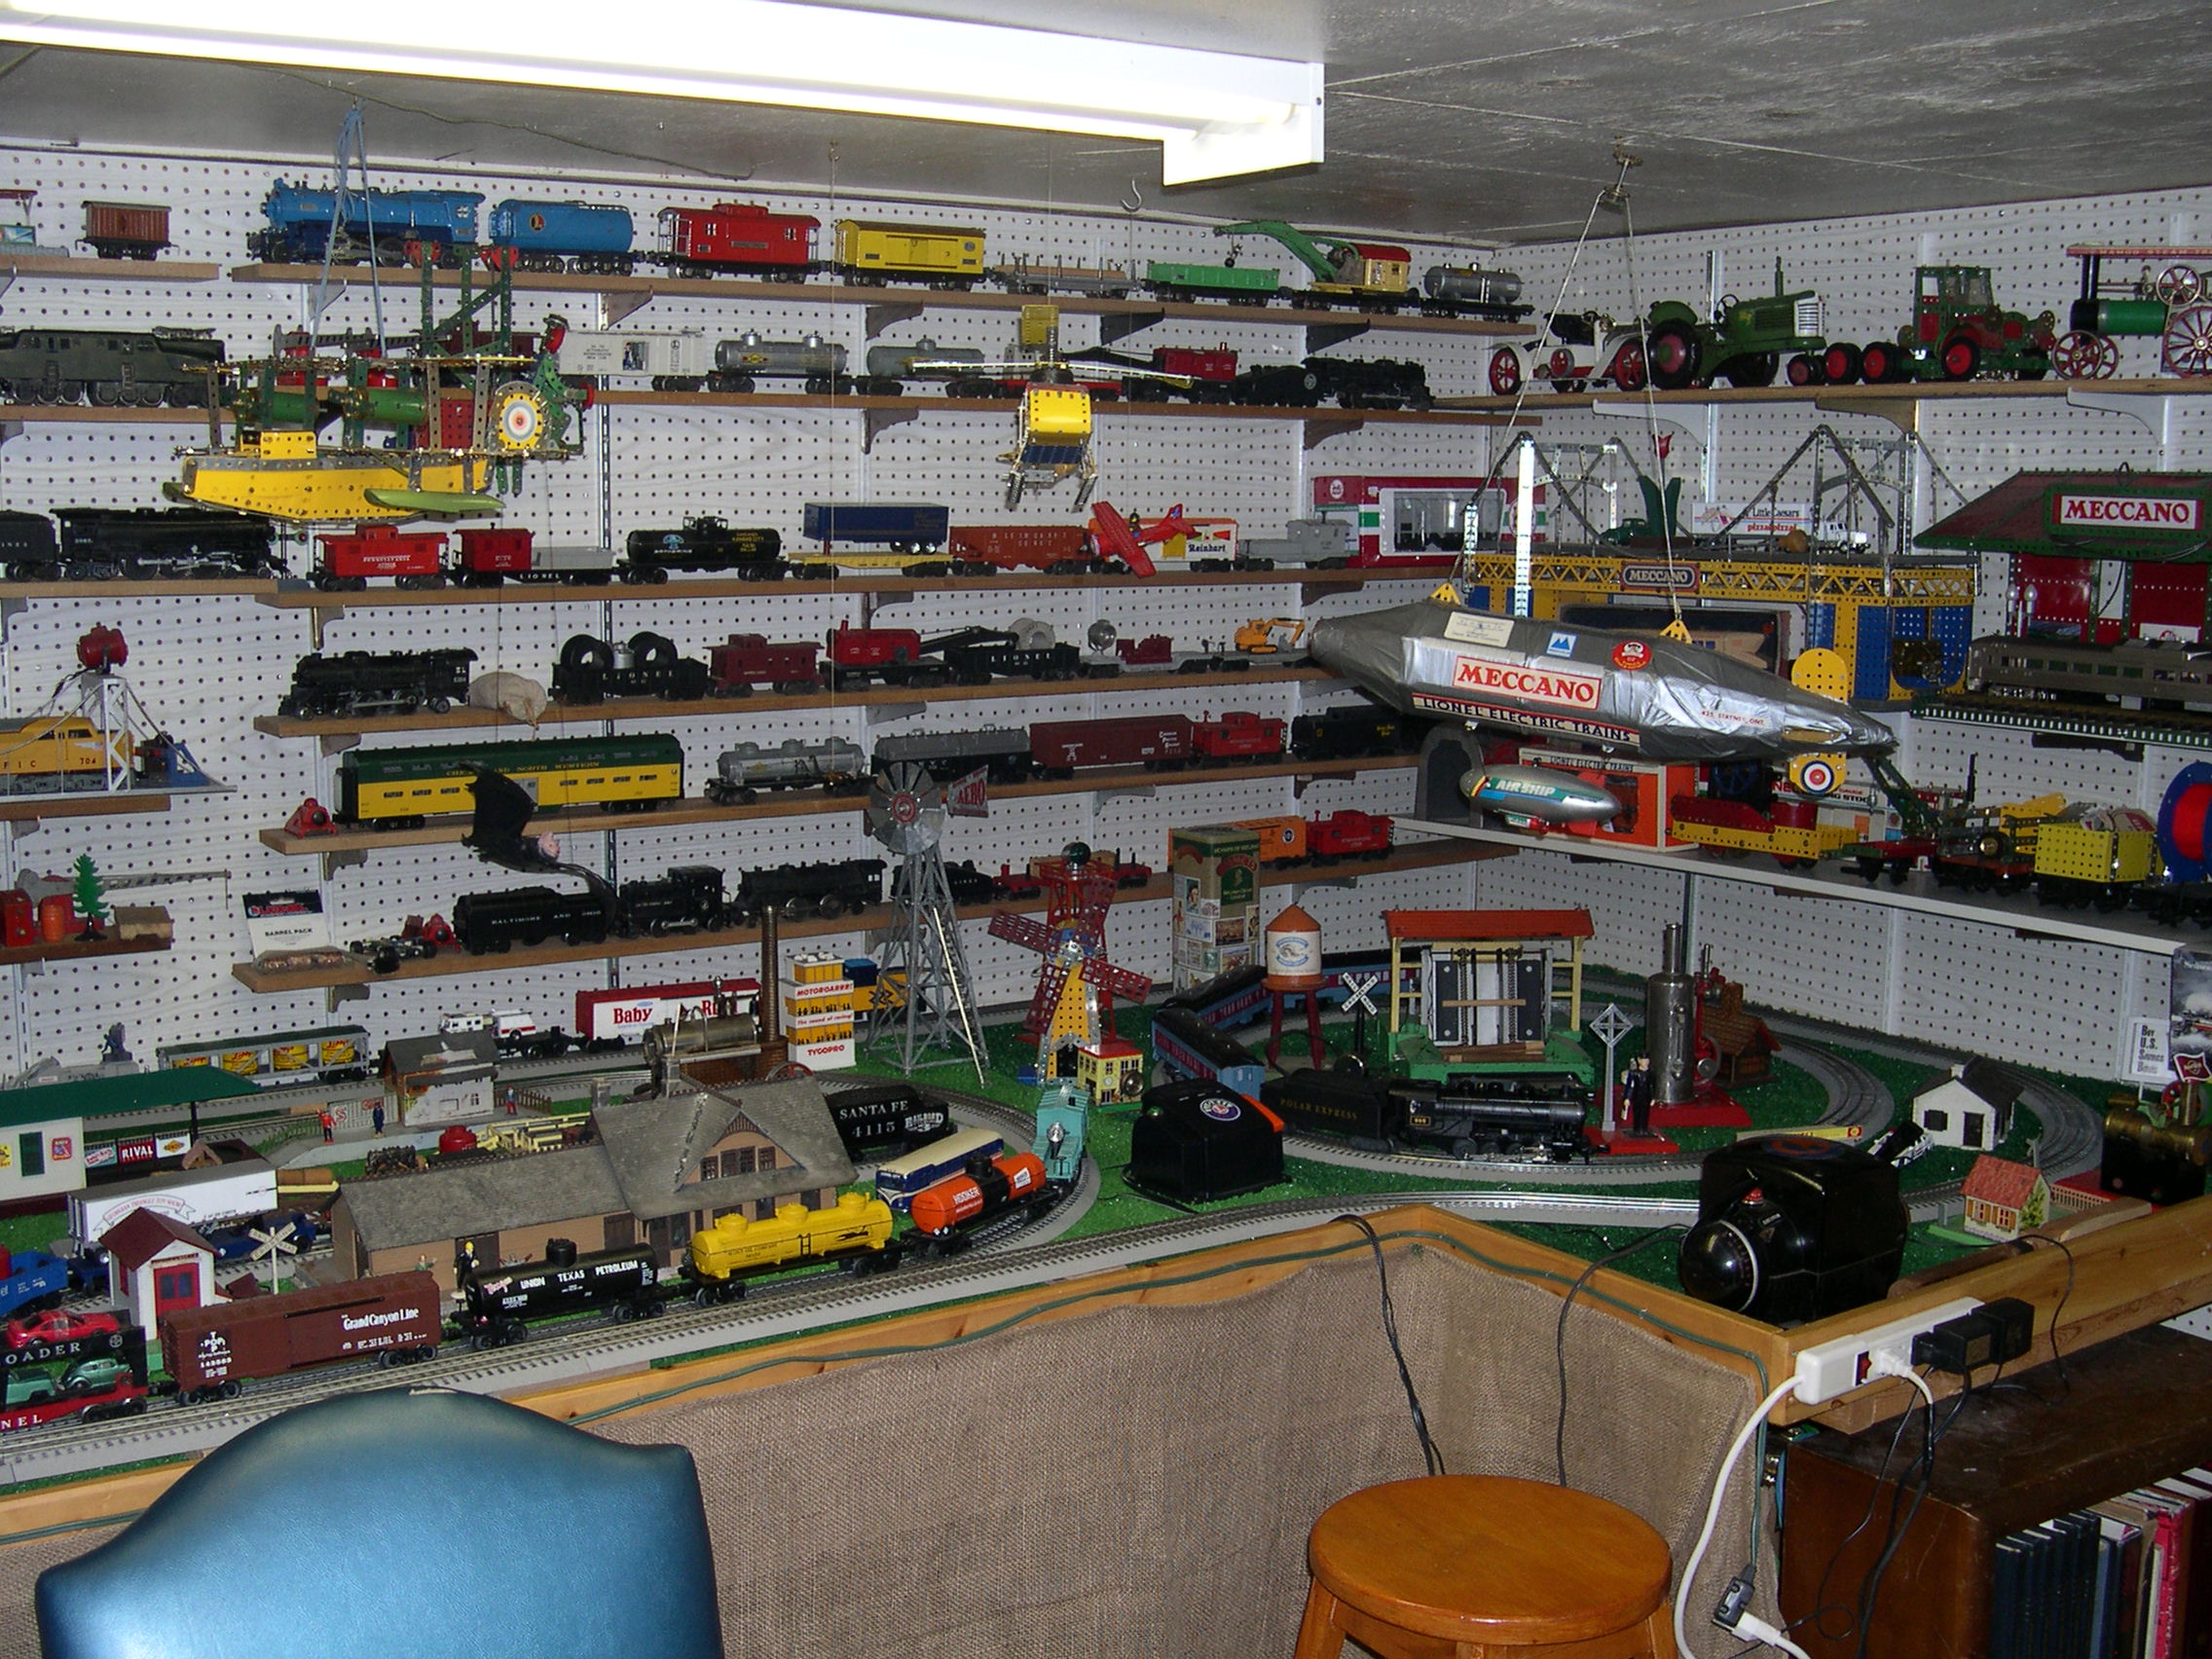
I have a Marklin layout 4 feet by 8 feet. Most of it dates back to the 1950’s ,but I have engines from the 1930’s . They run on AC on a three rail system as I grew up with it. I also have a large Lionel O collection – old and new. My oldest train is a Bowman live steam from 1902. It runs perfectly on a straight track. This winter was a perfect winter to operate the trains and I find it a fun hobby.
Add your comments.
If you would like to have a photo of your layout published, then please write a short article telling readers about your layout. Use the form at http://www.model-train-layouts.net/Submit-An-Article.html
Tony W sent in his ideas on operations:
It is easy to spend days or weeks designing a railroad layout, but the key is not to just get carried away with planning the scenery. From my experience successful operation is critical if the railroad is to function effectively. A few tips for managing operations and meeting scheduled target are given below.
–> Locate your stations close to the passengers and storage places, which will be using the service.
–> Link adjoining stations through straight tracks. This minimizes the running time.
–> Use simple siding if the train has to load and unload cargo.
–> Use fiddle yards to store trains, which are not being used for the time being.
Add your comments.
Club member Larry sent in this tip:
Laying the track is one of the most important aspects of building a railroad model. Design the entire track on paper first. Once done, loosely place the sectional and curved pieces to get the whole idea of the layout. Do not join any pieces at this point. For curved tracks, choose a radius that is bigger than the size of the train.
You can now proceed with joining the track. Start at one end and work on small sections at a time. Fasten the track down. Soldering is a good option to finish off the track because it prevents derailments.
Add your comments
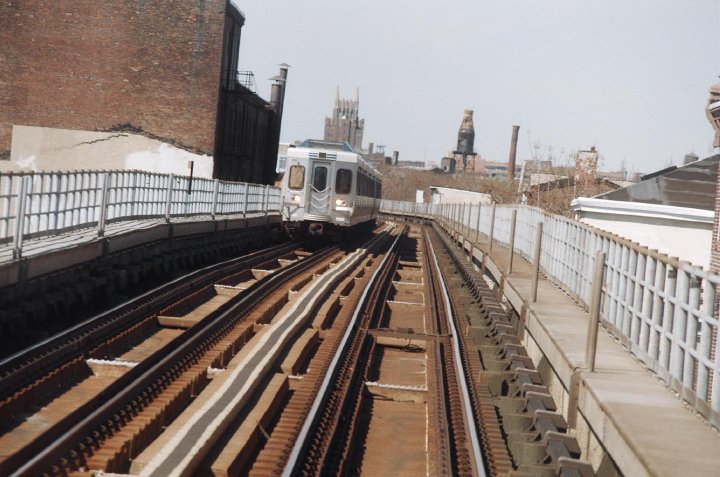
This photo kindly supplied by Fred was taken in Philadelphia Pennsylvania. Fred says, “It the Market -Frankford Subway Elevated line of the South Eastern Pennsylvania Transportation Authority (SEPTA) aka The Blue Line. This line’s track Gauge is 5 ft 2 1/4 Inc Gauge. Its aka is Keystone Gauge. The line is not far from where I used to live back in the day when parts of this line was captured in the Movie “Rocky” Sylvester (The Italian Stallion) Stallone.”
Add your comments.
Supplied by club member Warren:
Nickel – Silver is a composition of copper and nickel, with copper being the dominant metal. It is similar to brass but has added advantages. When brass oxidizes, a layer called rust is formed. Rust does not allow electrical conductivity. Consequently, if brass tracks are used, trains may not run smoothly. Regular cleaning and removing of rust is essential.
Nickel-Silver tracks also oxidize after a time. The difference is that nickel silver track has a higher current flow resistance than does brass track. This can necessitate more wiring to adequately feed the track.
Add your comment.