
Everything on model trains, model railroads, model railways, locomotives, model train layouts, scenery, wiring, DCC and more. Enjoy the world's best hobby... model railroading!
Kristopher asks:
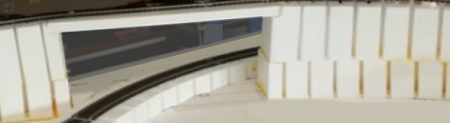
“The added risers to get elevation change I needed. No problems so far, but I’m not sure the best way to cover them to make the elevation and scenery look natural. Help wanted!”
Add your thoughts below.


This is where newspaper an hot glue guns come to their own. You can either use crumpled paper to create hills either side of the embankment to make it look like a cutting our rising valley. Cover this with papier mache (newspaper and pva glue) or plaster bandage. and scenic scatter materials and trees
If you want the embankment as a feature, glue retaining walls to the risers using the glue gun, or stick strips of paper to the top of the risers, stretch them to the baseboard and then cover them with the papier mache or bandage.
You could, if in an urban area turn the area into a viaduct using model bridge components.
Use pieces of extruded foam (the pink stuff) and butt them against the risers to create scenery
Kristopher, I too elevated for a second track. I used cardboard to cover the risers and then covered the board with the high density foam, the pink or blue one –do not use the white stuff. Carve the foam to your desired look.
Very nice Raul!
Looks great!!!
For covering risers, some modelers simoly use Plaster cloth, and treat i tlike an elevatd embamkment.
The sides can be flared out to form a hillside. Else they can be left with vertical sides and form the base for walls
When working with elevations, be aware that about 2% is the limit on the rise depending on your loco strength and number of cars being pulled. For ever 50 inches in run, a rise of 1 inch is a 2% grade.
When going around curves, the drag on the consist can increase upwards of 25% of pulling load
My advise is to lay the track loosly on the incline and make a few runs under your worst conditions to be sure you can climb it. INCLUDING ANY CURVES.
One common thing I try to do is to look to nature. Exagerated hill slope angels are a dead give away. Work the scenery in gradually with longer slopes that you can work back up to your track elevations. Remember, it’s your layout and it will suit your well if you take the time and get it done to please you.
I used these initially, have since rebuilt the layout w/o them. I used cardboard strips, wadded up paper hot glue to the sides of the foam and then covered with plaster cloth. The plaster cloth was smoothed out along the beveled edge of your roadbed