Everything on model trains, model railroads, model railways, locomotives, model train layouts, scenery, wiring, DCC and more. Enjoy the world's best hobby... model railroading!
Club member Trevor sent in this tip to share:
Laying ballast can be a tough learning curve, because once it’s in place it is difficult (if not impossible) to remove. Particular care is needed around point-work to stop ballast from interfering with railroad operations. If ballast finds its way into places it shouldn’t, then there is the potential for mechanisms to seize up… I know, because it’s happened to me. The stuff is so fine and if it’s not glued down it will move. Also, when glue is added – well, that can cause problems too.
To prevent problems, I now apply a small amount of locomotive oil around all the moving parts on each point. This stops the glue adhering to the moving parts on the points. I also use a small hand water sprayer/mister to dampen the ballast. This helps the glue flow between fine particles of ballast. This also restricts the ballast from moving whilst applying the glue.
Club member Ashley sent in this tip to share:
If you spot your train slowing down or stopping only in some places the problem may be caused by voltage drop. It could be that the distance to the nearest power source is too far or that perhaps the quality of the joints between track sections has weakened the flow of power.
Begin by tightening any loose joiners and if required, add a second set of wires from your power supply to the track in the problem area. Take care to connect each wire to the correct rail.
On larger layouts, especially with DCC setups, it is suggested a bus wire (with feeders) to multiple track sections be used. Keep in min d that using a heavier wire is more reliable than using the rails themselves. You can attach smaller feeder wires between the rail and the bus as often as required. Generally, feeder wires are attached every 6 to 12 feet or so.
Another option is to solder the rail joiners themselves. Doing this should minimize any voltage drop, as well as help get rid of any kinks that could potentially cause a derailment. Also consider leaving some joiners open to compensate for contraction or expansion over time.
Andrew H asks readers:
“I bought a new HO scale diesel loco with 6 trucks. However, it keeps on derailing when crossing the turnouts. I originally had 18 inch curves and changed these to 22 inch curves, but I didn’t replace the turnouts. My question – Should I replace my existing turnouts with #6’s (22 inch curves)? Will this reduce the likelihood of future derailments?”
 Here’s a clever idea sent in my Mike:
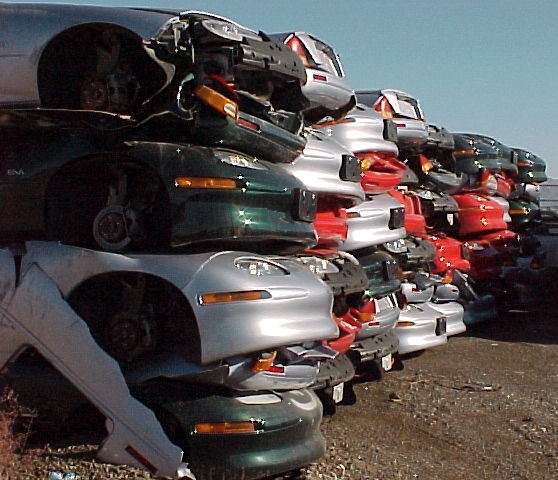
“When trying to make up loads for flat cars I came up with an idea for making scrap cars being crushed and sent to be recycled into new steel. I take a scale model car (I model in HO) and cover it with aluminum foil and press it to form the shape of the car and trim the excess foil off.
I then remove the foil and paint it with a rust colored paint and then repaint in another color that is common for that vehicle leaving some of the rust showing. When the paint dries I flatten the shape slightly to make it look like it wash crushed down so more can be loaded for shipping.
I use silicone caulking to fasten the car shapes together then tie them on to a flat car.”
Thanks to Mike for sharing.
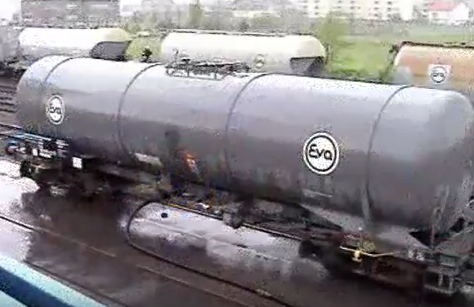
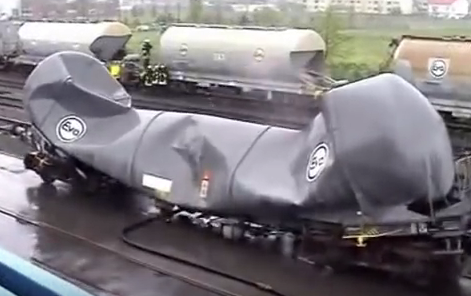
What caused this steel tanker car to get crushed like a thin aluminium pop can?
It was air pressure.
There was enough difference between the air pressure inside the tank car and the pressure of air surrounding the tank car… enough to cause the steel in the tanker to implode inwards.
Fortunately, that won’t happen on a model railroad!
Reg asks readers:
“In reading all the info on DCC I keep reading of the necessity to keep the motor isolated from the chassis. They go into quite a bit of detail about cementing the motor in being one way of insulating it from the chassis, or using black plastic electrician tape or other methods. I’m questioning this.
Surely if your motor windings are isolated from the chassis it won’t short out the decoder no matter if the chassis and motor casing is connected to one side of the track. Surely all you need is to ensure the motor windings are isolated?
The windings connect to one side of the decoder and the other side is connected to each side of the track no matter how its picked up. What does it matter if the motor case, and the entire chassis of the locomotive connected to one set of wheels acting as pickup for one side and is electrically isolated from the set of wheels connected to the copper pickup(s), you still have 2 separate pickups. Neither is connected directly to the motor winding. “
Peter Field from Pietermarizburg South Africa sent in an update of his model railway to share with readers.
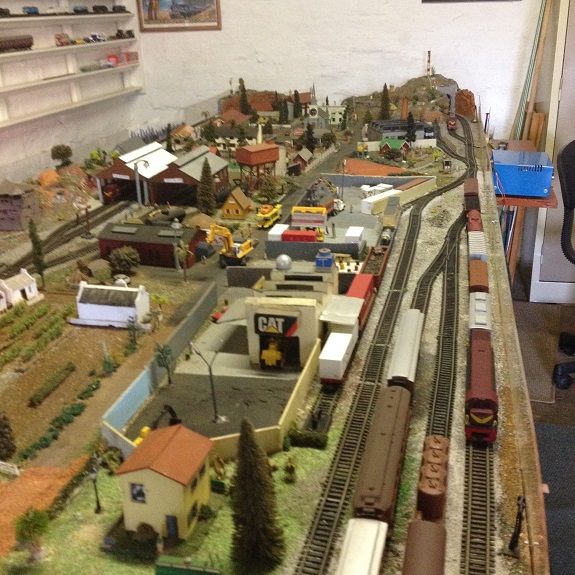
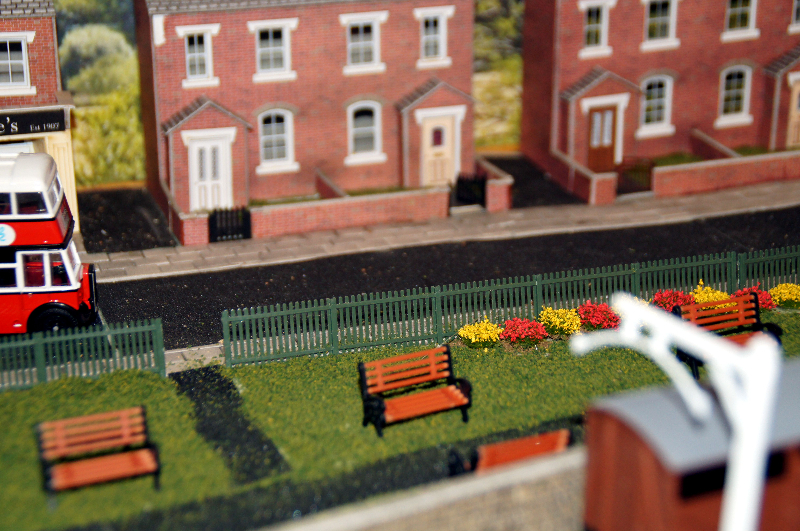
Looking up along the layout at the bottom is the farming area, middle are the factories and top end of the board is the village.
He’s what Peter has to say –
In an article some years ago I built a board which was basically a demonstration board of 1.80x 1.20m that was portable for model train shows.
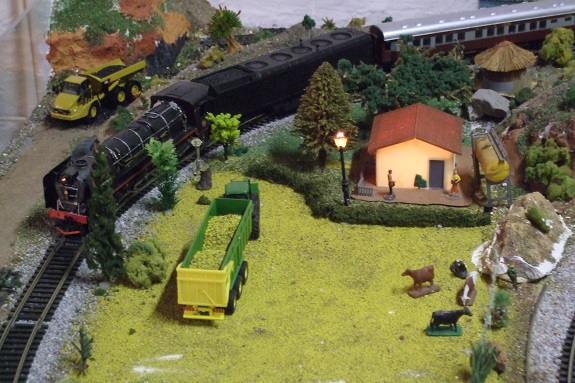
A class 25 Condenser hauling the Trans Karoo passes the Anglo Boer war block House on route to its destination.
The next phase of the building plan was to make it a permanent layout still being 1.80x 1.20m and broke the board up somewhat to modify it and to extend it at a later stage.
In 2013 I started to expand the board and added another 1.80×1.20 board to the existing board which was now 3.6meters in length, this took almost a year to complete and add the scenery etc. Then at the end of 2015 I extended the layout yet again by 500cm making to the total layout 4.10x 1.20meters in size.
The layout was built to represent the South African railways in the early 1960’s up until the mid 2006 period.
When steam and diesel were working side by side on many of the SAR lines. There were the mighty Class 25 condenser locos to the Class16E a Pacific grey hound and the 15CA on many lines mixed with diesels of various types from the Class31, 34. 35, 36 and some SAR electric locos Class 6 E1.
The layout is based on a rural area of the Midlands in Natal with a general dealer, Hotel, Church, Garage and some factories and farms on the one side of the layout all served by rail.

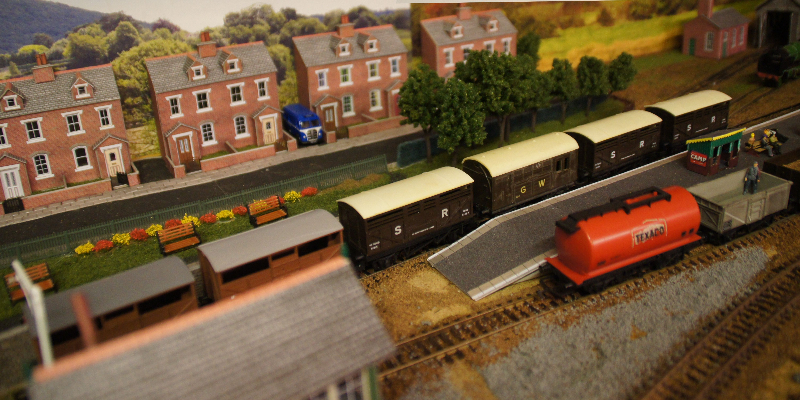
The Hilton station with an EMU on the adjacent line whilst a goods train hauled by a Class 34 diesel glides past the station.
The village has plenty of action with people doing what people do taking dogs for walks people shopping at the grocery store ride motor cycles, people getting married at the church people working on the roads, offloading containers in the container bay area. Plenty of motor vehicles and trucks and farming implements on the farms.
The track in total is +- 8.20min length plus all the sidings along the line which is operated off a dual controller which powers the rails and the 16V supply to the towns lights and street lights etc.
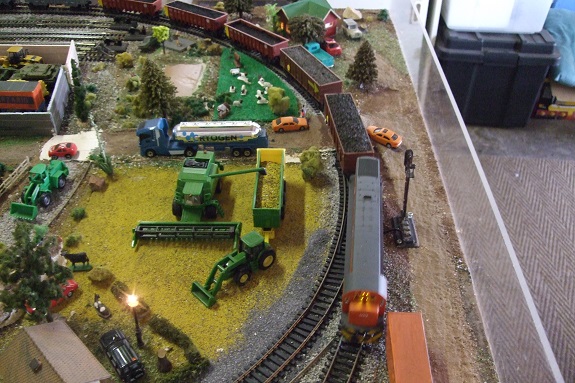
A Coal train being hauled by a Class 34 diesel past the factories with a wine farm on the left.
The trains can vary from the Crack Trans Karoo express to the Blue train or mixed goods trains Coal trains or container trains or even a fuel train as the operate in block trains over here for say coal.
We also have a 1940’s balcony coach train of wooden stock to represent that era with the first diesels imported into South Africa the Class 31 or a fast passenger train hauled by a Class 25 condenser or a pair of Class 34 diesels. There is also an EMU suburban train that operates every so often. Trains are made up in terms of the periods when they would have operated on the SAR. The whole idea was to show what the South African railways looked like in the respective periods.
I call this layout “My world” as it was in my young years to the mid 1970’s when I saw the railways in the period of my life from a young boy to a young adult . There nothing more relaxing than to go into my train room and sit operating trains shunting and making up trains for the next session and to repair trains that are damaged or broken.
Alister asks readers:
“I saw a demonstration of joining a drop wire to a buss. The buss was blue and appeared to be insulated. The guy had a plastic joiner which clamped the drop wire to the buss without removing the insulation on the buss line ( no soldering was needed). How does this work? I was told the buss wires for the different rails were best to be different colors so that there was no confusion when joining drop wires. For the buss lines to be different colors they will be insulated. How can contact be made through the insulation? Thank you.”
Club member Duncan from New South Wales in Australia sent in these planning tips to share –
I’m on to my 2nd layout so thought I would jot down some suggestions for others. Here we go…
The more carefully you think through the planning stages of building your model railway, the fewer problems you’ll have when it’s finished and operational. That’s my experience anyway.
I can’t stress enough, the importance of selecting the right track plan for the space you have available. The cars need to operate without derailing, and the railroad needs a reason to exist, because no trains run from point A to point B without a purpose. Also, I’m sure you’ll soon get bored if the layout is too restrictive, and doesn’t allow for enough operational variations.
 Based on my experience, I would say you should be 100% certain of your track plan, and lay it out on your baseboard before pinning it down. I first pin the track lightly to my baseboard which I make from exterior Water and Boil Proof (WBP) plywood. You can use other materials. I don’t use cork.
I then test for smooth operation and test that the electrics of the track are correct. I do this before starting on the ballasting. This is really important, because it’s too late if you find problems after the ballasting is done. It’s just so hard to rip it up and start again. So check track alignments, wiring etc before you ballast.
As soon as I have finished and tested the wiring, I then test my various locomotives and all my rolling stock on the track. I do this to satisfy myself that the track is laid correctly and that it allows for good running. I hope this helps someone.
Johan sent in this question for readers:
“Thanks for your model train newsletters. I love to read them. One big question, I have my own DIY dcc command station (DCC _Gen v 2c ) with ACK Detector, Booster R-CDE and a Feedback module S88. What kind of DCC hand held controller do I need. I bought my first model train in 1974 the Lima type.”
Bob from the UK sent in this story:
I had until 3 months ago an up and ‘almost’ running layout in my loft, then-I broke my left hip-which shouldn’t be a problem NORMALLY, but it is giving me a lot of grief. On top of that my right hip which was replaced 4 years ago is also giving me grief, on top of that my spine is knackered, there are gaps where there shouldn’t be so I constantly get trapped nerves.
Apart from that I’m ok because I’m able to make single DIORAMAS which is what I’m doing now in my spare upstairs bedroom. Currently I’m making WATERLOO STATION and tracks plus turnouts. This has been a marathon job but I’m determined to finish it and God willing my Left hip will be okay in the future – when ever that might be. Morphine doesn’t help one bit, but with my other hobby Amateur Radio which I have been on since 1978 keeps me sane.
Enough said, I look forward to the future, because there is always hope.
 Club member Mal sent in these weathering tips to share.
For a lot of my weathering I use a solution of 1 teaspoon of India Ink mixed with 1 pint of rubbing alcohol (70% isopropyl alcohol). I use this for my LIGHT weathering jobs.
When HEAVIER weathering is needed I use a mix of 2 teaspoons of India Ink in 1 pint of rubbing alcohol. My personal preference is to use the Hunterline bottles of alcohol based weathering which I buy direct online. You might prefer another brand.
I do a lot of dry-brushing as it gives my projects a more “blended” look. To do this I lightly dab my paint brush (it must be dry and clean) in the color. I then brush most of this paint off onto a disposable paper towel. When almost all the paint is gone from the brush I am ready to start dry-brushing the object.
It takes a bit of experimenting and practice to master this technique, but it does look really good when done properly to subtly and slowly build up the paint layers.
Steve used a link on this page to post this question:
“I am operating a 060 Tank locomotive but am having problems on turnouts. At slow speed it stops. When I run it faster it sometimes derails. The loco appears to rise a little as it goes through the points. Has anyone got any suggestions please?”
Add your comment if you can suggest a solution.