Planning
Everything on model trains, model railroads, model railways, locomotives, model train layouts, scenery, wiring, DCC and more. Enjoy the world's best hobby... model railroading!

Ben is new to the hobby and seeks advice from readers:
I have started planning my first layout – a 12 ft x 6 ft HO railroad with a small mining town, at least one industry and some mountains. I think I will cope ok with the scenery side of things, but will struggle with the technical stuff (not my strong point).
Can someone advise me how to begin the DCC setup with transformers and booster (how many would I need)?
Can I mix brands and loco types on the same track? Any other suggestions appreciated.
Mark used the “Submit Your Question” link in the right hand column to post this question:
“I only have enough space for a new 10ft x 9ft layout but don’t know whether to switch from HO scale to N scale. I already have some HO gear from my last layout but I had more space for that. With less space I can’t decide if I should make the switch to N scale which would give me more room for the scenery etc. What is best for in my 10 x 9 space? Does anyone have a similar size space?”
 Branch lines are side tracks off the main railroad so work well as a quiet alternative to the main line. The main lines connect major points on the layout so are generally carry faster through traffic. Subsidiary tracks are added to insert more routes and extend the layout. They also induce flexibility in the design and at times require fewer components. Each line is likely to have at least one station, freight depot, or destination point so that trains can load and unload cargo or drop off passengers. A branch is will often include a passing loop or sidings to allow trains to pass or perform other tasks.
Branch lines may permit designers to build a more realistic prototype. Countryside scenes or city views can be added to the layout along the length of several side tracks.
There are plenty of things to consider when planning and building a model railroad layout and it pays to take your time considering the numerous options and possibilities before getting too advanced with your project. In fact it’s usually best to begin with the end in mind by visualizing what you want your finished layout to be like before you get started with anything.
That’s not to say you shouldn’t be flexible throughout the construction process… you should! After all, you might discover a better way of doing things, or think of a great addition that could make your layout even better. You might even decide to eliminate a facet of your layout that isn’t really contributing to the overall design or operation.
I liken the planning and building of a layout to a long railroad journey. You start at Station A with the intention of arriving at your destination Station B (which represents the ultimate layout you dreamed of having).
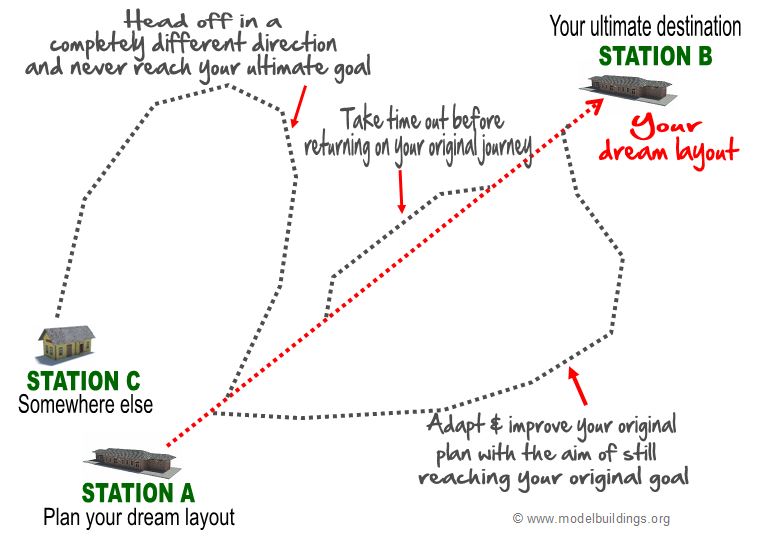
Now along the way you can take different routes, or pause on a siding for a while, but the end goal should always be to get to Station B.
If on your journey you get diverted and decide to head in a different direction, then that’s okay as long as you eventually end up at Station B (your ultimate layout). What you don’t want to do is suddenly head in a different direction and never actually reach your ultimate goal (Station B).
If you want time out from your project then pause your journey on a siding for as long as you need, before recommencing your journey to Station B.
If you do decide to take a completely different route such as changing scales, then that’s okay (because it’s your layout and you get to decide), but you will need to accept you’ll likely arrive at a different destination (Station C). So, don’t be disappointed if you never actually get to where you originally intended. You might be happy with a different destination, because your ideas and goals may have completely changed. The decisions you make are entirely over to you. You’ll eventually end up somewhere, and as long as you enjoyed the journey, well that’s what really matters.
Planning and building a layout will require compromises along the way, so it’s not a bad idea to write down and prioritize what you really want (and what you could do without). Ruling up three columns on a sheet of paper like this is a good idea.
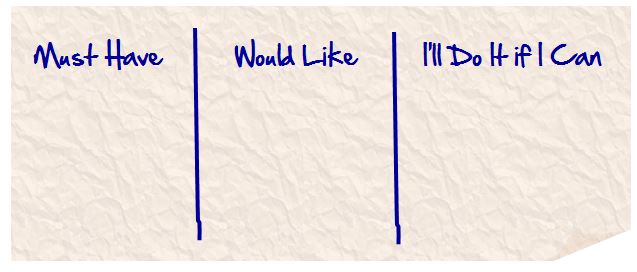
So many things can influence how a layout looks and operates. That’s why it makes sense to draw up a list of things to consider such as: benchwork designs, control systems, operating schemes, and scenic features. Include any other special wants, likes, dislikes, or desires such as “must be child-friendly,” “plenty of tunnels,” “lots of switching.” These are all worthy goals to consider at the planning stage.
I guess what I am saying is this:
–> Building a layout requires careful planning from start to finish
–> Begin with the end in mind
–> Although you will need a disciplined approach to keep on track, you may need to compromise on some ideas in order to get where you want to go. Time, budget, space, and your skill levels will affect what can be achieved.
–> Apply some flexibility to adapt and improve along the way. Be prepared to take different routes if necessary to get you to the same destination. There will be many options available, and multiple ways to get you where you want to go. You might not be able to alter the key elements of your layout plan, but that shouldn’t stop you from being creative in the way you work within the constraints you have. You may need to frequently revisit your list of priorities as you proceed along the journey.
–> If you want to throw the rule book out the window then that’s your choice. It’s your layout so do what you want to do.
–> Most importantly…. have fun along the journey!
Click here for more ideas on planning your dream layout.
Tell readers all about your layout here. Send in one good photo with a caption so readers can see what you created.
Add your comments.
The purp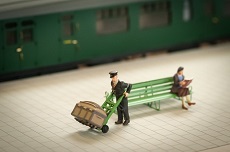 ose of any railroad (real or model) is to transport freight and/or passengers efficiently from one place to another be it a port, railway station, or a rail yard where the freight can be delivered directly to a local industry.
There are various car forwarding systems available for railroad modelers to use, ranging from simple colored tabs attached to the cars through to to electronic waybill systems. There are advantages and disadvantages for each system and much depends on personal preferences. Some systems will allow for a “random flow” of cars whereas other systems work to maintain a “disciplined flow” of a specified car numbers in or out of particular zones as a way of balancing the traffic.
The system you use is really over to you, so it is best to choose the system that best meets suits your railroad or your own preferences based on what interests you most.
A waybill and car card system is very easy to set up. The basic steps are as follows:
–> Start by making a complete inventory of all your rolling stock
–> Print the car cards
–> Draw up a chart listing the various interchanges and industries
–> Decide the capacity of your layout and the best way of balancing the rolling stock
–> Print your waybills
–> Set up the car cards and waybills
–> Get the system working and start operations
Try and create a system with records you can keep and maintain through the time you have your layout. This is because when you buy new rolling stock, or alter the layout track work, it will potentially affect the dynamics of the system you have in place. Record any deletions, additions, or changes and change your waybills accordingly to ensure the system continues to operate efficiently.
A simple computer spreadsheet is suitable for listing the details. If you don’t have a computer spreadsheet you can draw up some tables on paper and keep them in a ringbinder. Keep accurate records and a system you can continue to use in years to come.
You can record the road name, road number and initial, the car type and description, along with any additional information such as the manufacturer, the cost etc.
If you prefer to use a more automated system, there are switch list systems that generate lists of freight and passenger cars to switch to allow you to achieve realistic train operations.
Tony W sent in his ideas on operations:
It is easy to spend days or weeks designing a railroad layout, but the key is not to just get carried away with planning the scenery. From my experience successful operation is critical if the railroad is to function effectively. A few tips for managing operations and meeting scheduled target are given below.
–> Locate your stations close to the passengers and storage places, which will be using the service.
–> Link adjoining stations through straight tracks. This minimizes the running time.
–> Use simple siding if the train has to load and unload cargo.
–> Use fiddle yards to store trains, which are not being used for the time being.
Add your comments.
![]() If you are new to model trains, then you’re at a loss about where to start from. Prototypical designing is just for people like you. It allows the entire railroad to be modeled according to a real system. This eliminates possibilities where trains might not be on schedule or not operate at all.
If you are new to model trains, then you’re at a loss about where to start from. Prototypical designing is just for people like you. It allows the entire railroad to be modeled according to a real system. This eliminates possibilities where trains might not be on schedule or not operate at all.
Peter asks readers:
“What is the best way to join track when you need a new section of table that is removable.”
Add your comments.
Reader Rob asks:
“I am looking some FasTrack layout idea’s. I only have a 4×8 board at this time. So I am limited to space. So if anyone has ideas for layouts that I can use it will be greatly appreciated. I cannot get out that much due to a disability. I do have about 8 switches a 90 degree cross track and plenty of track. Thank you for your time and concern. ”
Add your comment.


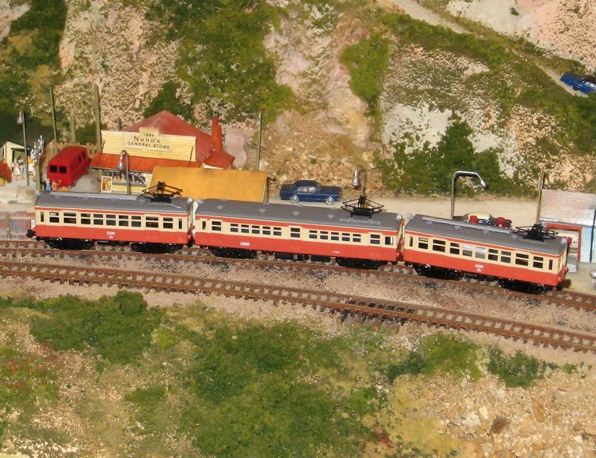
Ron sent in these photos of his layout to share:
My new layout is a 4ft by 17ft folded figure 8. I have most of the scenery done on one side. I have attached a few pictures of that side. On one side is a mine on the upper track, an interchange yard a small businesses on the lower track. The other side of the layout has a small yard serving a car float and local industries (no scenery yet.)
The Shamrock mine is a modified Walthers New River kit. I removed 1 story, shortened it for 2 tracks, scratchbuilt a new open conveyor a over burden tower.
The small community is Cherry Creek. The bridge is scratchbuilt and spans the lower mainline and a small interchange yard. The building on the right side is a scratchbuilt combination depot, hotel, and gas station built from plans in the Narrow Guage Gazette. On the left side is a scratchbuilt general store, Dalton’s Almost Anything (from the Red Green Show).
Add your comments.
Nathan has a question for readers:
“I was wanting to hear ideas for a custom HO layout. I am kinda new to this. The size doesn’t matter unless it’s bigger than 150 sq ft. I only have cheap set locos but I have got 10 of them. Any help is appreciated. Thanks.”
Add your suggestions here.
John has very kindly sent in another article to share:
You’re reading this from somebody who tried four times to make a very small layout, and failed miserably every time, in my opinion. I work in N-Scale, a great size for small or large creations, but very small seems to be something else completely to make it look realistic and not a toy. My layout was less than 2×3-feet, just enough using a radius of 45-degree 9-3/4′ curves in Kato N-Scale Unitrack. It was an oval with one siding, and was based on the TV show “The Honeymooners”, which I still think was the greatest comedy ever created, even after all these years.
The mistakes I made might help someone else, and they’re recorded below:
– In the first creation, I had so many trees on it that it looked like a Tree Farm. So in the second try I added more structures. So now it looked like a Tree Farm with Buildings. The third and fourth attempts didn’t remedy the situation.
– Don’t put in too much. A very small layout naturally does not allow a lot of space, so choose wisely. Stay in scale, and pick structures, landscape, and figures that blend in with the track without overdoing it.
– Put trees, especially smaller ones, in the foreground, and don’t use a lot of them. Save the background for tunnels and larger trees, and for trees in clumps.
– Though it’s easy to lay the track, don’t be in a hurry. Take your time and add detail, but not enough to overpower the rest of the layout. Driveways, flowers, freight loads (if you’re using a freight house or station), fences, and vehicles are all examples of adding detail, especially on smaller layouts.
– Do things backwards – have roads that fit whatever structures and scenery you want to use. If you try to match houses to the roadways, it could be asking for trouble. Try out all combinations before gluing them down, and take a few days to study them to find what works.
– Don’t let scenery take over. N-Scale is known for letting scenery get too much for the trains in some cases. The trains are the main thing, and have the trains run through the scenery, not the scenery through the trains.
Remember simplicity. Making anything over-complicated on a very small layout (or even a large one) can result in failure.
These ideas might make a relatively tough job much easier, but remember; the only “critic” is you. This is your creation, and no matter what, if you get enjoyment out of it, that’s the name of the game and nobody can tell you different.
NOW to make that very small N-Scale layout, and it will be different this time!
Barrie from Tasmania in Australia posted this:
“I’m wanting to start into N gauge and coming from an engineering background want to build a layout that does more than just go in circles. Basically I want to design a layout that I can work the trains. My preference is moving freight to different places as you would on a real system. I know little about railway administration and dont want to start a layout to find that Ive limited my options due to ignorance. I have spare room that measures 3.5 metres by 3.5 metres which will be the train room. Im hoping that will be enough room for a reasonable N gauge system.”
Barrie, if you look in the right column of this blog you will see a couple of excellent N scale ebooks that will be very useful to you.
George has a question for you:
“Trying to lay cork using center of track is frustrating because its difficult to mark the actual line with the track in place on the plywood. What is needed is a tool to mark the center line. Doing it by eye creates a very unprecice line. I thought of using a two wheel truck and making the dot through the mounting hole on the truck. In practice it didn’t work too well. Using a pencil through the hole wasn’t much better. What is needed is a marking pencil firmly mounted to the truck hole. Is there any such tool available?”
Add your comments.
Ed seeks advice from others in the hobby and asks:
“I am using the foam method for my base. What is the best glue to hold down the cork roadbed on the foam backing and what about removal for changes later?”
Add your answer to this post.
Cathy is working on an interesting concept and asks readers for suggestions:
“I’m trying to run an HO (or bigger) train through a sealed clear plastic tube (or other clear material). The tube would go under water for a short distance then come out and go around a lay out. The water would be in a small elevated pool at the bottom of a water feature, still in the making. A lot to accomplish but have had this idea for years and now I’m trying to put my two loves together-water and trains. Do you have any suggestions or could you refer me to someone who can?”
Add your ideas below.
 Raymond wants advice from experienced model railroaders and asks:
“Do your readers have a suggestion for resources teaching and planning for how to create a yard on a HO layout – I need help with how to couple and uncouple from idle cars in the yard to a switcher to another loco on the mainline. So I need suggestions how to do these steps and how to plan, purchase and place the magnets as well as the way to do the turnouts and block control for these maneuvers.
One specific question I have is whether it is feasible to perform the switching moves when there is any grade change or regardless of precautions, will there always be a problem with freight cars rolling downhill. I am assuming that this would be feasible as long as I can control the coupling and uncoupling very well with parked locomotives and end of line bumpers preventing the downhill escape. Thank you in advance for suggestions on how I can learn more about and plan this.”
Add your answers below.
Steven asks readers:
After too long not having a layout, S and A lines is starting to come alive. I am planning a multilevel layout.
My question is on helix construction. What methods seem to work the best? What is the formula to get proper grade?


