Everything on model trains, model railroads, model railways, locomotives, model train layouts, scenery, wiring, DCC and more. Enjoy the world's best hobby... model railroading!
Ian sent in this tip to share:
For code 100 or smaller track, use a solder iron with a conical type tip. The end of the tip will be unplated iron. This is the area that gets coated with solder. The rest of the iron tip will be copper plated with iron, nickel and chrome. The chrome stops the solder from adhering to the body. For larger rails than code 100, you might want use a screwdriver shaped tip instead.
Add your comment.
From Michael W:
Sticking wiring through 2″ thick styrofoam can be testing for any of us. However there are a couple of easy methods. Use a knitting needle and thread the end of the stripped 22-gauge wire through the eye. Then push the needle through the top of the foam and pull it out from underneath with the wire attached. A sailmaker’s needle will work just as well if the wife doesn’t like you borrowing her knitting needles. Coating the knitting needle with some rubbing alcohol will help it slide through easier.
Add your comment.
Our recent poll asked “Did you get any trains or model railroading accessories for Christmas?”
The 394 participants said:
–> YES – I got what I was hoping for (31%, 124 Votes)
–> Yes – But not what I was expecting (6%, 20 Votes)
–> No – Unfortunately I missed out (52%, 206 Votes)
–> No – I haven’t got a layout yet (11%, 44 Votes)
Add your comment.
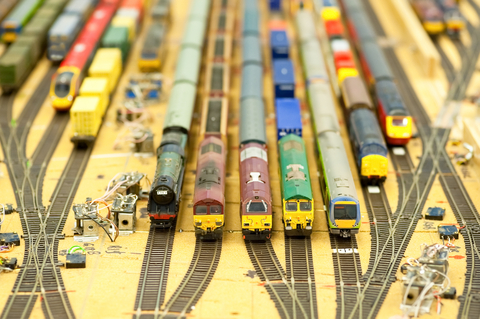 Switching tracks direct the train from one track to another. This is achieved by points which are moveable rails, lying outside the main track.
Crossover: A crossover switch lets trains on one track to continue in a straight path or diverge onto an adjacent track. When both tracks diverge onto each other, a double crossover track is formed.
Three-Way: A three way track splits a track into three different directions.
Wye: A wye track allows the train to change directions. The train can go both right and left through a single track.
Double Slip: A double switch guides the train on four different routes. Two tracks combine with four points to achieve this.
Wayne sent in this little tip to share:
Here’s a clever but simple idea I saw used. This guy had spray painted some left-over circuit boards with dark gray paint. He then cut them up to fit inside an industrial building. He added some lights and three little model figurines of workers to create a factory scene. Last I heard he was adding a lighting circuit (flashing arc lamp) to simulate someone welding.
For more clever scenery techniques go to http://www.modelrailwayscenery.org/model-railroad-scenery.html
If you have a tip you would like to share with others in the hobby go to http://www.model-railroad-resources.com/train-tips.html
Art sent in this tip to share:
A great way to make asphalt roads is to mix beach sand into a container of black paint then trowel it on. By laying down styrene or wood strips along the roadway edges, the paint will flow to the curbs. The black top goo should be pretty stiff, but still liquid enough to self-level.
For more scenery ideas http://www.modelrailwayscenery.org/model-railroad-scenery.html
 —> The BIG BUNDLE packs of model buildings (with up to 67% OFF the regular price) are now available . Here is the link to one http://www.modelbuildings.org/big-bundle-deal-1.html
—-> Some of the popular multi-packs with 35% – 49% saving are now available from the same website.
Also, if you haven’t get joined my Online Model Train Club, please consider it. The content and resources gets updated every month and there are some exciting developments in the pipeline. The club is going from strength to strength and is too good to miss!
Remember to BOOKMARK the blog so you can check for regular updates. And feel free to add your comment to any of the postings.
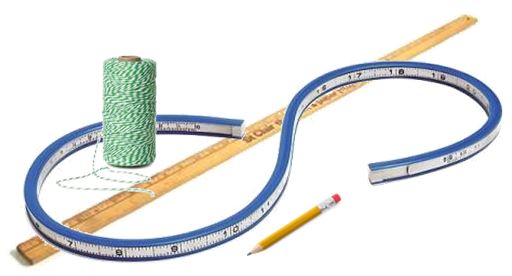 Most model railroads have curves, so it is important to know what radius is needed for smooth running and to avoid derailments. The next thing is to work out whether the curve will fit where you want it to go, and then to draw it to see how it looks. There are various ways to do this including using a flexible curve ruler (pictured) to form the required curve. Securing one end of some twine to a nail and the other end to a pencil is another way to draw a neat curve. I made a radius tool from a wooden yard ruler. I inserted a nail at the 1″ mark and drilled several holes at various intervals along the ruler. I then poke a pencil into a hole to scribe a curve. For example, if I want a 22″ radius, I drill the hole at 23″ (22″ from the nail). As any carpenter will tell you “measure twice, cut once.” It is simple advice, but well worth remembering.
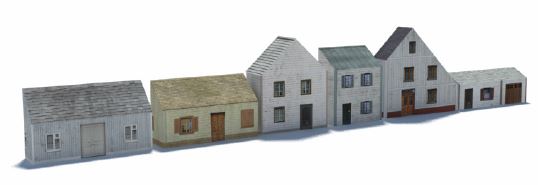
Just released is a series 6 new low relief houses to build. They are really easy to assemble using foam core or core flute from a local art store or hardware DIY. I paid less than $10 for a giant sheet and it made several buildings. They are extremely sturdy and very realistically weathered. Each building is less than $10, but right now if you buy all 6 you pay only $19.95 (a 49% SAVINGS) Here is the link to the special offer http://www.modelbuildings.org/low-relief-buildings-C.html
The latest model train poll asked: Will you let friends and/or family operate your trains over the Christmas break?
357 people responded as follows:
–> Yes – I even let the Children have a go (37%, 133 Votes)
– -> My trains won’t be operating (17%, 59 Votes)
–> I haven’t got a layout yet (15%, 54 Votes)
–> No – they’re not interested (11%, 40 Votes)
–> No – that’s too risky (8%, 29 Votes)
–> Yes – but only adults (7%, 24 Votes)
–> Yes – but only experienced operators (5%, 18 Votes)
Add your comment.
Mark has a question you might be able to help him with:
“I want to raise a layout to ceiling height. What is the best way [motor] to achieve this ?? My grandsons keep on about having a setup in the garage, but I have not the room.. Any suggestions?”
Add your comment.
Mistakes when constructing benchwork can be difficult to rectify, so it’s best to avoid them in the first place. Here are some things to consider and mistakes to avoid:
>> Will anything you do be a safety risk that could potentially result in an accident or fire? Will the use of materials such as foam void your house insurance?
>> How much weight will the structure need to support? Will it cope with the weight now and in the future? Will you ever need to climb over or stand on the benchwork?
>> Will the benchwork be stable? Shaking and movement can derail trains.
>> Are the aisles wide enough for you and other operators? Not having aisle room to pass another operator can be very frustrating. Narrow aisles can restrict walkaround control.
>> Can all areas of the layout be easily accessed from either from the layout edge or from underneath? No being able to access a derailed car cause problems.
>> How will humidity affect the layout? Will the sub-roadbed bend or buckle?
>> How will the changes in elevation (vertical displacement) affect train operations? Sudden changes in track angles can uncouple and derail cars.
>> Is it practical now (and in the future) to crawl underneath or “duck-under” benchwork access areas, or to operate from a pit? Is there an easier way to do things?
>> Is the layout the right height for you? An uncomfortable height can spoil the fun especially if you develop back problems.
>> Are you making best use of the under layout space. Can areas be used for storage or will this make accessibility difficult?
>> Are you ever going to move house and relocate? What happens to your layout then? Does it need to be built in modules to make it portable?
Click here for more scenery ideas
http://www.modelrailwayscenery.org/model-railroad-scenery.html

Right now there are several multi-pack specials all under $20 (saving from 35% to 48% off the normal price) and a couple of BIG BUMPER PACK deals for just $47 (saving up to 67%!!!).
Here is the link to a couple of BIG BUMPER PACK deals to give you an idea
http://www.modelbuildings.org/big-bundle-deal-1.html
http://www.modelbuildings.org/big-bundle-deal-2.html
Our last poll ran for only a few days and asked: Will you be working on your layout over the Christmas break?
There were 323 respondents and the votes were as follows:
>> YES – I hope to (72%, 233 Votes)
>> No – Unfortunately I have other things to do (16%, 53 Votes)
>> I don’t have a layout yet (12%, 37 Votes)
Add your comment.


Ron sent in these photos of his layout to share:
My new layout is a 4ft by 17ft folded figure 8. I have most of the scenery done on one side. I have attached a few pictures of that side. On one side is a mine on the upper track, an interchange yard a small businesses on the lower track. The other side of the layout has a small yard serving a car float and local industries (no scenery yet.)
The Shamrock mine is a modified Walthers New River kit. I removed 1 story, shortened it for 2 tracks, scratchbuilt a new open conveyor a over burden tower.
The small community is Cherry Creek. The bridge is scratchbuilt and spans the lower mainline and a small interchange yard. The building on the right side is a scratchbuilt combination depot, hotel, and gas station built from plans in the Narrow Guage Gazette. On the left side is a scratchbuilt general store, Dalton’s Almost Anything (from the Red Green Show).
Add your comments.
Howard asks for advice from others in the hobby:
“On the new HO layout I will probably solder feeder wires to the flex track at the workbench. I don’t want to solder under the layout this time. What color suitcase connectors should I use and what size wires will they use? I’d prefer to use solid copper #12 for the bus wires and 22 solid for the feeders. Who has done this and can tell me about it? Thanks.”
Add your suggestions.
Sebastian from Norway sent in this weathering idea:
No model train layout should look too perfect. It is usually most natural when objects appear random rather than manicured in place. A stone wall is a good example of this. If the wall is too perfect it will look unnatural as if it was made by a machine. A stone wall can be weathered to look handmade. The stones can be random shapes or spaced irregularly. You can also paint the stones randomly.
I use acrylic paints and start by painting some of the stones in one color – maybe every third or fourth stone in the same color – vary it. I then choose another shade to paint some of the other stones. Then I select another shade for some more stones. I use about 5 different colors in all. I vary the color sequence to give a random pattern. I finish off the wall by toning down the colors with a weak wash of India ink or grimy black paint. The end result looks really natural.
Add your comment.
More weathering tips from http://www.modelrailwayscenery.org/model-railroad-scenery.html
Sent in by Rod:
Another trick I discovered, is to gently dribble some bleach over a cliff face using an eye dropper. You need to be careful not to get bleach on your clothes as it will take the color out, but when dribbled down a cliff face it will settle in the cracks and give a good weathered look.
I also use dry brushing on cliff faces and rocks. For those that don’t know; dry brushing is the technique of dipping a stiff paint brush into paint before brushing off most of it from the bristles. You lightly drag your brush over raised rock surfaces to deposit a very small amount of paint to highlight the raised-up sections only. I dry brush a little white paint to highlight the rock edges. I dry brush to slowly add a little hint of color to the rock work.
Add your comment.
More weathering and clever scenery tips at http://www.modelrailwayscenery.org/model-railroad-scenery.html