Weathering
Everything on model trains, model railroads, model railways, locomotives, model train layouts, scenery, wiring, DCC and more. Enjoy the world's best hobby... model railroading!

Kerry asks:
“I want to highlight some of my number board and window gaskets on a couple of locos, but with poor eyesight and a shaky hand, I am not good at lining things up or doing fine brushwork. I have a hands-free magnifier but still struggle. I can’t be the only old codger with this problem. Is there an easy way?”
Add your thoughts under this post.
Raymond asks:
“I know decaling is quite an art form which is probably why I suck at it. Can someone with experience share their insights on what to do and what not to do when applying decals? I seem to mess things up.”
Kel posted this question:
“I want to start learning to airbrush and was all set to buy a boxed set with jars. Then I found out there are single action and double action types. Now I’m confused about what to buy. Input wanted if someone knows?”
Mason posted this question:
“I know there are lots of fancy ways to model water on a layout, but I am wanting to model a couple of little patches of water a bit bigger than puddles in a sort of ditch on the side of my little country road. I don’t need much water, but I want it to look a bit muddy and stagnant. What material or method should I use without going to the expense of buying resin?”
Mel asks:
“I’m not very experienced using an air brush. Does any brand make primer for use in an airbrush?”
Ben asks:
“I had thought of coloring Hydrocal instead of painting it. Is this possible and worth doing?”
Add your comments below.
Stuart posted this question:
“When laying my track I incorporated 2 re-railers (Atlas), which also serve as grade crossings. I model the transition era from steam to diesel which gives me the chance to operate both types of trains. I am wondering whether to remove them or weather then so they appear more authentic?”
Send in your question(s) for publication. This is a free service for the model railroading community.
Sav asks:
“I purchased anHO Log Dump Car with 3 logs. The logs are made of plastic and have a shine to them. I was wondering if somebody could give some advice on how to weather these logs.”
Online Model Train Club Member Allan posted this question:
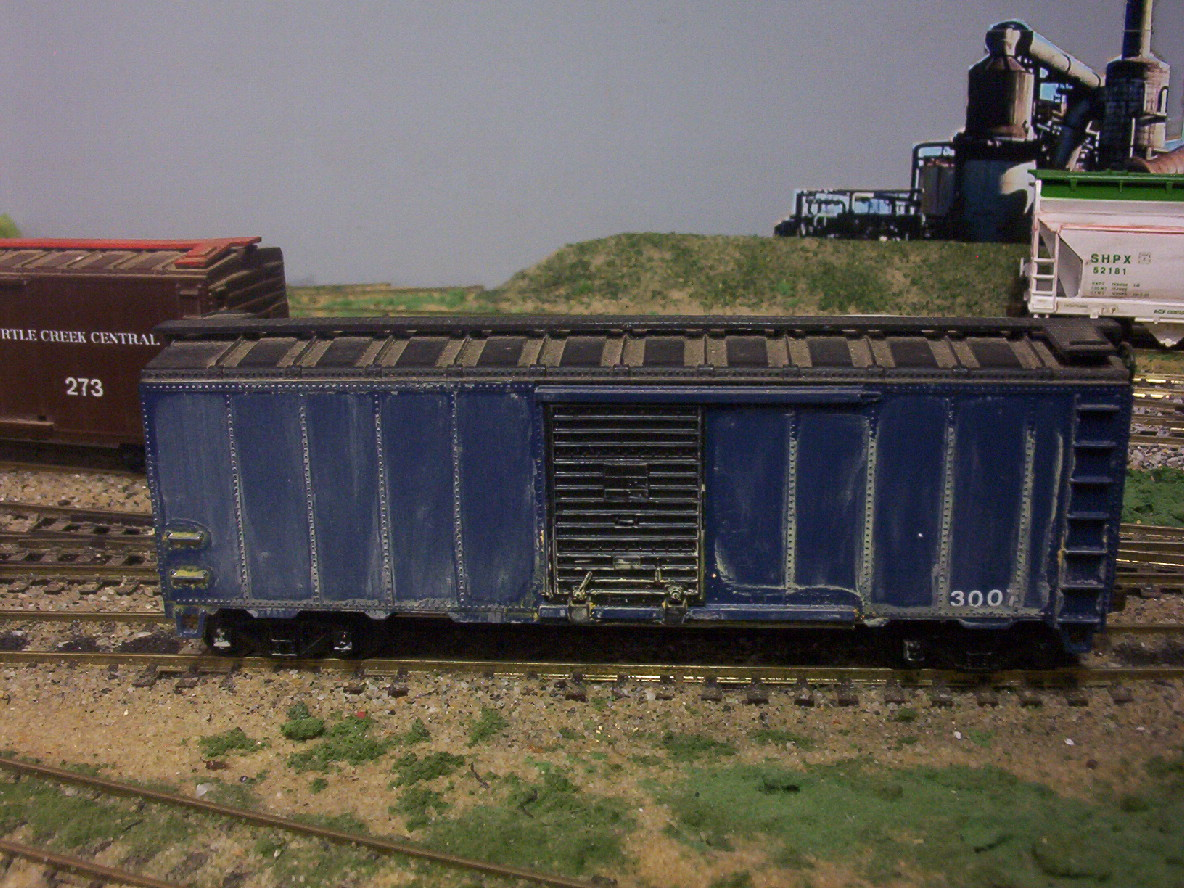
“I have an old reefer that looks very authentic even with the decals flaking off. Trouble is when I touch the decals bits flake off so I fear being so brittle they will disappear completely. I applied several coats of Dulcote but the problem persists. I did a google search and couldn’t find replacement decals that I liked. Has anyone else had this problem and how did they solve it? I am not against fading or peeling decals and signages because it adds to the authenticity, but I am going to lose these decals forever if I don’t do something to keep them in place. Any ideas?”
Share your thoughts with the COMMENTS link underneath this posting.
Koot posted this question:
“The India ink I use for a wash with 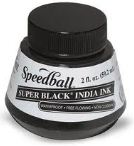 Isopropyl alcohol separates and black sediment settles at the bottom of the container. On the label it says that the ink can be diluted with distilled water. Why the separation?”
Add your COMMENTS below or post your own question using the ASK A QUESTION link.

Roy sent in this photo he captured at the Chiltern Model Railway Exhibition in the UK. This worker looking over the rail certainly adds life to the scene.
 Gordon asks readers:
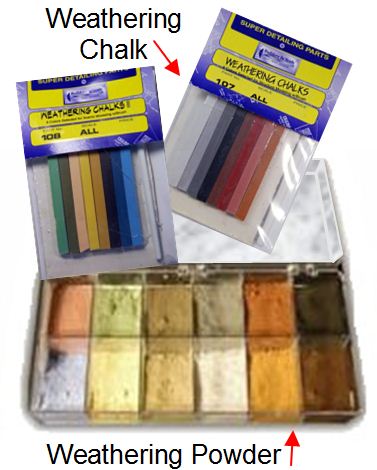
“I looking at buying some pastels for weathering and I saw some advertised as soft acrylic pastics, some are described as hard pastels and some say chalk. I’m just not sure which is best for weathering plastic, wood, and card buildings and the track. I’ve also heard that people apply Dullcoat first so the pastels have some to grip to. Is that right, or would a simple paint base coat do the same?”
If you have a question you would like published, then please use one of the links below each posting to view the guidelines. Then submit your carefully worded question to the Blog Moderator for consideration.
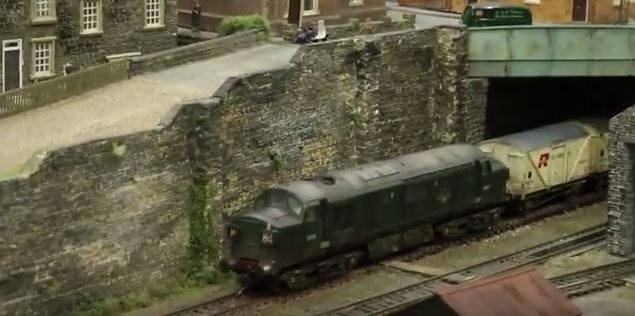
Andrew sent in this photo he shot at the Pontefract Model Railway Exhibition in the UK. He was very impressed with the moss and weathering of the wall.
Gary from Alberta in Canada sent in these photos to share:
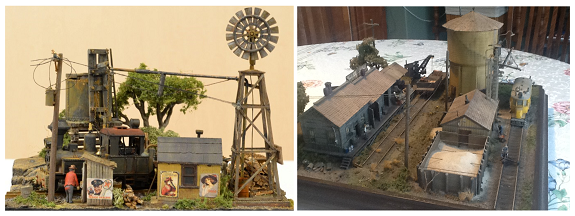 I’m not planning to build a large train layout, as I would prefer to build very detailed dioramas instead, mainly because I model in several different gauges…HO, Hon3, Hon30, On30 and G scale. Attached are some photos of some dioramas I’ve completed in HO and Hon30 scale. One of the photos shows a very small diorama on a black turntable. The size of the model is 4″ x 6″ (10.16cm x 15.24cm) and is in Hon30 scale. It was a challenge to the members of our club to build a scene on a block of wood that size.
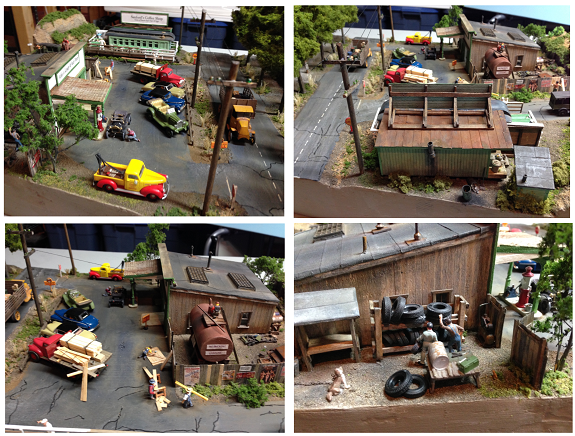 I also built an HO scale diorama that had nothing to do with model trains. It was of a turn-of-the-century house that was constructed to fit into an enclosed case. It was built as a wedding present for my granddaughter, who lives in Melbourne, Australia. My wife and flew down there for the wedding in November and had to hand carry the diorama from Calgary, to Melbourne, via Los Angeles. I had to wrap it to fully protect it, and still be able to open it up for security and customs checks. Thankfully, I was able to get it to the wedding in one piece.
Gary – I couldn’t open the file you sent with captions, so perhaps you could add some comments using the COMMENTS link under this posting.
 Club member Mal sent in these weathering tips to share.
For a lot of my weathering I use a solution of 1 teaspoon of India Ink mixed with 1 pint of rubbing alcohol (70% isopropyl alcohol). I use this for my LIGHT weathering jobs.
When HEAVIER weathering is needed I use a mix of 2 teaspoons of India Ink in 1 pint of rubbing alcohol. My personal preference is to use the Hunterline bottles of alcohol based weathering which I buy direct online. You might prefer another brand.
I do a lot of dry-brushing as it gives my projects a more “blended” look. To do this I lightly dab my paint brush (it must be dry and clean) in the color. I then brush most of this paint off onto a disposable paper towel. When almost all the paint is gone from the brush I am ready to start dry-brushing the object.
It takes a bit of experimenting and practice to master this technique, but it does look really good when done properly to subtly and slowly build up the paint layers.
Ken asks readers:
“I am detailing some of my models and wish to add handrails and steps etc. I can find plenty of detail on the width/length of these items, but nothing that tells me how far off the face of the wagon/carriage the handrail, steps etc project. I am modelling in HO.”
 Ron B sent in this article to share:
The world is far from perfect especially when it comes to everyday scenes. It is not uncommon to see trash, litter, and junk lying around streets or in fields. That’s why adding trash to a model railroad scene can add realism and bring a scene to life.
And, it can be a lot of fun making the items for a junkyard scene. It could include damaged or abandoned vehicles, a rusty old shipping container, perhaps lots of spare parts and oil drums scattered around, and maybe a dilapidated broken down old fence of some kind surrounding the yard. The yard will most likely be overgrown with weeds or vegetation, so that will be another way to add realism.
The good thing is; you don’t necessarily need to use expensive model vehicles for this type of project, because you’ll probably want to cut them apart, repaint and weather them. Junk car sets are available from companies like Walthers as well as piles of ready-made junk, piles of tires and scrap metal bales. However that said; I personally prefer to make my own and enjoy doing so.
If you are including abandoned automobiles, remember to choose models that are older than the setting of your scene. After all, it is likely they have been abandoned for some time, especially if they are covered in rust. When it comes to adding the rust effects, I use powdered pastels in various colors, although you can use an airbrush to apply rust colored model paints.
 The powdered paints have tiny particles of pigments that get into the gaps and the effect can be altered depending on what color combinations you use and how much you apply. I finish off with a really thin film of rust-colored powder, but take care not to apply it too thickly as you’ll want the darker deep-seated old rust areas to still be seen. The lighter shades will usually indicate patches of newer rust. I sometimes mix very fine sand with the powders to give a rougher rusty surface in some places.
I use some long nosed pliers or tweezers to hold the model in place so I can dismantle or cut a vehicle into sections. I use a motor tool with a fine tooth saw to remove doors, hoods, and/or fenders. I usually remove the parts before painting them to ensure the cut edges match. When I glue them back in place with Super Glue (cyanoacrylate adhesive), the joins usually look quite rough which adds to the effect. I also scratch the surfaces of the bodywork with a craft knife which can look like the paint is damaged. Dents and scrapes add extra realism.
Care is needed when positioning vehicles in the junk yard. It’s unlikely they would have been lifted in by a crane, so they could be positioned at odd angles. There will probably be old auto parts, axles, doors and wheels leaning against the bodywork. Grass and weeds may be spouting through some of the windows and around the wheels. The scene can be completed with a couple of people or a dog in the yard. Use your imagination, because the possibilities are endless.
An Airbrush is an amazingly useful and versatile tool for any modeler to have. The key to mastering airbrushing is to understand the relationship between the air pressure, the thickness of the paint, and the type of airbrush you are using.
Here is a basic diagram to show how an airbrush works.
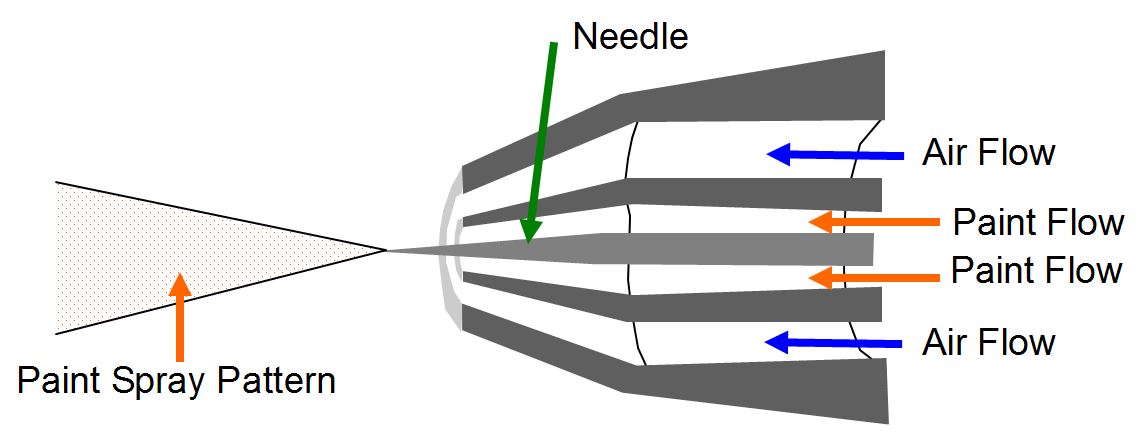
The above diagram shows how paint particles mix with air pressure. The pattern can be altered by adjusting the movable needle backward or foreward.
14 Tips To Help You Master An Airbrush
1. Choose the right airbrush for your needs. There are two main types: single-action airbrushes and double-action airbrushes. A single action airbrush is more basic as it has fewer moving parts so is simpler to clean. A double action airbrush gives more control as you can adjust the air volume and paint separately.
2. Depending on the brand and type you use, you might choose to try different needles for different jobs.
3. The air source needs to be reliable. Some people buy the air in small air propellant cans, others use a compressor, and some people even use an old car tire to dispense the air. An air source delivering 100 PSI at a constant rate is usually what’s required.
4. Airbrushes vary a little in how the paint in stored. Some use jars attached under the airbrush and others use little bowls to hold the paint at the side of, or above, the airbrush. The important point is to mix your paint to an inky liquid consistency so it doesn’t block the airbrush. Acrylic paints can be thinned with water. Inks can be used on some projects and they won’t usually require thinning. When diluting acrylic paints add only two or three drops each time until you get the consistency right. It is easier to add more water, but once you have added it you can’t take it away.
5. Adjust the paint type depending on the surface you are covering. Some paints are more flexible and less prone to cracking or damage than other paints. As an example; a less pliable and harder paint might work better when airbrushing on a metal surface.
6. Before getting started on a model train shell or airbrushing some scenery, it is wise to test your techniques and your paint consistency on a piece of scrap paper. It is a good idea to practice pressing the button control on the airbrush. It might save you from having to wipe the model clean and start over again if you make a mistake. You will be able to adjust the needle on the airbrush so that it doesn’t quite touch onto the cap, but still allowing just enough space for air to escape. The airbrush will need to be about 8-inches (20cm) from the surface you are spraying.
7. Practice, practice, practice! Get to understand how to control “atomization.” I know it is a fancy name, but it basically relates to how fine the paint particles are when sprayed. A higher pressure will result in finer paint atomization. There are several youtube videos to explain techniques. Understand how the type of paint and consistency will affect the atomization process. Try out using various paint types and consistencies to determine what works best for you. Thicker paint will require more air pressure for the paint to flow freely, whereas thinner paints (and inks) will flow easily with a lower air pressure. Adjusting the button (on the top of the airbrush) will usually provide some control of the air pressure. If paint Splutters out of the airbrush it usually means it’s too thick.
8. When using a finer needle a thinner paint consistency will be needed. A lower air pressure of perhaps 15 to 40 PSI may work best for high precision work like this.
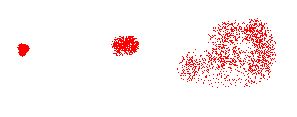
Different effects can be achieved by altering the paint consistency, air pressure, movement and distance of the airbrush from the object being sprayed.
9. Take care not to “over-spray” when using an airbrush. Horizontal stroke movements can be applied when applying the first coat of paint. After leaving it to dry a second coat or different color can be applied maybe using a vertical stroke movement from three or four feet away. For weathering structures or scenery a subtle buildup of paint layers and colors usually looks best. Complete several passes of your airbrush to create the weathering effect as opposed to applying just one thick layer. In real life, grime and dirt on a structure will usually build up over years, so airbrush weathering needs 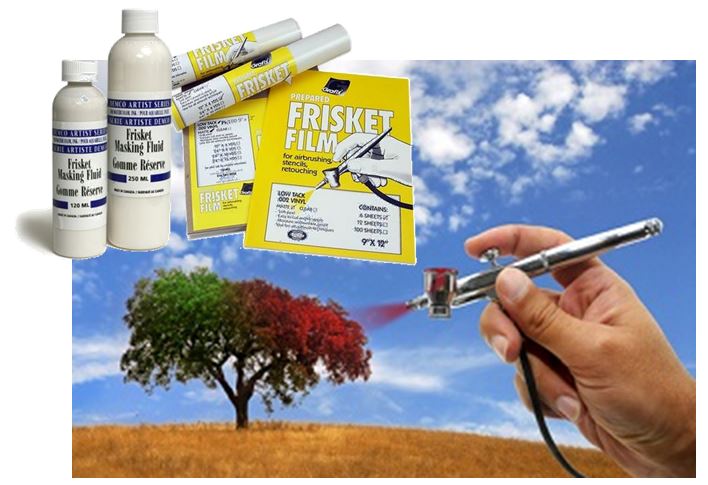 to replicate that process by building up multiple thin paint layers (grime and dirt) using the airbrush.
10. Any airbrush if it’s to operate effectively needs to be kept in “as new” condition meaning it must be kept spotlessly clean. Paint will harden if left inside the mechanism and it will cause blockages and affect the paint flow. For this reason special care needs to be taken between projects to ensure the airbrush is returned to the condition it was before it was used. The jar or bowl can be removed and soaked in water for cleaning. Blowing air through the airbrush will help wash out any paint left in the mechanism. It will also stop colors from intermixing if dregs of the last used color are still inside the airbrush. The airbrush should also be clean of any water before adding new paint to the bowl or jar dispenser. Just blow it out onto a rag. Cleaning the airbrush immediately after use will prevent many problems. When taking the airbrush apart remember to take care with the needle as that is usually the most fragile part of the mechanism.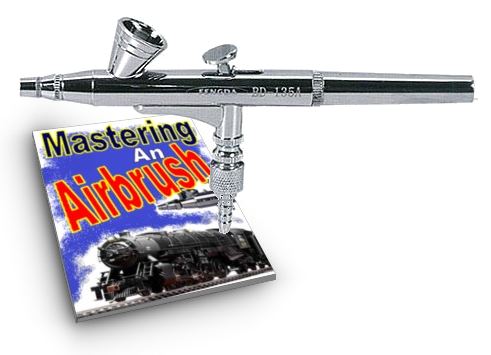
11. Although there are no hard and fast rules with airbrushing, it is generally best to build up the color layers one layer at a time usually starting with lighter colors first, gradually adding darker colors.
12. Masking tape is a good material to stop paint spraying where you don’t want it to go. Artist Frisket (film or liquid) can be applied for masking too.
13. Any fine detailing can be achieved by using a fine airbrush needle.
14. In some instances you might want to seal the model using an artist fixative or clear matt spray to protect the paintwork.
There is a very good ebook available free as part of the package at http://www.model-train-help.com
Add you comments.


